Showing posts with label gift idea. Show all posts

Monday, April 21, 2014

Path Publishing: Review and Giveaway!

Disclaimer: I recently purchased a blank recipe book to help me get organized. The publisher, Path Publishing, has also provided me with two blank journals for review: Happiness and Kidisms. Path Publishing is sponsoring this giveaway, in which you can win your own blank book of your choice, however, the information contained is purely my own opinion. There are several blank journals available, so read on for the details of the giveaway!


My home is filled with little scraps of paper on which I have written down assorted things that I need to keep track of for everyday life and future reference. I like to write things down so I don't forget them: recipes, cute things my kids have said, stuff that made me smile... Problem is, it's getting out of control. Sound familiar?

A recent goal during spring cleaning time was to get the paper clutter under control! (Even just a little bit of paper decluttering makes a HUGE difference for me.) One area of my life that was a complete disaster was my recipe organization (read disorganization). I had tried a couple different ways of doing this over the years and most recently, I had two overflowing file folders stuffed with loose papers of assorted sizes -- some were computer printouts, some were torn from magazines, others were on index cards, and still more were scribbled on any scrap of paper I had handy at the time. Chaos masquerading as "organization" because, hey, they were in folders, right?

Needless to say, this was not working very well for me. Yet I kept using this chaotic "system" -- rifling through each folder EVERY time I wanted to cook or bake, which pretty much meant several wasted minutes. EVERY. Single. Day. Who has time for that?!

{Recipe Book Table of Contents in Action}

I'm happy to tell you that this is improving! Here is my work-in-progress recipe book from Path Publishing. I've already transcribed 61 of our favorite family recipes (several days worth of work), and there's room for 43 more! This gives me plenty of space for those stragglers that are still hanging out in the file folder (I have it pared down to one much skinnier folder instead of two massive bundles!) and room to grow -- because I am sure to find more good recipes that I simply must save. (The desserts alone take up more than one page in the table of contents, and I don't see my love of sweets dwindling any time soon.)

The pages are just the right size for listing all of the ingredients and directions, even for my more complicated recipes. There is also a spot to note where you found the recipe. (I've already retraced my steps once since I accidentally omitted an ingredient, so this made it handy to find the website again.) My favorite part is that I don't have to rifle through a huge folder or check the Internet for a recipe. They are all contained in one book, organized the way I want them to be. Soups and stews are at the beginning because I look these up weekly for "Crock Pot night" (a.k.a. Wednesday, when Mia has dance class). Next, I listed chicken dishes and other family favorites, followed by those much-loved desserts.

{Recipe Book in Action}

Since it's a blank book, YOU make it completely personalized to your own preferred method of organization! I didn't alphabetize anything because I thought that would take too long, but maybe that's what works best for you. List your recipes and note which pages they are filed on. Put like items together, if you wish. For example, I wrote my favorite sugar cookie recipe on the left side of the book and a frosting recipe on the corresponding right side. This made it so simple when we wanted to make cut-out frosted cookies for Easter. However, you don't have to categorize your recipes if that's not your thing; just jot each one down as you acquire it. Do whatever works for you.

 {Blank Books from Path Publishing}

More Blank Book Options from Path Publishing:
  • Kidisms -- All parents need this for all those cute and clever things the kids say. Give it as a gift, too, because what grandparent wouldn't love getting a journal filled with all of the funny things that the grandchildren have said? Write down the who, what, when, where, and why so that you don't forget! Normally, I write these all in my notebook and then do a blog post when I have several. (Lately, that is at the end of each month! Here's the most recent of my kids' quote posts.) This is quite entertaining to look back on. Now, I'm finding it convenient to keep this little green journal in my van, for when they say their little witticisms away from home! This would make a nice baby shower gift, too. (Those little booties and onesies only fit for so long. Eventually parenting becomes quite the ride, and you don't want to forget the goofy things they said along the way.)
  • Happiness Journal -- This year, I've had the goal of writing down little things that I feel joy or gratitude about. Then, I slip the scraps of paper (more paper scraps, geesh!) into a small jar. Even though I don't come up with something every day (and truly, it seems like there is something to be thankful for each day), my jar is quickly overflowing, and it's only April! This journal is the perfect clutter-free solution to noting these small bits of happiness, and there is NO pressure to do it each day. It would make a nice gift for moms, dads, grads, and teachers.
  • Gardening -- Okay, I will admit that this really isn't my "thing." I pretty much botch every gardening attempt. I like to remind my children that I don't sew and I don't grow, whenever they get the mistaken notion that Mommy can do everything. That said, if I do decide to get serious about gardening (because, after all, we only improve with practice, right?) this journal is just the thing for keeping track of what is planted in each location, when it was planted, where it was purchased, guarantees (if any), and notes on progress. That should help take away some of the guess work! And, if you're not much of a gardener (join the club!), this would be a very thoughtful gift for someone who is.
  • Advice -- I love this idea! Give a blank book to the grandparents and have them share words of wisdom with your children. Or, take the time and fill it in yourself. This would make a nice gift for kids of any age, but I think it would be really special to give as a graduation present or as a baby shower gift -- offering all that acquired wisdom to people who really can use it!
  • Usernames and Passwords -- Handy place to note all of those things that are getting increasingly difficult to keep track of. And it's certainly smarter than using the same password for everything! Perfect for the tech-savvy graduate on his way to college.
Now, here's what you've been waiting for...

Two Ways to Get Your Own Blank Books:
  1. Head to Path Publishing right now and order one (or more)! With Mother's Day, Father's Day, and wedding and graduation season upon us, you probably need some gifts for all the important moms, dads, grads, brides, and teachers in your life. Surely one of these affordable blank journals will be just the thing for helping them keep track of all the important memories. You could even choose to fill them in yourself and make that part of the gift. For example, the recipe book would make a nice bridal shower gift!
  2. Enter my giveaway! (For residents of the United States only.) For an entry to the giveaway, first check out the different blank book options on the Path Publishing site. Choose your favorite one and then come back here and leave me a comment on this blog post letting me know which one you like the best. For additional entries, please share the love by linking to your favorite social media sites!
  • Share this blog post on your Facebook page. Come back and leave a comment here letting me know that you shared -- for one additional entry! (Please make a separate comment letting me know you did this.)
  • Share this blog post on Twitter. Come back and leave a comment here letting me know that you tweeted about the giveaway -- for one additional entry! (Please make a separate comment letting me know that you did this.)
  • Share this blog post on your own blog. Come back and leave a comment here letting me know that you shared on your blog -- for one additional entry! (Please make a separate comment letting me know that you did this.)
That's a total of 4 ways to win a blank book of your choice! The giveaway will run from Monday, April 21, 2014 through midnight (Eastern) on Monday, April 28, 2014. I will draw a winner on Tuesday, April 29, 2014 and share the results on the blog. Stay tuned for the results!


Wednesday, March 26, 2014

3-Ingredient Homemade Sugar Scrub

This week is making me a teensy bit stressed out and it's only half over. Mia has a new pet, Bluey, that we brought home on Monday. Remember what it was like to have a newborn baby? How you constantly kept checking to make sure the baby was still breathing? Well, I have a newborn now, too, except my "baby" is a betta fish and at least a dozen times in the past couple days I have checked to make sure that he was still kicking -- I mean, swimming!

Then there was yesterday, when Logan announced, "I pooped my pants!" (Darn! He was doing so much better lately, too.) Of course, this was right as we were about to head down to the bus stop. And, of course, the bus was running early for like the second time all year. Yes, that wild woman running down the street holding a little boy upright, neither of them in hats or coats despite the never-ending winter weather... That was me.

Fortunately, I was able to take a nice relaxing bath after the kids were in bed. I soaked in some homemade lavender bath salts and then I pampered myself some more with this skin-softening sugar scrub that I made a few days ago. After that, I nearly felt like a new woman. Having smooth and soft knees, elbows, and heels feels really great, and I can't help but hope that the weather will turn soon and I will get to show them off a bit more!

When my friend Jaci shared this recipe for homemade sugar scrub that she had guest posted on The Blessed Nest, I knew I would have to give it a try! (Thank heavens I did. It's just one of those simple but wonderful indulgences that keep this mama from losing her mind.) This is super quick (think under 5 minutes!) and easy to pull together -- with ingredients in your kitchen!

The only item you may not already have is the essential oils. For this batch, I used orange essential oil purchased from a nearby health food store. You can also buy essential oils online. Here's how to make your own little bit of heaven in a jar.

{Pretty Bow + Label = Easy Gift Idea!}


Ingredients:
  • 3 cups white sugar
  • 1 cup + 2 tablespoons oil (I used EVOO.)
  • 35-40 drops essential oil (I used orange.)
Directions:
1. In a good-size bowl, combine sugar and oil. (I like extra virgin olive oil.) Stir until well-blended.

2. Add essential oil of your choice, and stir some more. I used 40 drops of orange essential oil, and I found this to be nice for several reasons. First, it is one I already had. (Others were tea tree, lemongrass, lavender, and peppermint, and orange just seemed to fit with this homemade beauty item.) Orange essential oil is relatively inexpensive. It smells lovely, and I think most people will enjoy the refreshing citrus scent. As a added bonus, it goes well with the color achieved from this particular brand of olive oil I used. (The color of your sugar scrub may vary according to your ingredients.)

{Freshly Mixed Sugar Scrub.}


3. Store in air-tight containers. This makes enough to fill about 4 half-pint mason jars, perfect for gifts! I just added a ribbon and a simple hand-made label to the top of the jar.
4. To use sugar scrub, rub into skin and then rinse off. If using it on your hands, you may want to do it over the sink. For other parts of the body, apply in the bath or shower. 

Note: I've noticed that the oil starts to seep to the top of the container after a few days, so you may need to mix it up before each use. This is easy and quick to do with your hands -- although a spoon would probably be better to help prevent any contamination.


Tuesday, February 4, 2014

DIY Puppy Ears

These fun puppy ears doubled as photo props (for the upcoming thank-you cards) and as party favors. What can I say? I like when stuff serves double-duty -- it's just plain smart. Plus, I saved money by making them myself instead of purchasing them from this site! Here's how I made these cute puppy dog ears (I made 11 pairs total) for about $6.

{Some of the finished puppy ears}
Materials:

  • tan felt (I bought 6 sheets of 8 1/2" x 11" size at Wal-Mart, 23 cents each)
  • brown marker
  • scissors
  • brown/black plastic headbands (These came in 3-packs from Dollar Tree. I bought 4 sets.)
  • hot glue gun
  • cream felt (This came in a neutral colors multi-pack at Wal-Mart, but I only used cream for this project.)

Directions:
  1. Fold a piece of felt in half, width-wise. Cut along the fold. 
  2. Now, take one half piece and fold it in half, lengthwise this time. Cut along the fold. 
  3. Draw a floppy ear on one side and cut it out. Mine had a triangular notch at the top end.
    {This is how I folded and cut my felt to get started.}
  4. Use this as a template for all the other ears. Trace around it onto the felt. A brown marker works nicely, and even if it shows on the felt later, it doesn't really clash. (Note: You can either cut the felt smaller first, or just trace an ear, flip it over, fit the template ear against the tracing, and trace again. Then, cut all traced ears out. I did it both ways, and didn't really have a preference.)
    {How I laid the ears for tracing with as little waste as possible.}
  5. Lay out ears in sets of two, facing them the desired direction. (I made each one curve toward the center.) Then, using a hot glue gun, adhere each ear to a plastic headband. Lay them flat while the glue cools.
    {Here is my triangle tip + hot glue, before folding.}
  6. Cut spots from cream felt. Mine were all shapes and sizes, but you can make basic circles if you prefer. Apply the the ears using the hot glue gun. I took my triangle tip, turned it over, applied the glue to that area, and then folded it over on itself around the plastic headband. Again, lay flat while glue cools. Tip: If glue strings bug you, use your fingers to remove any glue strings.
  7. Your puppy ears are now ready to wear!

Tuesday, December 10, 2013

Homemade Peppermint Bath Salts

A while back we made bath salts at a MOPS meeting, which I thought were great! After getting the link to where the idea originated, I decided to make more of my own, some of which we are giving as gifts. I'm very happy with how this year's teacher gifts turned out. They look pretty, they smell wonderful, and most importantly, they have been test-driven and given two thumbs up by this mama.

To get started, I chose three different scents: peppermint, orange, and lavender, and I found the essential oils at a nearby health foods store. Why did I choose peppermint oil for the gifts? Well, it is currently vying as my favorite fragrance of the three types of bath salts that I made. Orange is on top at the moment, but peppermint seemed like the obvious choice for Christmas. Plus, it has lots of health benefits like alleviating muscle soreness as well as stress, improving circulation, helping ease congestion, and promoting energy and alertness. These are all the curative properties that I will personally attest to. Peppermint essential oil is also said to help curb appetite, just by inhaling the scent, so that may be an added bonus I have not noticed yet. At any rate, these bath salts are a perfect no-calorie indulgence during the crazy-busy holiday season.


{Easy Christmas gift idea!}

Ingredients: (Makes enough to fill 2 half-pint mason jars)

  • 3/4 cup Epsom salts 
  • 1/2 cup coarse sea salt 
  • 1/4 cup baking soda
  • food coloring (I used 10 drops of red.)
  • essential oil (The original recipe calls for 8 drops, but I found this to be much too faint once I got into the tub, so I have doubled it for the gift batches.)

Directions:

  1. In a bowl, combine the dry ingredients. (If making gifts for teachers, kids can help pour the ingredients.)
  2. Add essential oil and food coloring*. (Kids may be able to help with this step. I helped Logan count out the food coloring, but I added the essential oils myself.)
  3. Use a spoon or whisk to mix it all together. (Kids may help with this step, too as long as they don't stir to roughly.)
  4. Store in an air-tight container. (It will clump together somewhat after time. This happens to store-bought bath salts as well, so I don't see this as a problem.)
  5. Enjoy your bath salts or package them up and give as gifts. 

*Notes about food coloring:

  • Food coloring is optional, and mainly just for presentation. 
  • Once diluted in the bath, you don't need to worry about it staining your skin.
  • When I made orange scented bath salts I used a combination of 3 drops red and 5 drops yellow to make orange. 
  • For the lavender bath salts, I used 8 drops of neon purple food coloring. 
Notes on Where to Purchase:
  • The best deal I have found for Epsom salts is at Sam's Club, but they are very reasonably priced and can be found near the first aid section of any grocery store.
  • Coarse sea salt is found in the baking aisle. I have also used natural sea salt, which has smaller grains that don't look as much like the bath salts you might purchase, but it's a bit cheaper and it works the same.
  • My essential oils came from a natural foods store, but you can also find them online.
  • Lavender essential oil was the most expensive at $8.79 for a 0.5 ounce bottle, followed by peppermint oil at $8.29 for a 0.5 ounce bottle, and the least expensive was the orange essential oil, which was only $3.99 by comparison. (That may sound pricey, but since you will only use a few drops at a time, a bottle of essential oils will last a long time, so I look at this as a good investment.)
How I packaged my gifts:
  1. First, I filled each half-pint mason jar with bath salts.
  2. To make tags that read "Peppermint Bath Salts," I downloaded this free font. I put it in 24 pt. font, switched the color to red, and printed it so that I got 8 per page (in portrait layout). Then, I used plastic templates to cut them out, and then layered them on top of oval cut-outs of red card stock (which I made with another template.) I adhered the layers and then added a gold eyelet.
  3. I used a glue dot to affix the bamboo spoon to the jar.
  4. I cut a 21" length of red and white bakers twine, which I wrapped around the jar twice before tying on the tag.
  5. Then, I added a red card stock circle to the top of the jar and topped it off with a cute peppermint button, which I bought a few years back from Oriental Trading, attached with another glue dot. 

Thursday, September 12, 2013

Best Homemade Bubbles

Last summer, I tried out three different recipes for homemade bubbles, and I posted about our experiences here. This year, I had hoped to do a similar experiment and try out several more recipes for bubble solutions. However, I only tried this one. In part, time slipped away from me, but the main reason for not trying other recipes is that I really like this one! Recently, a few people have asked me for the recipe, so I decided it was time to share my current favorite bubble recipe.

This one has made the rounds on Pinterest and Facebook so you may have seen it before. When I saw it, people were claiming that it makes super industrial-strength, indestructible bubbles, so naturally I was curious to give it a go. The original recipe said to use JOY dish detergent, which I have been unable to find. So, I used Palmolive instead. I am not sure if the brand makes a significant difference, but our bubbles were pretty run-of-the-mill as far as pop-ability goes. With the right tools, however, this did create very large bubbles, and quite easily, I might add. Combine this with the fact that the recipe does NOT call for ingredients that are terribly expensive or more difficult to find (glycerin, for instance, which I used for last year's recipes) and it is a sure-fire winner.


So, far I've made a couple of batches, and we've had lots of fun with these bubbles throughout the spring and summer months. It was a hit at Logan's recent shark-themed birthday party. We have even  packaged this in small peanut butter jars along with homemade pipe cleaner wands and given it for birthday gifts along with some other homemade goodies, so this also makes a nice gift.

Ingredients:
  • 6 cups water
  • 1 cup light corn syrup (I used Karo.)
  • 2 cups dish soap* (I used Palmolive.)
* If using ultra concentrated dish soap, reduce to 1 1/3 cups.

Directions:
  1. In a large bowl, add water and corn syrup. Stir until combined. Note: It is difficult to completely dissolve the corn syrup, so just do the best that you can.
  2. Add dish soap. Sand gently until well mixed, avoiding creating bubbles as best as possible.
  3. Dip wands into bubble solution and blow or wave to create bubbles. Tip: To make it easier, pour the solution into containers such as cake pans and pie tins. Set these on the ground (or any flat surface) and let kids dip their wands into the solution.
  4. To store bubble solution, pour it into a container with a lid. This should keep for many weeks. As mentioned above, I like peanut butter jars for this. They are unbreakable, but secure.
Note: Any bubble "wand" will work, whether it is something you have saved from commercial solutions or homemade wands made from twisted pipe cleaners, which are a favorite of mine.

Plastic bottles with the bottom cut off work very well for young children who are just learning to how to blow bubbles.

We've also had lots of fun this year with a couple of fly swatters that I got in a 2-pack at Dollar Tree, which can be used two different ways: first you can blow bubbles, or you can wave them around to create lots of tiny bubbles. We have found that swatting up and down works better than side to side.


Also, don't forget to check your kitchen for possible "wands!" Slotted spoons and spatulas are two that we have found to work well. I've even had success with old glow necklaces, which make quite large bubbles!

So, don't be afraid to think outside of the box (or commercial bubble container) here! It's very easy and affordable to make your own bubbles at home.


{Tiny bubbles... make me happy!}

Wednesday, June 19, 2013

A (Hopefully) Practical Gift for Dad

So, feeling a bit of a time crunch, I didn't have the kids make (or hand-make it myself, and let them take credit, whichever the case may be) gifts for Brett and the grandfathers this year. I chose to stick with a photo gift. They are usually well received plus they are relatively quick to make and not at all expensive (at least not the ones I choose!). The only problem was deciding what photo gift to make.

In the past, I have made a few different photo gifts for various occasions: photo calendars for Christmas, photo books for Mother's Day, photo mugs for Father's Day, personalized photo notepads for Mother's Day, photo aluminum water bottles for Mother's Day, photo travel mugs for my brothers' birthdays, and possibly more that I can't think of right now. The thing I have noticed, though, is that some of these items don't get used for their intended purpose because the recipient is concerned about damaging it or something. For example, my dad told me that the mug used to sit on his desk at work as a hard candy holder. Really, my intent was for these gifts to be used, and not just displayed. (Really, you can put a hot drink in the mug! That's what it's for...) So, I had to come up with something really functional.

My original thought was to make iPhone covers after they were mentioned in an email I received from Shutterfly. However, upon doing some research, I discovered that my father-in-law no longer uses an iPhone for work, and my mom swore that my dad wouldn't like it, suggesting that it was too "girly." That I don't even understand, but I just thought, Okay, that idea is out. Plus, the obvious issue here is that Brett doesn't own an iPhone (although, trust me, if this were a viable option for us, he would definitely want one!).

Then, I thought about photo barbecue aprons, but again, those might have come across as too "girly," even if they would have pictures of my adorable children on them. So, I wasn't even gonna go there. Next, I thought about photo mouse pads, which would serve a purpose for Brett at work, but maybe not so much for the grandpas. Plus, there's the lame-o gift factor, so I nixed that idea.

Eventually, I settled on the idea to make these photo magnets, which are a set of four magnets, each 2" x 2" and can be completely personalized. (They were also on sale, so it pays to look for the deals.) This allowed me to make two magnets with photos of Mia and two with photos of Logan. I made one set that said things like "World's Best Daddy!" and "I Love Daddy!" Then took the same pictures and altered the text to read  "Grandpa!" in place of "Daddy," which was a quick, simple change. The photo magnets look nice and they're a truly practical gift. So, to all my favorite fathers, it's on, guys. I challenge you to not use these the way they were meant to be used!


Friday, June 7, 2013

A Charming Teacher Gift!

Well, school has officially ended for the year, but not before the presentation of teacher gifts. Mia took her teacher and the para-pro the gifts that we had made, birds nest earrings with handmade cards. We were down to the wire on this, too, because I didn't get her to write in the cards until yesterday. So they were not delivered until this morning, the very last day of school! Both of these lovely ladies thanked me at pick-up time, so I decided the gifts were a success.

But, what really surprised me was that her teacher, Mrs. Myers, gave ME a gift! It was completely unexpected, of course. I can't imagine too many teacher give gifts to the parents at the end of the school year when they already have so much on their plates. This is what makes it so special and so very sweet!

{My life is charmed -- a gift FROM the teacher!}

She gave me a bright pink Gerbera daisy, and told me that Mia had selected the color she thought I would like best. (Secretly, I believe that Mia selected the color she preferred, but that doesn't really matter. I do LOVE it.) Here's the really special part about the gift. It was completely personalized because Mrs. Myers, along with the entire kindergarten class, had stamped their thumb prints in various colors and then signed their names. (And, the teacher in me noted that every child's signature was legible, which is an accomplishment for many of them! Trust me, I can tell you this from personal experience, having sorted many, many papers over the past several months. This was the first time that there wasn't one or two I was unsure about, and I like to believe that my special education background has given me pretty good handwriting analysis!) That she would find the time to have the whole class do this for me was so thoughtful, and it completely made my day to receive this on Wednesday!

{Look how they've "bloomed!"}

It felt amazing to read these words, "Thank you so much for your support in my classroom this year! It's because if parents like you that we can do as much as we do with our little sweethearts!" (See, Self, it's not a waste of a master's degree to collate, file, and do other mundane classroom housekeeping tasks! Not that I miss doing these things in my own classroom one bit, thank you very much.) While it felt wonderful to be appreciated as a volunteer, it had me thinking that this would also make a very thoughtful gift FOR a sweet teacher, if you happen to be looking for ideas. The trick is just to find a way to get all the kiddos in the class to sign it in secret. I especially love the thumb prints, too, it's just a little something extra.


Thursday, May 16, 2013

The Perfect Play Dough?

We are gearing up for yet another birthday party for one of Mia's little friends, so that meant making a fresh batch of play dough. It really makes an awesome, inexpensive gift, in my opinion. (All I know is that nobody has complained yet, but that would bad form, of course.) I really do believe that homemade stuff is perfect for children's birthday gifts and not just because I am cheap resourceful! This will keep her interest for several weeks of creative play. Plus, what mom wouldn't be happy for her child to receive homemade gifts in place of yet another Barbie doll?

When I asked Mia what kind of play dough she wanted to make, she couldn't decide between Kool-Aid play dough and glitter play dough, so we decided to combine the two. This was actually something that I had wanted to try for awhile, but hadn't had the opportunity. Our most recent batch of play dough is holding strong, you see, and we made it two months ago. To make our "perfect play dough" or  "sensory overload play dough," as I am calling it in my mind, we used the Kool-Aid play dough recipe and then added in the glitter at the end. I LOVE any homemade play dough, but this one smells delicious, has vibrant color, and it has a little something extra in the form of sparkle, so who could ask for more? It's quite possibly the perfect play dough!

To make the gift of play dough complete, I like to include inexpensive plastic cookie cutters. (After Easter, I stock piled a bunch of these that I picked up on clearance at Target. Thirty cents for a 4-pack was a steal!) Also, here is where I posted directions for how I make my recipe "label" to attach to the jar, in case you are wondering. Mia's friend, the birthday girl, will also be receiving a few other homemade goodies to round out her gift bag including: a wave bottle, a seek 'n' find bottle, some dyed pasta beads for making bracelets and necklaces (materials for that included), some bunny shaped scribble cookies plus a construction paper pad, and a batch of homemade bubble solution complete with two wands made from pipe cleaners. (This bubble recipe is a new one I have tried this year and have not blogged about since I want to try a couple more recipes before doing a post. If you are looking for a recipe now, feel free to check out the 3 I tried last year.)


Ingredients:

  • ½ Cup salt                           
  • 1 Cup flour                        
  • 2 tsp. cream of tartar        
  • 1 pkg. Kool-Aid*                  
  • 1 Tbs. cooking oil               
  • 1 Cup water               *I use generic drink mix packets.*
  • glitter
Directions:
  1. In a pan, mix dry ingredients. Add oil and water. Kids can help with this. (We used a Kroger Tropical Punch unsweetened drink mix packet for this particular batch.)
  2. Cook on medium heat until a ball forms, stirring as needed.
  3. Set aside to cool, and then knead the play dough. Kids can help with this. Tip: Wax paper or a cutting board or place mat will protect your work surface from stains.
  4. To add glitter, I find it is easiest to make a well in the play dough, pour in small amount of glitter, cover it over with the dough and then knead until it is distributed throughout the dough. Repeat as needed until you have as much glitter as desired. Tip: Glitter play dough is not all that messy. The glitter tends to stay in the play dough quite well and not end up everywhere, as you might expect it to. So, don't be afraid to add some sparkle to your play dough! If you are concerned about the mess, just have kids play with it on a vinyl place mat, some wax paper, a cutting board, or my new favorite multi-purpose craft item: the liner from a cereal box - It's free and stuff doesn't stick to it. You can even re-use these.
  5. Enjoy! Play dough will keep for several weeks in an airtight container. Tip: Cool Whip tubs, zippered baggies, and jars work well for this. My personal favorite are plastic peanut butter jars. Important Note about Homemade Play Dough: Although it is non-toxic, kids shouldn't eat it. It's very salty, so I'm not sure why they would want to, but it does happen. Tip: Personal experience has taught me to keep play dough away from pets as well. I can't tell you how many times our dog has eaten this and then gotten sick. It doesn't hurt her, of course, but it is a nuisance to have to clean up dog vomit while your kid is contentedly playing with his new batch of play dough.

Wednesday, May 15, 2013

A "Tweet" Mother's Day Gift

I love when I discover that I can do something new. Don't you? I'd had seen this kit for making birds nest earrings (so cute!) in the Oriental Trading Company catalog a handful of times and each time I thought I really like those. I wonder if I could make them? But, why would I buy a kit to make 6 pairs? Then, I decided they would be perfect for Mother's Day gifts, so I went for it!

I'm glad I decided to give it a go. These were not at all expensive and both my mom and mother-in-law were impressed by them, saying, "You made those!?" Yep. That's me. I can make earrings, apparently. (I'm smiling while I type this because I am so pleased.) Each pair only took between 20 and 30 minutes to make, I think, and it took less time as I went along because I got the hang of it. All I needed to make them was a wire bending tool-thingy, which I already owned for some reason. (In case you couldn't tell from my lack of proper terminology for the tool, this is my first attempt at jewelry making -- outside of the little "class" I took at our library in the fall -- where I made a couple of necklaces that are sort of falling apart.) I'm pretty sure I bought this tool some years back when I was making beaded wire flower pot decorations in the shapes of butterflies.

How will I use all 6 pairs of earrings? Well, I made one pair as a gift for myself. Remember, I mentioned that Mother's Day this year also happened to be my birthday? So, of course, I needed a little something special for myself. The remaining three pairs will be perfect for end-of-the-school-year teacher gifts for Mia's kindergarten teacher, para-pro, and her tap teacher. Yay for advanced planning and having that taken care of! (I'm mentally patting myself on the back, here.)


I think the card turned out cute, too. I used some pre-made beige card stock cards. Ordinarily, I just make my cards from scratch, because I am cheap resourceful, but I found these on clearance and put them aside for when I needed a quick card. (Since this month is sort of kicking my butt with exhaustive things that I trying my best to keep up with, I was thankful for that foresight!) Next, I found a pretty bird-themed clear stamp in my collection and used my scrapbooking markers to ink the bird in teal, the branch in brown, and the leaves in green. I gave it a quick "huff" to add some moisture back to the pigment in case it had started to dry out while I was finishing my coloring, and then stamped it in the lower right corner of the card. I used my ProvoCraft Silent Setter tool (I got this a few years ago at either Jo-Ann's or Michaels, using a coupon, of course!) to make two holes in the front, using the smallest size punch tip. First, opening the card and placing the cutting mat on the inside of the card prevented me from making the holes go all the way through when I only wanted them on the front of the card. Then, I slipped the earring through the holes and added a small piece of tape to the inside to secure them. I scrawled a quick note, and the card was finished, wishing both grandmothers a "tweet" Mother's Day. I have since made 3 more quick and easy cards for the teachers with "a note of thanks" stamped in brown below the bird in place of the words "Happy Mother's Day!"

Nature is full of elegant designs. I just love the color of the robin's egg blue paired with the twisted silver wire. It's very organic and simple. Plus, I love the symbolism of nesting, which I thought was perfect for some of our favorite nurturing women. I think this makes a nice tribute to the moms, grandmas, and teachers in our lives, who deserve to have a "tweet" day on Mother's Day. I hope that you, too, had a "tweet" and restful Mother's Day.

Sunday, April 14, 2013

Spring Bunny Scribble Cookies

I was not even planning on doing a project yesterday, but this just came about. Logan was grumpy about something and he dumped out the entire crayon bin. While it was his responsibility to pick these up, I did end up helping him in a way. I noticed there were tons of broken bits of crayons again plus many, many cheap-o crayons, the kind from from restaurants, birthday party goody bags, and the like.

These crayons have a huge redeeming value, in my opinion. While being pretty awful for regular coloring, they make excellent scribble cookies. The cheap crayons tend to be smaller and easier to break into bits (one of the reasons they do not work the best for coloring), which is great for scribble cookie prep work. Also, their wrappers tend to come off easier than the good crayon wrappers (Crayola, for example, which does a double layer of wrapper), again, making them ideal for scribble cookies. I'm not suggesting that you buy cheap crayons, but if you happen to be given them, hang on to them and give them a new life as scribble cookies.

Anyway, I scooped up all of these crayons, took all the wrappers off, sorted them into bowls by colors, and then decided to try out my new bunny-shaped Wilton silicone mold that I found on clearance at Target after Easter for just $3. The silicone mold worked very well, and once they were cool, I was able to pull the scribble cookies out easily, with no wasted muffin cups like when I make them in muffin tins (which is still a great method, I am just happy to have had success using a mold!). The end result made me quite happy, lots of colorful bunny crayons, which I think will make good gifts. Also, I think black, white, gray, and brown bunnies are cute, whereas these colors of regular scribble cookies seem a bit on the blah side. I may keep these fun bunny cookies on hand since I am still hoping to do a busy bag swap, and I know they could be perfect for that.

{In the process of filling the mold...}
Materials:

  • broken crayon bits
  • sharp knife (optional)
  • silicone bunny mold (or other shape)
  • cookie sheet (optional)
  • oven set to 275 degrees Fahrenheit
  • bowls for sorting crayons (optional)

Directions:

  1. Gather up all your broken crayon bits or cheap-o crayons if it's time to get rid of those. (Tip: I usually save these in a bowl as they accumulate and then use them when we have enough for a project.) 
  2. Make sure all papers are removed. I usually just do this while I am saving them, but since this was a spur-of-the-moment decision to use up the cheap-o crayons, I had a bit of paper peeling to do. Kids can also help with this step.
  3. If the pieces are too big, break them into smaller pieces. Kids can help with this. Adults can also use a sharp knife for this. (Tip: As I am breaking them, I like to sort them into bowls by similar colors: blues together, greens together, reds together, etc. You do not need to do this, but I don't see the purpose of making a couple dozen or so of mixed-up crayons. Even if they are all a bit different, they're still essentially the same. This way, we end up with crayons with blends of assorted hues of the same color, which the OCD side of me appreciates.)
  4. Preheat your oven to 275 degrees. (ADULT USE ONLY)
  5. Fill the silicone bunny mold with broken bits of crayons. Kids can definitely help with this step. You can fill them almost all the way to the top. (Tip: Before baking, I like to the mold onto a cookie sheet. This makes it much easier to take them in and out of the oven without spilling crayons or melted wax.)
  6. Bake for 12-15 minutes at 275 degrees. Scribble cookies do not have to be completely liquefied, just melted enough so that there are no big chunks remaining. Set aside to cool completely. This took about an hour for this batch.
  7. Once scribble cookies are cool, you can peel them out of the molds, by inverting them, pushing them inside out if needed. These recycled crayons are fun to color with, and they also make nice homemade gifts. (Tip: Just make sure to supervise young children. Scribble Cookies do look like treats, and I still catch Logan, at 3 1/2 eating them at times.)

Tuesday, April 9, 2013

Recycled Magnet Craft

Here is a brilliantly simple way to re-use that round piece of aluminum that comes with cans of frozen juice. I learned this one tonight at the Art Night at Mia's school and even though I very rarely buy frozen juice, I loved this idea! In the past I always felt there had to be another use for that nice round piece of tin, but I never thought of one. Now, I know! They make super-simple little magnets.

To switch things up, you could even cut out a photo and paste it in to make them little photo frame magnets instead of using puffy paint. That is much less likely to stain clothing and more personal, too. I think that would make a nice Mother's Day gift idea.

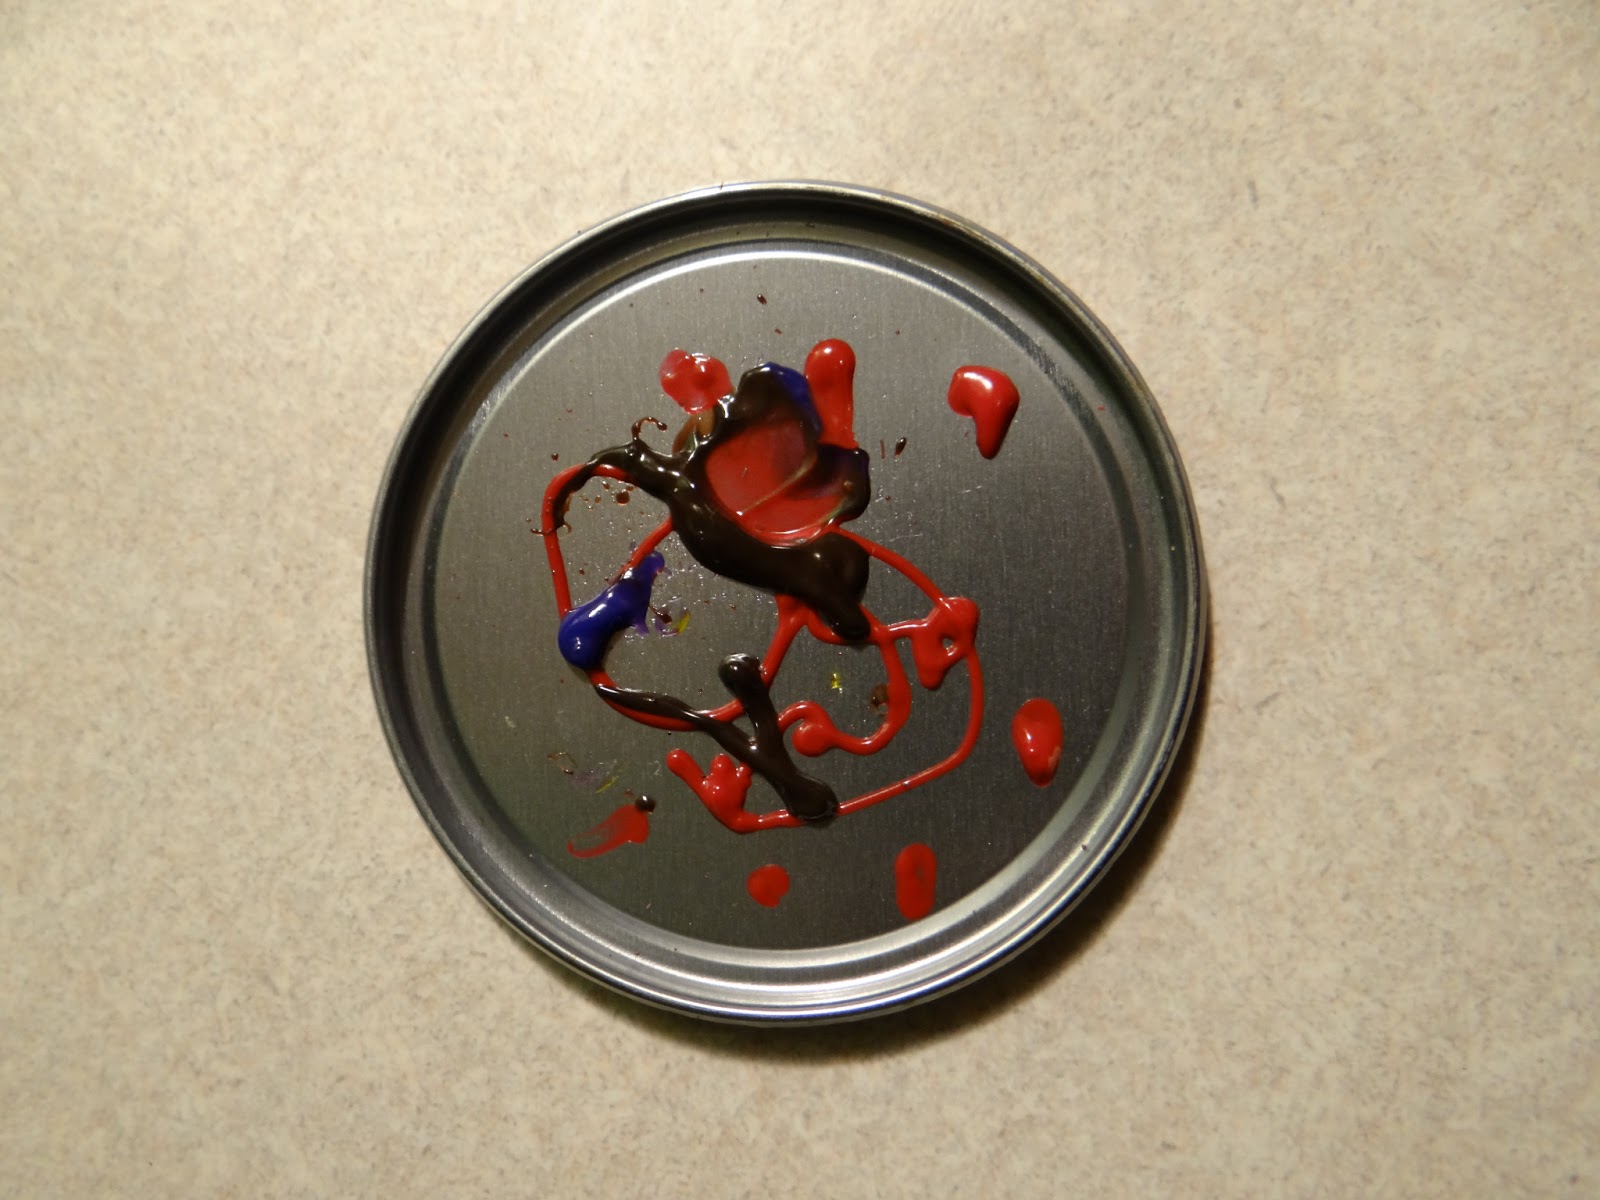
{Recycled Magnet by Mia, Age 6}


Materials:
  • clean, round aluminum lid from frozen juice can
  • self-adhesive magnet
  • puffy paint
Directions:
  1. Peel the backing off of a self-adhesive magnet, and adhere it to the inside of a clean, round lid from a frozen juice can.
  2. Flip it over and then use puffy paint to make designs on the opposite side. Tip: I have found puffy paint to stain clothing, so you may want kids to wear smocks or old clothes before using puffy paint.
  3. Allow puffy paint to dry completely. This will take several hours, more or less, depending upon how thickly you apply the paint. Now you have a magnet. Tip: You can save your lids and then make several magnets to give as gifts. This is something useful that any mother would appreciate for Mother's Day!

Wednesday, March 27, 2013

Homemade Sidewalk Chalk Experiment #3

The third time's a charm, right? I think that I did, in fact, nail it this time. My first sidewalk chalk experiment was successful, but time-consuming due to the large size of the chalk. Also, I was concerned that the cost of the powdered tempera was a deterrent for some people. I wanted to find a more cost-effective solution that would also allow me to mix colors as I pleased. Then, I thought about the second experiment, and how it was good for color mixing, just not setting up as "chalk." I realized there must be a way to combine the Plaster of Paris from experiment #1 with the food colors from experiment #2 in order to get the best of both worlds. So, I looked online to see if anyone had done this before. Bingo! I found directions from this blogger, who also happened to share my dream of making shaped sidewalk chalks.

I used approximately 2 1/2 bags of Plaster of Paris mix. The box contained 4 bags and cost about $4 at Wal-mart. After two go-rounds, I made a total of 22 egg-shaped chalks, which works out to under 12 cents apiece if you are only taking into account the cost of Plaster of Paris. (I did not try to figure in the cost of food coloring. If you don't have some, get it because it is a super craft investment. Today, I saw that it was on sale at Kroger and 2 boxes were only $4.) This is comparable to the cost of store-bought sidewalk chalk, and this gives you the bonus of making it whatever shape you like! You can see that my egg-shaped chalks nest very nicely in a re-used egg carton. Wouldn't that make a cute gift for some of your favorite little people? So, now that I know how to make chalk with this method, I am way more excited by homemade chalk, and I can actually see myself doing this again and again.

{Homemade egg-shaped sidewalk chalk! Just in time for Easter!}


Materials:
  • molds (I used 2 Jell-o Jiggler egg-shaped molds.)
  • 1 cup Plaster of Paris
  • 3/4 cup water
  • container to mix in
  • spoon
  • funnel
  • food coloring
  • cake pan (optional)

Directions:
  1. In a container (preferably something you aren't worried about "ruining"), mix 1 cup Plaster of Paris with 3/4 cup water. Tip: I used an old margarine tub.
  2. Add several drops of food coloring. You can use any color or combination of colors that you like. For my first batch I used 15 drops of yellow. Stir until color is well blended.
  3. Snap together your egg-shaped molds (or whatever molds you have -- I have not tried it, but I am sure you could do this in muffin tins, cake pop pans, or even Dixie cups. Or try toilet paper tubes as I did in experiment #1.) Tip: If desired, set the molds in a cake pan or on a cookie sheet to help catch the inevitable drips and dribbles.
  4. Using a funnel, pour your Plaster mixture into the egg molds (or whatever mold you are using). Once filled, tap to get rid of air bubbles. I found that one batch filled about 3 and 1/2 of my egg cups. Tip: A skewer was occasionally helpful for getting some of the lumpier bits to pass through the funnel.
  5. Set aside to firm up. You can remove from the molds after 24 hours. Tip: I used a butter knife to help loosen up the edges of the molds in order to get them open. Then, let them continue to air-dry for about another 48 hours before using the sidewalk chalk.
  6. Repeat as desired. The first time I made these sidewalk chalks, I did three batches: yellow (15 drops), blue (15 drops), and green (15 drops). Once the molds were emptied and cleaned out, I made 3 more batches: orange (8 drops yellow + 7 drops red), red (20 drops), and neon purple (10 drops).
  7. Enjoy your shaped sidewalk chalk! Note: In the photo, you can sort of see how my original batches have some color that has sort of risen to the tops as they dried. I am not sure why, but I don't think if affects how well the chalk work. The colors appear to be distributed throughout the whole chalks, and more importantly, I tested these out and they work beautifully! Plus, they are not dusty.

Tuesday, March 26, 2013

Basic Homemade Play Dough

We make a lot of play dough at our house. It's great stuff and I very much prefer it to store-bought play dough. My Little Man really loves homemade play dough, and he will spend an hour or more at a stretch playing with it. He also likes to help out in the kitchen, so this is a good activity that we can do together. Since his big sissy is sick and had to stay home from school today, I decided we should make a couple of batches of basic play dough for gift giving. He enjoyed helping me pour the ingredients, and once the play dough was packaged up, he got out our most recent batch of Kool-Aid* Play Dough and continued with the quiet play. (The quiet part was pretty important since Mia had fallen asleep on the sofa, and after getting sick several times during the night, I thought that she really needed some uninterrupted sleep.) But, I'm getting off topic.

The point is that play dough is super easy and quick to make at home with a few basic kitchen ingredients. The only item you may not necessarily have on hand is cream of tartar, which you can find in the spice aisle of your local grocery store for under $5. I recently decided to see how far one canister of cream of tartar will go, so I have been making tally marks on it each time we make a batch of play dough. I have used a few different recipes, each of which calls for varying amounts of cream of tartar, so it is hard to say how many total batches you could for sure get. I am up to 5 batches so far and there is about 1/3 of the canister remaining. I think that is pretty reasonable. I've lost track of where I originally found this recipe, but it's a good basic one.

Ingredients:

  • 1 cup flour
  • 1/2 cup salt
  • 2 Tbs. cream of tartar
  • 1 cup water
  • food coloring
  • 1 Tbs. cooking oil

Directions:
  1. Mix the dry ingredients in a pan. Kids can help pour or measure and pour, depending on their age and ability.
  2. Mix the desired amount of food coloring in with a cup of water* and add to the pan along with the oil. Kids can also help with this step. (Note: Being hopeful that we will be having spring weather very soon, I used our bottles of left over snow paint for this, blue for the first batch, and green for the second. Then, I decided to add about 5 additional drops of food coloring per batch.)
  3. Cook the mixture on medium heat until a ball forms. Spoon the play dough out onto a counter top to cool. Tip: Waxed paper helps keep your counter from getting sticky or stained, so you may want to tear off a piece and place it on the counter first.
  4. Once the play dough has cooled, knead it until it is soft and pliable. *If you want, you can also choose to add the food coloring during this step instead of step 2 along with the water.* Both ways work, but the advantage of adding it along with the water is that it is less likely to stain your hands. The advantage of adding it later is that you can add just a small amount at first, and then add more until you get the color saturation you are looking for, which is a little harder to do when you are diluting it in water.
  5. Play dough will keep for several weeks in an airtight container. Tip: My current favorite storage containers are left over peanut butter jars. Cool Whip tubs also work, or you can use zippered baggies.

 A Few Notes on Homemade Play Dough:
  • Although play dough is non-toxic, you should watch kids to make sure they do not eat it. I don't think they would eat too much, however, as it is quite salty.
  • Keep this play dough away from pets. Trust me, our dog has eaten enough of it for me to tell you that the salt content will always make them sick. While this isn't harmful in the long run, it's no fun to be cleaning up vomit.
  • If you're worried about messes, you can have kids play with the play dough on wax paper, cutting boards, or vinyl place mats or tablecloths.
  • You do not need to buy any special play dough tools. Kitchen forks, spoons, and butter knives are all fun to play with. Rolling pins and cookie cutters are a perennial favorite at our house. My kids also like those little tracers/stencils that they get as party favors. We also use kitchen toys like pastry cutter, pizza cutter, and a little muffin tin. They also enjoy making impressions with things like bottle caps and toys (You only have to worry about play dough getting caught in things like Hot Wheels tires, but it's not really a big deal. It eventually dries and falls out or can be picked out.) We even have a few sandbox toys that have made it in with our play dough toys. So, really just about any thing you or your kids can think of could potentially be a play dough tool.
  • If you don't have cream of tartar, or you don't want to buy it, here is another recipe that we have used, which calls for powdered alum instead. (Again, you would find that in the spice aisle.)
  • If you want your play dough to have a little extra something, try making glitter play dough.
  • If you want play dough that smells fantastic or has has vibrant color without the addition of food coloring, try Kool-Aid* play dough.
  • Homemade play dough makes a terrific gift! I just package it up in one of my old peanut butter jars, print off the recipe (all of which I have saved in Microsoft Word, so that I can get three per page), trim it down with my paper trimmer, and adhere it to the jar using clear Con-tact paper. I make sure that the recipe covers up that last bit of sticky label residue that never wants to come off without more elbow grease than I am willing to employ. Then, for a little something extra, I tie on some inexpensive plastic cookie cutters. I recently found packages four spring-shaped cookie cutters for $1 in the impulse buy section of Target, so I bought several of them and set them aside for gifts. In the past, I have found 6-packs of plastic cookie cutters at Dollar Tree, so I also check for them whenever I am there.

Thursday, March 21, 2013

Dyed Pasta Beads: Speed-Dry Method

In the past, I used this method for dying pasta for bead crafts, and I still would do it this way in a pinch if I didn't have rubbing alcohol available. Recently, however, I found this way of doing it from Totally Tots. After dying pasta with rubbing alcohol, I have to say that the tremendous increase in the speed of drying outweighs the smell of the alcohol and the fact that you need to purchase it if you don't have it on hand. (Unlike vinegar, which is always readily available at our house. It has many, many practical uses, but that's a whole other post.) Rubbing alcohol is inexpensive and one bottle should last you quite awhile. The rubbing alcohol evaporates quickly, taking the yucky smell along with it, which I think makes it reasonably safe to have little ones use pasta that has been dyed with it. This is assuming that they are not allowed to consume large amounts of the pasta, which I am certain that no parent would find acceptable in the first place. 

You can dye any type of pasta, and you certainly don't need to use name brand. This is just what I happened to have. I have done this with bowties, corkscrews, tiny stars, and Ditalini to name a few. I like the Ditalini pasta because it is about the size and shape of pony beads, but costs a small fraction of what I would pay for actual beads. In the past, I have tried gel food coloring for dying, and I can say that liquid food coloring definitely works better. It is also very inexpensive, and most stores should even have it on sale right now since Easter is approaching. Liquid food coloring is versatile. You can mix your colors any way you want, or use them straight from the bottles. The neon colors, of course, are slightly more vibrant, however, there is not much of a difference between neon pink (on the right) and red (on the left). Also, blue and neon blue were only slightly more defined than pink and red.

{Dyed Pasta Beads -- shown while drying}

Materials:
  • zippered baggies (1 per color)
  • pasta (any kind with a hole will work for beads)
  • rubbing alcohol
  • food coloring
  • measuring spoon/s
  • flat surface for drying (cookie sheets work well)
  • wax paper or similar for covering cookie sheets (optional)
Directions:
  1. Separate the pasta into zippered baggies according to how many colors you would like to make. Tip: If you don't have any zippered baggies, you can also use regular plastic bags, but this could be messier, and I would not suggest having little helpers. (This is a good way to use up old bags that weren't too messy, but you still may not want to use them for foods that will be eaten. I like to wash and re-use my bags from other stuff, but that's just me. Once they have food coloring in them, I usually pitch them because it's not worth it to me to wash them again at that point.)
  2. Add a small amount of rubbing alcohol (I used a teaspoon) and a few drops of food coloring. A little goes a long way so start with just a couple drops, and then add more if you want.
  3. Close the bag, and shake to cover the pasta to the desired saturation.
  4. Once the pasta is coated with food coloring, open the bags and spread the pasta out to dry. Cookie sheets work for this but you could also use plates. Tip: I first covered mine with the empty baggies that come in cereal boxes, which I had removed and opened up to make flat sheets of very cheap "wax paper." This keeps the cookie sheets clean and helps make sure that no pasta sticks to it. It is not essential, but I find it to be convenient for me.
  5. Let pasta dry completely. Ours took no more than 2 hours, I believe. Enjoy!
Some Uses for Dyed Pasta:
  • When letting kids work with pasta, you may want to first give them a cookie sheet to contain the beads since they often like to roll away and make a mess.
  • Make necklaces. I like to take a small piece of tape (Scotch or masking) and wrap one end of a piece of yarn so that it resembles the end of a shoe lace. This makes it easier for little hands to string the beads. Also, the prevent beads from slipping off one end, I suggest tying a bead onto the opposite end that you used the tape. You can always remove the bead later, if you leave a bit of extra yarn for knotting once the necklace is complete. This is an oldie but goodie Mother's Day gift idea.
  • Make bracelets. The simplest way to do this is the thread the beads onto a pipe cleaner, fit it to the child's wrist, and then twist off the ends. Cutting excess pipe cleaner is optional. You can always save the left over bits for other projects.
  • I have also packaged up some of the dyed pasta beads along with some pipe cleaners and prepped yarn for necklaces, and Mia has given this as a birthday gift to friends.
  • Make a spring Butterfly Garden Collage using dyed bowtie pasta butterflies and corkscrew pasta caterpillars. This is an idea for a Mother's Day gift.
  • Make a spring bouquet of Pasta Petals from dyed corkscrew pasta. This could also be a Mother's Day gift.
  • Make S'ghetti Skeletons for a Halloween craft.
  • Make Beaded Indian Corn Mosaics for another fall craft option. 
  • Use colored pasta in a plastic bin, cake pan, or similar container as a sensory bin. Kids can use bowls, spoons, cups, funnels, and their hands for scooping, pouring, and sorting the pasta. 

Wednesday, March 13, 2013

Kool-Aid* Play Dough

I recently posted one of my favorite play dough recipes, glitter play dough, but I have to say that this recipe for "Kool-Aid" play dough is my current favorite. It smells wonderful and you don't need to add any food coloring since the color comes from the drink mix. I am calling it "Kool-Aid Play Dough" for simplicity sake, but I actually use generic store-brand drink mix packets to make our play dough since they are less expensive. This play dough is very easy to make, and it lasts for several weeks if kept in an airtight container. 

Homemade play dough also makes a great gift, especially if you add a recipe card and some inexpensive plastic cookie cutters. My latest method of including the recipe is to print it off (I first typed it to fit 3 per page in portrait page setting of Microsoft Word), trim it down, and then adhere it to the peanut butter jar with clear Con-tact paper. This also helps cover up that last little bit of sticky backing from the jar label that is tough to remove. I just found a four-pack of spring cookie cutters for $1 in the impulse-buy section of Target, so I purchased three packages to set aside for gift-giving. I have also found cookie cutters in six-packs at Dollar Tree, although not on recent trips. It's just something to keep in mind for future reference. Once you have them on hand, you can whip up a gift in just a few minutes time.

{Here are just 3 of the possible options: Pink Lemonade, Orange, and Grape. Note: The Pink Lemonade is not nearly as vivid as the other colors. Black Cherry also makes somewhat dull-colored play dough.}

Ingredients:

  • ½ Cup salt                           
  • 1 Cup flour                        
  • 2 tsp. cream of tartar        
  • 1 pkg. Kool-Aid*                  
  • 1 Tbs. cooking oil               
  • 1 Cup water               *I use generic drink mix packets.*
Directions:
  1. Mix dry ingredients. Add oil and water. Kids can help with this.
  2. Cook in a sauce pan on medium heat until a ball forms, stirring as needed.
  3. Set aside to cool, and then knead the play dough. Kids can help with this. Tip: Wax paper or a cutting board or place mat will protect your work surface from stains.
  4. Enjoy! Play dough will keep for several weeks in an airtight container. Tip: Cool Whip tubs, zippered baggies, and jars work well for this. My personal favorite are plastic peanut butter jars. Important Note about Homemade Play Dough: Although it is non-toxic, kids shouldn't eat it. It's very salty, so I'm not sure why they would want to, but it does happen. Tip: Personal experience has taught me to keep play dough away from pets as well. I can't tell you how many times our dog has eaten this and then gotten sick. It doesn't hurt her, of course, but it is a nuisance to have to clean up dog vomit while your kid is contentedly playing with his new batch of play dough.