Monday, December 31, 2012

DIY Snoopy Costume


Sewing is definitely not one of my strongest skills, but I was pleased with how this home-made Snoopy costume for my husband's work party (his department had a Charlie Brown theme) turned out, especially considering that he only gave me a couple days notice that he wanted something like this. It wasn't really difficult so I think anybody can do this. I started with this basic idea for using a white hooded sweatshirt, which I found on clearance at Old Navy for $10.49 and improved upon it. The only other items I purchased were two pieces of black felt which were 23 cents each at Walmart. I was originally thinking that now that it served its purpose, I would dye the sweatshirt whatever color he chooses, but my mom suggested that we keep it for a Halloween costume, so I may wait a bit before deciding what to do. If I had known I might have wanted this to be permanent, I might have used something like Liquid Stitch to save myself some time.

Materials:
  • white hooded sweatshirt
  • 2 pieces of black felt 
  • white felt
  • scissors
  • needle
  • white thread
  • black thread
  • hot glue gun (optional)
  • 16 gauge craft wire (optional)
  • wire cutters (only needed if using craft wire)
  • 2 black pipe cleaners (optional)
Directions:
  1. Cut the first piece of black felt into a large oval shape. It doesn't have to be perfect. Tip: Save your scraps later. Sew this to the back of the sweatshirt using black thread to make Snoopy's big spot on his back. I am not sure of the name of the stitch (running?) that I used but it was just like those lacing cards from when I was younger. I just did big stitches, about 1" long, and spaced them approximately 1" apart. I wasn't worried about how well it would hold up since I thought it would get worn once and then clipped off so that I could dye the sweatshirt.
  2. Fold the second piece of black felt in half like a hamburger. Then, cut out a floppy ear shape. These can be simple ovals, again, or if you want they can be more of a kidney bean shape. Either way, you will end up with two identical ears. Position them how you would like onto the hood of the sweatshirt. Use black thread to stitch them onto the hood.
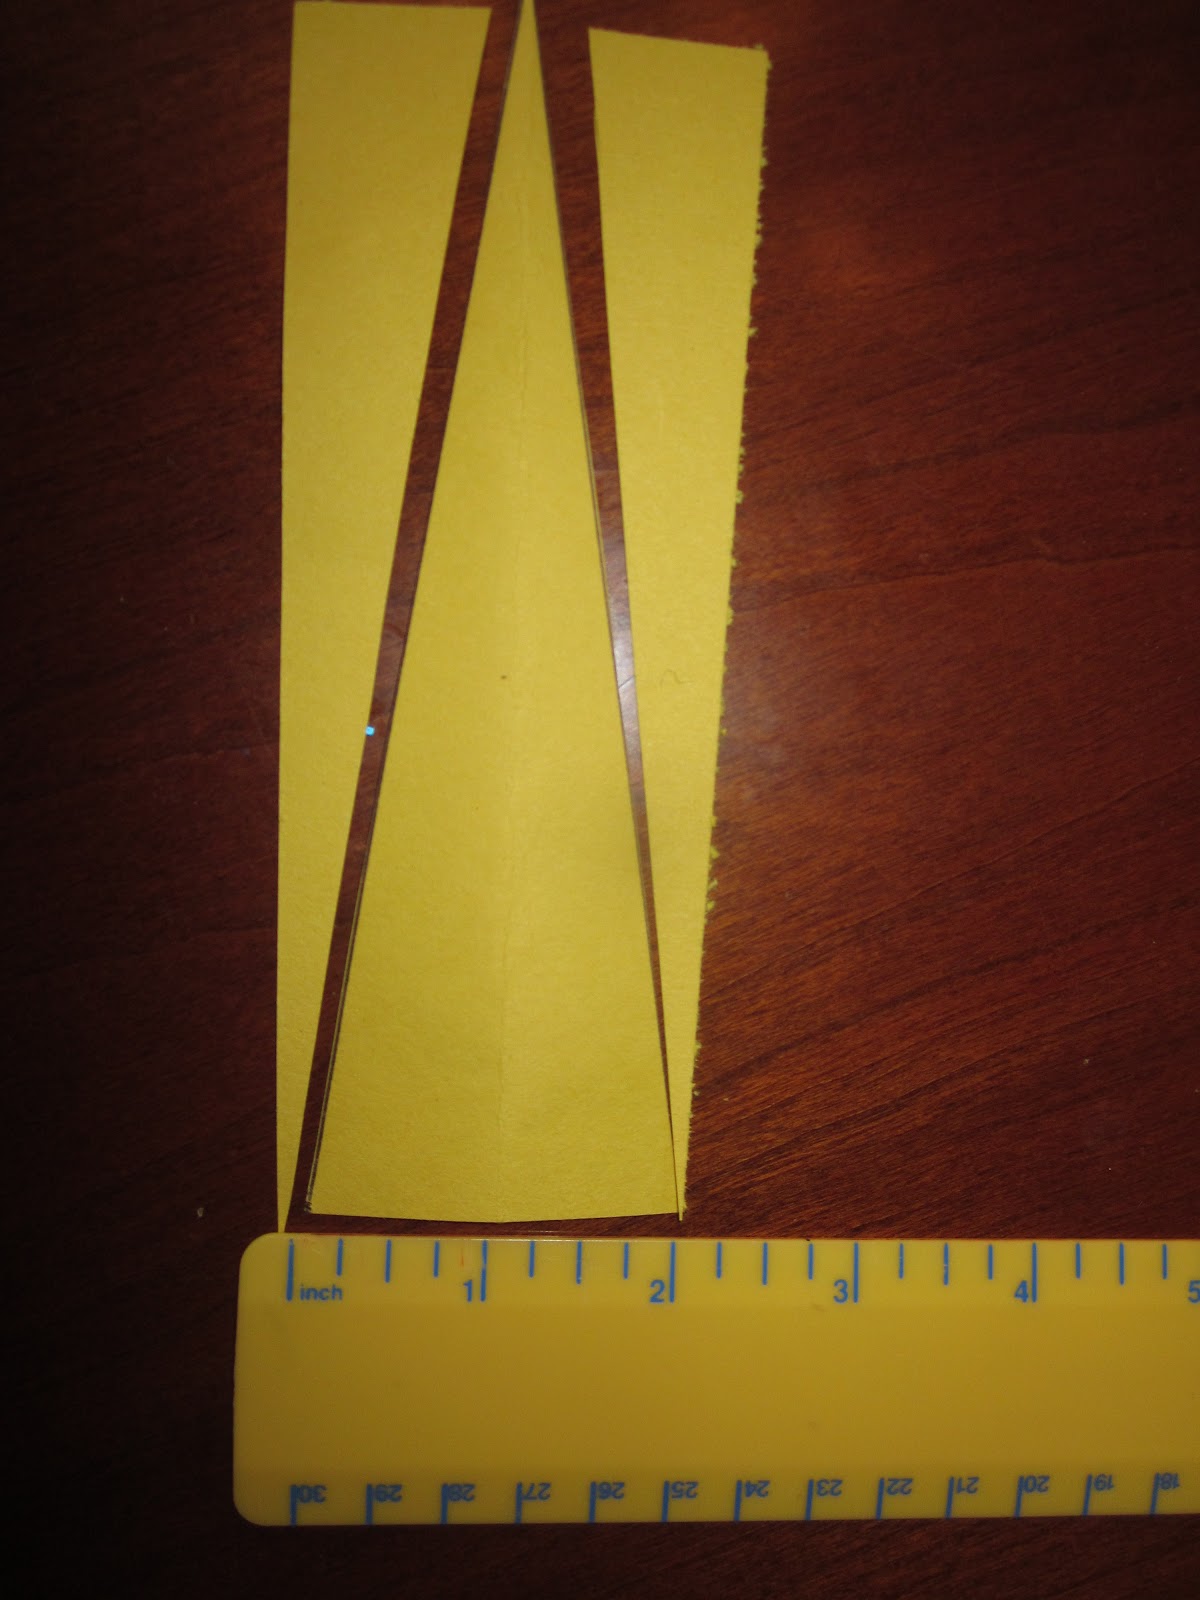
  3. Cut a piece of white felt into a triangle shape, making it as long as you would like Snoopy's tail to be. (The website I found directions on said to use black felt, but my husband said that wasn't right. I checked online and sure enough, his tail is white with a small black spot, not black, if you want to be precise.) I used a length of 16 gauge craft wire that I already had at home, which I cut with wire cutters to help give the tail some shape and make it stick out from the back of the sweatshirt. This is optional, but it looks nice (Plus, Brett says his co-workers really liked it when Snoopy wagged his tail after getting a strike. Their party took place at a bowling alley.) I laid the wire on top of the white felt triangle, stuffed it with some of the extra felt that I had cut, rolled it up into a long, narrow, cone shape, and hot glued it. I tried my best to make the seams end up on the underside of the tail. Then, I covered up what was left of the seam with a black felt spot that I cut out and hot glued to the tail. Lastly, I sewed the tail to the back of the sweatshirt using white thread. Tip: If you don't have craft wire, you can use a wire coat hanger instead. 
  4. This last step is optional, but I think it completed the look. Make a collar out of two black pipe cleaners. Fit them around the neck of your Snoopy, and twist them together. If needed, you can trim away the excess. (I also sent him with some black ribbon and black yarn, but this was the collar option he went with since it didn't require any tying, glue, tape, staples, or other work.)
  5. Another option I gave him was some black face paint so that he could paint on a Snoopy nose. He chose not to do this since we had a Date Night together that evening. I think that was the right choice, but if you don't have anywhere else to be, it would be a nice finishing touch.
{Snoopy was a hit with our girl, Ritzy!}


"Holy Koalas!" (and Other End of the Year Quotes)

Okay, it's more than a couple of months worth... but they're worth reading.

August 17, 2012
Mia: "Holy koalas!" (yelled after a bunch of birds landed on the neighbor's roof)

August 17, 2012
A discussion I had with Logan before bedtime when he wanted to sleep on the sofa and I was trying to get him to go upstairs:
Me: "You can't sleep down here. You don't have a pillow."
Logan: "You can bring Lightning McQueen pillow downstairs."
Me: "I can't do that. He likes to sleep upstairs."
Logan: "Him not 'live (alive), Mom."  (And that is why you can't try to rationalize with a 2 year old.)

August 19, 2012
When I woke her up in the morning, I told Mia that we were going to the contemporary church service and that Daddy and I were wearing jeans. Mia replied, "Well, I'm wearing a dress and a purple tiara and wings." (As if I would argue with that.)

August 19, 2012
Mia was in the bathtub pouring suds onto a wash cloth when she told me, "Mom, this is called 'waffle wash,' usually for washing waffles, but I don't wash my waffles." (Okay. Good to know.)

August 20, 2012
Mia was getting ready for bed and she was combing her freshly washed hair.
Mia: "Mom, do you know why I'm combing my hair?"
Me: "Uh huh."
Mia: "Because it's got frills and things." (Obviously.)

August 25, 2012
It was sweet to hear that Logan's favorite part of his 3rd birthday party was "all my friends."

September 5, 2012
Logan said the following while making his own sandwich at lunchtime:
"Peanut butter... Check! Bread... Check! Jelly... Check! 

September 9, 2012
Mia: "I know what chicken pox are. They're spots with chickens on them!"

September 11, 2012
Mia: "Mom, there's a boy in my class (tap) and he's older than everyone else!"
Me: "Thank goodness you're only five. Otherwise, I would be worried."

September 22, 2012
Mia: "Mom, when you tell me good night, you have to say, 'Good night, Miss Princess.'" (Thank goodness she doesn't have any delusions of grandeur.)

October 13, 2012
Mia: "Mom, I'm washing my hand with Ritzy's tongue!" (said after eating a caramel apple)

October 19, 2012
Logan: "We go somewhere fun now? With lots of Logans?"
Me: "Yes, we're going somewhere fun with other kids."
Logan: "I want to take the flashlight."
Me: "We're not taking the flashlight."
Logan: "You flash everyone?" (Hahahahahaha. I'm dying here. Anyone else?)

October 29, 2012
After catching Logan feeding the dog veggies underneath the table:
Me: "Please don't feed the dog."
Logan: {smiles} "I sharing!"

November 26, 2012
Mia: "Hey, Logan! Guess what my shirt says?"
Logan: "I don't know. I can't spell letters."
Mia: "Big sister!"

November 29, 2012
Logan: "This cup been glued. {Flips it over to show me the bottom.} It was stickin' to the table."

November 29, 2012
Me: "What do you want to be when you grow up?"
Logan: "A bird."
Me: "Anything else?"
Logan: "No, just a bird."

December 10, 2012
After hearing my phone, which was set on vibrate, receive a text message, Logan looked at me and asked, "Is that a cow?"

December 16, 2012
Logan was trying to negotiate his way out of time-out so that he could watch Brett play Angry Birds.
Me: "Sorry, it doesn't work that way."
Logan: "But they're ANGRY!

Sunday, December 30, 2012

The Elf on the Shelf: Year 2

{The Return of Coconut E. Butterfly}

{Hi Ho, Silver, Awaaaaaay!}

{Elf behind bars?}

{Peek-a-boo Elf}

{"E" is for Elf}

{Jingle Bell Rock}

{Elf-zilla! Elf-zilla is attacking!}

{Our elf is called "Coco" for short. Get it, cocoa? I'm so punny.}

{Don't we look cozy?}

{In retrospect, giving him the instruments may not have been my best decision. The kids were very noisy on that particular morning.}

{Coco catches up on his "beauty sleep."}

{Hanging in the toy catch-all -- because the tub was probably too wet.}

{Mind if I join you? Mama forgot to hide me last night so I need a quick hiding spot!}

{I wonder how he got all the way up there? Helped by Daddy, perhaps?}

{Here he is another morning after I had forgotten to move him and had to think quickly.}

{Yes, we still have one, and the kids know what it's for.}

{Coco gets creative with the coffee filters...}

{Oh, Christmas Tree...}

{Hanging out on Mia's bedpost...}

{Now, he's in her stocking.}

{Coco wants to go to school, too!}

{Mission Elf-Possible. Can you hear the theme music now?}

{Nestled all snug in the doll's bed}

These were not quite all of the Elf on the Shelf photos for 2012. I'm not sure if I can retrieve the rest. Sadly, my camera died. I was able to use our original digital camera (circa 2003) for a couple of days before it, too, bit the dust for good. So, now, I have no evidence that Coco spent some time gracing the shelves in Logan's room (in an effort to be fairer since Logan became almost as enthusiastic about searching for Coco as his sister has been).

Of course, this also means that I don't have a picture to show of Coco's grand finale. Remember last year when he made the "flour angel" on the counter. Well, this year on December 23rd, he spelled out a on the counter, encouraging the kids to "BE GOOD" with the help of some gum drops and mini marshmallows. The mini marshmallows were used after I ran out of gum drops, but gum drops worked better. They didn't get shriveled, which meant I could put them back in the bag to be eaten later.

I was wondering if it would get hard not to repeat hiding places the second year, but it was fine. The kids, being older, were able to find him in more challenging locations, which meant I could put him in any room in the house and they would keep looking until he was found. The frustrating thing was looking for more ideas online and only finding photos of naughty elves doing things that are completely inappropriate for viewing by young eyes. I'm sure you have seen a few so you know what I mean. To all the people out there who complain that they don't have time for Elf on the Shelf, I ask how is it that you have time to make him do such disgusting things? Anyway, we love our family tradition, so I guess it doesn't matter what other people think.

Reading Log 2012

So, after reading this list that Button Bird Designs kept last year, and after seeing my friend Kim's Facebook update telling how many books she had read for 2011 (and apparently none were picture books; I checked), I was inspired to keep my own reading log for this year. I don't think I actually wrote any New Year's Resolutions for 2012 since they never seem to be kept and that just makes me feel like a failure, but I did make it a goal to read more often and to keep a log of all the books I finished. I don't think I came close to Kim in terms of how many volumes I made it through, but it's not too shabby.

Re-reading these titles suddenly helps me realize why "murder" has become a recent addition to Mia's vocabulary. Incidentally, if you like light-hearted murder mysteries, I love the "Meg Langslow" series by Donna Andrews, which all have punny bird-themed titles. I also have enjoyed many, many in the "Hannah Swenson" series by Joanne Fluke. As a bonus, all of these dessert-themed books include tons of recipes. I don't think I have actually tried any of them yet, but someday... These books fill a void since I used to love crime-solving shows but I can't watch them any longer. Being a mom makes that stuff hit a little too close to home for some reason -- with the exception for Castle, which is irreverent enough to suit my sense of humor.

Confession time: some books I am listing individually were actually two different sets of three bound together. So, if you are keeping track and don't want to count them as separate novels, that means I am down 4 on my list. Personally, I thought they should all count as individual books since they all have separate authors and are really just compiled together because of similar subject matter, but Amazon listings seem to suggest otherwise...

And yes, I read the Fifty Shades books, which surprised both my sister-in-law and my mom, although I am not sure why. I couldn't put them down and finished the series in about 10 days, mostly while sitting next to the sandbox. Thankfully, it was during those glorious end of summer days that kept the kids engrossed in outdoor play, needing very little from me. Don't get all judgmental. I balanced that out nicely with a few choice parenting tomes. Here's the list:

  1. Remember Me? by Sophie Kinsella
  2. Owls Well that Ends Well by Donna Andrews
  3. No Nest for the Wicket by Donna Andrews
  4. Cockatiels at Seven by Donna Andrews
  5. What Happy Parents Do by Carol J. Bruess, Ph.D. and Anna D.H. Kudak, M.A.
  6. We'll Always Have Parrots by Donna Andrews
  7. The Penguin Who Knew Too Much by Donna Andrews
  8. Six Geese A-Slaying by Donna Andrews
  9. Cords of Love by Lynn A. Coleman
  10. The Heart of the Matter by Kristy Dykes
  11. Merely Players by Kathleen E. Kovach
  12. Swan for the Money by Donna Andrews
  13. Stork Raving Mad by Donna Andrews
  14. The Real Macaw by Donna Andrews
  15. Click Here for Murder by Donna Andrews
  16. Access Denied by Donna Andrews
  17. Delete All Suspects by Donna Andrews
  18. Explosive Eighteen by Janet Evanovich
  19. The Blue Bistro by Elin Hilderbrand
  20. Lemon Meringue Pie Murder by Joanne Fluke
  21. Cream Puff Murder by Joanne Fluke
  22. Fudge Cupcake Murder by Joanne Fluke
  23. Sugar Cookie Murder by Joanne Fluke
  24. Plum Pudding Murder by Joanne Fluke
  25. Blueberry Muffin Murder by Joanne Fluke
  26. Key Lime Pie Murder by Joanne Fluke
  27. Strawberry Shortcake Murder by Joanne Fluke
  28. Cherry Cheesecake Murder by Joanne Fluke
  29. Carrot Cake Murder by Joanne Fluke
  30. The Island by Elin Hilderbrand
  31. Devil's Food Cake Murder by Joanne Fluke
  32. Fifty Shades of Grey by E L James
  33. Fifty Shades Darker by E L James
  34. Fifty Shades Freed by E L James
  35. Maid of Murder by Amanda Flower
  36. Lucky Dog Matchmaking Service by Beth Kendrick
  37. Second Time Around by Beth Kendrick
  38. Peach Cobbler Murder by Joanne Fluke
  39. Apple Turnover Murder by Joanne Fluke
  40. Helicopters, Drill Sergeants, and Consultants: Parenting Styles and the Messages They Send by Jim Fay
  41. Cinnamon Roll Murder by Joanne Fluke
  42. Humor, Play & Laughter: Stress-Proofing Life with Your Kids by Joseph Michelli, Ph.D
  43. Parent Talk: Words That Empower, Words That Wound by Chick Moorman
  44. The Gift of the Magi and Other Stories by O. Henry
  45. Raising Boys: Why Boys are Different -- and How to Help Them Become Happy and Well-Balanced Men by Steve Biddulph
  46. Gingerbread Cookie Murder by Joanne Fluke
  47. The Dangers of Gingerbread Cookies by Laura Levine
  48. Gingerbread Cookies and Gunshots by Leslie Meier
  49. 500 Terrific Ideas for Organizing Everything by Sheree Bykofsky 

Wednesday, December 19, 2012

Christmas Craft FAIL

At some point in the fall, I saw leaves in Mia's classroom that had colored paint streaks on them, which I assumed were made with marbles. When I asked about the process, she confirmed that they had done some marble painting, and I decided that we were going to try it for a Christmas craft. This was not my greatest plan.

I am not sure if the biggest mistake was using acrylic paint (knowing full well that the marbles would go flying at some point and almost certainly land on our carpeted dining room, which I HATE, but that's another story... or perhaps, it's why I wasn't too concerned about the issue of using paint that stains in the first place.) The other problem I had was not being sure of what kind of container to use to hold the paper and marbles. I decided on some clear storage bins that we have because they were large enough to hold the paper, but small enough to fit on the dining room table.

So, here is how we did this, and I am warning you up front that this is obviously not the best way to go about things. I can share this now because it's been long enough that I am no longer annoyed with myself, and I am not in the stress of the immediate situation of flying paint covered marbles. There's an image for you, right? Anyway, I figure it's good to be able to laugh at myself, plus it helps clear up any misunderstanding that you may have that I am Super Mom. Nope, just a regular mom who has some kooky ideas, some of them more successful than others.

{Christmas Tree by Logan, Age 3}
Materials:
  • clear plastic container/s
  • green construction paper
  • pencil
  • scissors
  • plastic cups
  • spoons
  • red, green, and yellow acrylic paint
  • marbles
  • newspaper (optional)
Directions:
  1. Fold your green construction paper in half like a hot dog. Draw 1/2 of a tree shape on one side, (Start at the top center and make increasingly larger triangular branches. When you have about an inch left at the bottom, draw the last line back toward the center crease and then down to the bottom of the paper to make half of the tree trunk.) and keeping the paper folded, cut it out. You now have a symmetrical tree. If you don't like how it looks, you can always re-fold it and trim some more as desired. Tip: If you are making more than one tree, use the first one as a template to save some time. Lay your tree shape into a container.
  2. Pour a small amount of paint into cups. We used red, green, and yellow acrylic paint and added just enough to each cup to cover a marble completely. Tip: You may want to do this with a washable paint such as tempera paint. Tip: Gold would look nice in place of yellow, but we didn't have any gold paint. Tip: If using acrylic paints, have kids wear old clothes or a paint smock. Each of my kids has an old t-shirt of mine that we use for painting projects.
  3. Use a spoon the scoop the marble out of the paint and gently set it on top of the paper inside of the plastic container. Let your child roll it around to make designs on the paper. Tip: The marbles don't always stay put, so if you are concerned about paint getting spilled, you may want to protect work surfaces with newspaper first. Repeat as desired with other colors of paint. Allow paint to dry before displaying your Christmas tree, which should now look like it is adorned with colorful garland. Tip: You can lay it on newspaper for this.
Additional Notes and Words to the Wise:
You can make other shapes besides trees. We did bells on the same day. It's not my favorite, but I think that is because I wasn't thrilled with my bell shape that I came up with. You can find templates for these types of thing online, if you prefer, but I usually save time by making my own, and in this case I wasn't too excited by the results.

{Bell by Mia, Age 5}
Since this interesting craft catastrophe took place, I learned a helpful tip. Logan made a marble painted paper ornament at Story Time last week. I am sure it was no coincidence that the ornament was a circle, the same size and shape of the container being used for the marble painting (round cake pans). This is sheer genius, people. And now, you know how I will be doing this in the future, if I am ever again feeling brave (or crazy, you pick) enough to attempt marble painting with kids.

{Logan's ornament has a folded paper topper -- glued on either side of the paper -- and yarn for hanging.}


The nice thing about this project (see how I can find good in even my goofiest flub-ups?) is that you can do it with almost any age child. The marble painting itself is very simple and toddlers can manage it just fine. There is some prep work that an adult will need to do, but overall, it is easy.It is the stress caused by flying marbles that is the parental concern here. Don't attempt this at home if you know it will put you over the edge.

Tuesday, December 18, 2012

My Little Drummer Boy

On a recent trip to the library, Logan selected the picture book Drummer Boy by Loren Long. After reading this nice Christmas story, we were inspired to make a drum. It ended up being a project for Mama instead of a kids craft project like I was originally hoping, but he is still enjoying playing with it, and even Mia has had some fun with our homemade drum. My directions are far from perfect, but I will share them as best as I can for anyone who would like to make their own recycled drum. Most of the time I think of crafting with kids as being about the process rather than the product, but in this case the product is definitely what I want to focus on.

Materials:
  • clean empty canister with lid (we used a Swiss Miss Cocoa container)
  • 2 sheets of 9" x 12" green construction paper
  • 2 sheets of 9" x 12" yellow construction paper
  • glue/glue stick (optional)
  • clear tape
  • paper cutter (optional)
  • ruler
  • pencil
  • scissors
Directions:
  1. (Note: The logical way to start would have been to measure the drum to see what size paper to use. I didn't do this right away, but eventually I determined that the circumference was 22 inches by using a piece of yarn and measuring the yarn with a ruler. This might have made things easier.) However, the way I actually started was by folding a piece of green construction paper around the canister. It was too tall, so I used my fingernail to make an impression of where it needed to be cut. Then I used my paper trimmer to cut it to size. I did the same with a second piece of green paper, overlapped the two and taped them to the canister. (Tape was adding when a glue stick wasn't really getting the paper to stay in place.)
  2. Next, I made triangles from yellow paper. I decided to make 11 of them because I thought they would be 2 inches wide and then I would have an even number on my drum. (Note: It didn't actually turn out to work, but I was proud of myself for planning ahead and trying to use what math skills I still possess.) I used 2 sheets of yellow construction paper and used my paper trimmer to cut them into strips that were 6 1/2 inches long (the height of the container) by 2 inches wide. I folded one strip in half hot dog style and then used the crease to figure out where my triangle point would be. Then, using a ruler, I drew two pencil lines from the center (bottom) to the outer edges (top left and right). I cut out the triangle and used it as a template to make 11 more triangles.
  3. I started gluing the yellow triangles along the top edge of the green paper. I laid them next to each other and kept gluing, eventually discovering that I had one too many triangles. (So much for my math skills, eh?) They started being a bit too long as well. The final drum ended up with some overlapping of triangles, which I had done all that math to avoid in the first place, but oh well. 
  4. Logan doesn't care how it looks. He used two paper towel tubes for drumsticks, but you could use wooden spoons or whatever you are brave enough to give to your children. This drum does make noise when banged on, especially if they bang on the metal bottom instead of the plastic lid top. (Note: You can make your drum look even prettier I suppose, by adding ribbon, string, or yarn zig-zagged up and down the triangles. I would suggest securing it with metal brads if the drum is going to get played with, but again, this is not even needed.) Personally, I let it go that it didn't look perfect because the drum is making my little drummer boy quite happy, which, in turn makes me happy.


Build-a-Snowman Snack

Once again, we sat down to do a project that I pinned to Pinterest last winter. The idea was to make a snowman craft using mini marshmallows, but I decided it would be a shame to glue those tasty treats to paper when we could eat them instead. So, I switched it up and decided that Mia could build her own snack. I gave her a plate with some mini marshmallows, a skinny baby carrot, two pretzel sticks, and some mini chocolate chips. (I had originally thought to try to make it even healthier by getting out the raisins, Craisins, and peanuts, before deciding that it hardly mattered since the main ingredient of this snack was sugar considering how many little marshmallows it takes to make a decent looking snowman.) Here is what she came up with. Obviously, it didn't last long, but really, I didn't need a paper project with food on it that I would be concerned about somebody eating.

{Mia recently made this snowman snack.}

For Logan, I arranged the stuff on the plate in a snowman and let him have at it since I didn't figure he would have the patience to build a snowman himself. As you can see, mine doesn't look all that different from my five-year-old's handiwork. The kids both enjoyed this, and it wasn't time-consuming or difficult to do with items we already had in the pantry. Now, I am thinking that a gingerbread house with a snowman design would be another project for the future.


Friday, December 14, 2012

Easy DIY Glitter Ornament


Last night, at my Grace Circle meeting at church, there was a discussion of making ornaments and this technique was one that was mentioned. I thought it sounded simple enough, and then I was fortunate enough to get to make this one at my MOPS meeting this morning. Very serendipitous, indeed. And the good news is that these ornaments are truly simple to make. We moms used glass bulbs, but if I do this with my kiddos, I will seek out the plastic kind. I wish the picture showed the detail better. I used a mixture of blue and green glitter, and I was pleased with the results.

Materials:
  • newspaper
  • clear glass/plastic ornaments
  • glue
  • glitter
  • paper/funnel
  • permanent markers/paint pens/glitter glue pens (optional)
  • ribbon/ornament hook
  • scissors (if using ribbon to hang your ornament)
Directions:
  1. Protect work surface with newspaper.
  2. Remove the top of the ornament and pour in some glue. Making sure opening is covered, swirl the ornament around. If needed, keep adding small amounts of glue until the entire inside is coated with a thin layer of glue.
  3. Using rolled up paper or a funnel, add some glitter. (You do not need a lot.) Again, making sure the opening is covered, swirl the ornament around until the glitter adheres to the glue, and you are happy with the results. Don't worry if you see white areas because they will dry clear and should have glitter as well. Put the top back on the ornament and set it aside so that glue can dry.
  4. Decorate the outside of your ornament as desired. You can use permanent markers, paint pens, or glitter glue pens to write names and dates or to make designs. Allow drying time as needed.
  5. Cut some ribbon and attach it to the ornament. Or use an ornament hook to hang your completed ornament on your Christmas tree. These would also make nice gifts. You can make them with your kids (I would suggest getting the plastic kind if doing it with younger children) and give them to grandparents, teachers, friends, neighbors, really anyone, because who wouldn't like something made by an adorable child? Another option if you don't want to use glitter and glue is to use paint inside of the ornaments. Happy crafting.

Salty Snowman Scene

{I like to think of this guy as "Salty the Snowman." Created by Mia, age 5}

Here's another one I have had pinned in Pinterest for quite awhile, and we tried it out. Mia enjoyed it, of course. She is very much into crafting, just like her mama. This project, however, was not a good one for Logan, age 3. He ended up with a snowball scribble covered in A LOT of salt. I am not even ashamed to tell you that I threw it away, especially since he did not even notice. The end result is a fun, textured snowman, no glitter required.

Please note that this is not an original idea. I keep trying to find the blog of the original idea for this, but the link seems to be broken. I guess that can happen over the course of 40 weeks (crazy, but true, this is how long ago I saved this idea), so my apologies to whomever came up with this idea. I really did try to give credit, but it is just not working out.

Materials:
  • construction paper (any color)
  • crayons or colored pencils (white and any other color you choose)
  • paint brush
  • white glue
  • salt
  • baking sheet (optional for containing the mess)
  • small cups (optional for holding glue and salt)
  • other optional decorative items: puffy paint, buttons, sequins, pom poms, etc.

Directions:
  1. Have your child use a white crayon or colored pencil to draw a snowman. You can also put your snowman on the snow covered ground and make snowflakes falling in the air, as Mia did in her winter scene. Mia also drew a black top hat and a blue scarf.
  2. Lay the paper on a baking sheet. (Tip: You can add wax paper, tin foil, or parchment paper as well if you don't want to craft directly on your baking sheet.) Have your child add glue to the parts that he or she wants to be snowy. (Tip: For less mess, put some glue into a Dixie cup and let your child apply it to the paper with a paint brush.)
  3. Next, add salt to the glue. (Tip: I definitely recommend giving him or her another small cup of salt.) The salt can be added in little bits, shaken off, and then used again as needed. Allow the salt/glue mixture to dry.
  4. Decorate your snowman as desired. Mia used orange puffy paint for the carrot nose and red puffy paint for the eyes, mouth and buttons. Other materials that you could try are buttons, sequins, and pom poms. Make sure that all glue is dry before displaying the snowman project.

Thursday, December 13, 2012

Foot Print Penguins

{Foot Print Penguin by Mia, Age 5}
Know any kids with "happy feet?" If so, this project is perfect. You can do this with toddlers on up, provided that you are willing to do all of the work for young children. It's cute and not at all complicated, so what more could you ask for? I found this craft idea on Pinterest, and made a couple of small changes (black ink instead of paint and orange puffy paint for the beaks).

Materials:
  • paper
  • black ink
  • black paint
  • white paint
  • paint brushes
  • Styrofoam tray (or plate/bowl to hold paint)
  • orange puffy paint
  • 2 googly eyes
  • glue
  • newspaper (to protect work surface)
  • damp cloth/paper towel/baby wipes for clean-up

Directions:
  1. Spread newspaper on your kitchen floor (or other area you feel is okay for working). Lay a piece of paper down on top of the newspaper. (We used plain white computer paper.) Have your child sit in a chair by the paper. Using a black ink pad, cover the surface of his/her foot with ink. (You can also use black paint, but I decided to try this with ink to make it a bit simpler.) Help your child to step down from the chair directly onto the paper. Carefully lift foot off of paper, clean up the bottom of the foot, and set paper aside so ink can dry. If making more than one penguin, repeat step 1 as many times as desired.
  2. Once the ink (or paint) is dry, use white paint (We used recycled Styrofoam trays from meat packaging as our paint palette.) to make the face and tummy of the penguin. For the head, I started with a heart shape for each penguin. Mia was able to do the rest herself, but I did all of Logan's painting. (This was after I gave him the white paint and let him have at it, which ended up being that he covered all of the black foot print with white paint and made what I called an "invisible penguin" since it was on white paper, so please note that you can't really expect a 3 year old to be able to do this on his own.)
  3. Now, use black paint for the flippers. Allow paint to dry.
  4. Glue two googly eyes to the head. (That's the part that Logan did.) Make a triangular beak out of orange puffy paint (or regular paint if you don't have puffy paint). Allow puffy paint to dry. (This may take overnight.)
  5. Your penguin is now ready to be displayed. You can frame it and give it as a Christmas gift, turn it into a card, mount it on colored paper (I am thinking of using red card stock) or just hang it on the refrigerator. Enjoy.
{Foot Print Penguin by Logan, Age 3, with lots of help from Mama}


Wednesday, December 12, 2012

Paper Plate Turkey

Logan made this feathered fellow at the library before Thanksgiving, and I am obviously late in posting it. Besides being super swamped with holiday preparations, I have had problems getting pictures loaded onto the blog, severely limiting my ability to add new posts. I think I have the issue resolved, so fingers crossed.


Materials:
  • small paper plate
  • scissors
  • brown construction paper
  • yellow construction paper
  • other colors of construction paper
  • glue stick
  • 2 eye stickers (or googly eyes)
  • decorative scissors (optional)
Directions:
  1. Cut off approximately 1/3 of the paper plate.
  2. From brown paper, cut a turkey body. To do this, draw a circle (somewhat smaller than the paper plate) with a smaller circular shape on top for the head.  
  3. Cut several feathers from colored paper. If desired, you can use decorative scissors for this.
  4. Cut a beak from yellow paper. Ours is a diamond shape, folded in half.
  5. Assemble your turkey. The straight edge of the cut plate is the bottom. Glue the feathers along the curved top edge of the plate, and then glue on the body. Next, glue on the beak and add the eye stickers or googly eyes. (If using googly eyes, I suggest using white glue instead of a glue stick.)
  6. To make it more interactive, Logan's turkey has a song glued to the back, to be sung to the tune of "Short'nin' Bread." This is optional, but it adds to the craft.
"My little turkey 
has feathers, feathers.
My little turkey
has a feather of (color)."


Sunday, November 18, 2012

And the Liebster Goes to...


Here's something that makes me feel pretty special. I was nominated for the Liebster Award by Jason who writes the blog, Preschool Crafts for Kids*. I had not heard of this before, but the Liebster Award is given to bloggers by other bloggers. It's a nice sort of way to promote the blogs of others like us who don't have too many followers (apparently 200 is the max, and as I am sure you can see, I am nowhere near that limit). Most people may not know this about me, but I am a compliment junkie. I basically get high on compliments and I can't hear enough good things. I think that may be one of the primary reasons that I write this blog. It makes my day when someone sees something I did and tells me it was cool. So, thank you Jason, for building my self-esteem. I truly needed it. And, now let's share the love.

Fellow bloggers, here are the rules:

1. Thank the blogger who nominated/awarded you.
2. Answer 11 questions asked you by the person who awarded you.
3. Nominate/award 11 other blogs with links.
4. Pose 11 of your own questions to your nominees.
5. Put the Liebster Award logo on your blog. (There are several that pop up if you Google this. Here is the one I used.)

My Questions to Answer (from Jason):
  1. What's your favorite movie? Not sure if it is a favorite, but I could probably watch Sweet Home Alabama any time it happened to come on.
  2. What's your favorite home meal? Pizza made on the grill is sublime.
  3. What's the last book you read? Cinnamon Roll Murder by Joanne Fluke
  4. Are you an early bird or a night owl? I don't think of myself as either. I hate to get up early, but I can't stay up too late either. I am more productive in the mornings, though, so maybe I am more of a morning person.
  5. In the movie of your life, who will play you? One time, in college, someone told me I looked like Alyson Hannigan...
  6. What's your stupid human trick? I'm fairly proficient in "toddlerese." I can translate almost anything my 3 year old says.
  7. What superhero would you be or super power you'd like? I've always thought that moms should have evolved extra arms, so maybe Vishnu. I realize that's not a superhero, but a deity is sort of the same thing.
  8. What's the funniest video on youtube? "Gangnam Style" is the only thing I have seen recently, so I guess it gets my vote.
  9. Who is/was most influential in your life? My children have made me the person I am today. They have made me better and stronger than I ever thought I could be.
  10. What's the coolest/most beautiful thing you've ever seen? I am obviously biased here, but my kids win, hands down.
  11. What's your dream vacation destination? Italy and Ireland are at the top of places I would love to see.
And the Liebster Goes to:
  1. ...and Baby Makes 3! 
  2. So... tell me a story
  3. Souls
  4. Our Family's CI Journey
  5. My Pajama Days 
  6. Read it again, mom!
  7. 1-moms-ramblings
  8. Crafty Mom of 4 Boys 
  9. A Crafty Mom's Life 
  10. One Christian Mom
  11. A Frog in My Soup

Questions for My Nominees to Answer
  1. If I had a million dollars, I would _________ ?
  2. What is the best gift you ever received?
  3. What inspires you?
  4. If you could have a "do-over" in life, what would you try to do differently?
  5. What is something that most people don't know about you?
  6. What is your favorite magazine?
  7. What is your proudest moment?
  8. If your house was on fire, what one thing you would grab before getting out?
  9. What are you most afraid of?
  10. If you could have any job, just for a day, what would you do?

Thursday, November 15, 2012

"The Great Momdini"

Since becoming a mom, I have felt that one of the most humbling things about parenthood is that I cannot make my children do anything they don't want to do. As I was bemoaning this fact earlier this week (after an unusually difficult morning of getting out the door in time for school), I was reminded that it's not completely true. Feel free to call me "The Great Momdini," because I do have one little spectacular trick up my sleeve.

Drumroll, please ...

I can make Logan poop, without fail, in just two easy steps.

Step 1: Put a load of diapers into the washing machine.

Step 2: Wait a few minutes.

Yep, it's really that simple. Now, you may be asking how this is possible since I just told you it's impossible to make kids do things, but it's true. All I have to do is to wash the diapers, and I am guaranteed to find that he has pooped. While other cloth diapering mamas are sure to have discovered my secret for themselves, I am just nutty enough to deduce that I am producing this amazing result entirely on my own (which I am sure you agree makes me a sort of Super Mom).

And now, for my next trick, I will get my kids to eat the dinner I have prepared without complaint. Oh, wait. That's probably not gonna happen. At least I have one good "magic trick" in my repertoire.

Monday, October 29, 2012

Wish Fulfillment?

Like all moms, I find myself wishing and praying that my kids will grow up to be good people: kind,  loving, sharing... Sometimes I wonder whether or not I am the right person to prepare them to be the kind of human beings I want to raise. Then there are little glimmers of hope interspersed amongst the craziness that is day-to-day life with young children.

Tonight, as we were eating dinner (or rather the kids were complaining about the crescent mummy dogs I had prepared, which is another story altogether...), I noticed that Logan was handing pieces of mixed vegetables to Ritzy underneath the table. When I tried to stop him by saying, "Please don't feed the dog," he gave me a knowing grin and informed me, "I sharing!" Well played, Little Man, well played. Who am I to complain when my child is willingly sharing when I have asked him to do this very thing so many times before?

Sunday, October 28, 2012

Paperback Pumpkins, Apples, and Pears

I learned how to make paperback pumpkins at our local library recently, and I was so excited by the first one that I quickly returned to buy a stack of books to make more pumpkins. Once I knew the basic steps, I was also able to make apples and pears so now I have a total of 7 fruit shapes on top of my kitchen cabinets. They are very festive for fall.

{The paperback pumpkin that started it all...}
 Materials: 
{Paperback Apple}
  • paperback books
  • scratch paper
  • pencil
  • scissors
  • sponge (I used an old kitchen sponge cut in half.)
  • acrylic paint (I used orange, yellow, red, and green.)
  • tray/plate to hold paint
  • cup of water
  • sticks/twigs
  • curling ribbon, twine, or other ribbon
  • hot glue gun
  • newspaper to protect work surface


Directions: 
1.) Gather some old paperback books, the more beat up the better.

{These teen books were just ten cents each at our library.}


2.) Decide which shape you want to make (apple, pear, pumpkin). Fold a piece of paper in half like a hamburger. (I re-used some printer paper for this.) Draw your shape on one half, cut it out, and unfold it. Make sure it looks the way you want, or make changes if desired. (Note: Definitely be sure that your template will fit the pages of your book.) Now is also a good time to warm up your glue gun.

{Some of the titles are pretty funny: Help! I'm Trapped in My Gym Teacher's Body.}

3.) Tear off the front cover and then begin tracing the template onto the first page using a pencil. Cut out a small section (say 20 pages or so, depending on the sharpness of your scissors and how many pages you can comfortably cut). Continue tracing and cutting small sections until the entire book has been done. Tear off the back cover and any remaining parts of the cover on the spine. (Note: I would start cutting at the bottom, work my way up to the top, and once I got close enough, just tear off the remaining section to the point where it meets the spine, which saves some cutting.)

{Tracing my first pear...}


{Cutting out a pumpkin}

4.) Now for painting. This step takes the longest. First, protect your work surface with newspaper. You may also want to wear old clothes since acrylic paint will stain. Pour some paint onto a tray or plate (I used old Styrofoam meat packaging at home and a paper plate when I made my first one at the library.) Dip you sponge into the cup of water, then dip it into the paint, and dab it onto your tray/plate so that you are applying thin coats only. Sponge paint both sides of each page. I did just outside edges, leaving white space in the centers of each pear, apple, or pumpkin shape. (Note: Thin coats of paint work best because it dries faster and the pages are less likely to stick together. On my first apple, I experimented with a sponge brush in place of a sponge. It worked, but the paint went on much, much wetter and took forever to dry -- over 24 hours and that was with the help of a hair dryer -- so I don't recommend this method because once you start, you want to finish.)

{Sponge painting the pear}

{This apple I painted with a sponge brush, but it was not my preferred method.}

5.) Use a generous amount of hot glue along the spine of the book and then fold the book backward pressing the spine together. The pages should now fan out. Fold parts or individual pages back and forth as needed to get the look you want. (Note: As I made more of these, I just started folding the book back and forth along the binding before even starting the paint process because looser bindings seem to be easier to work with. Sometimes you just have to keep playing with it until it looks the way you want. If it isn't perfect, that's okay, the final step really makes it look finished. Plus, if there are sections pages that lay open and don't look the way you want them to, you can just point this toward the back of your display, unless it is your table centerpiece.) 
 
{A Finished Pear}
6.) Put the finishing touches on your pumpkin, apple, or pear. Add a stick to the center (or wherever you can get it to fit) using hot glue. If needed, glue a page or two around it. Green curling ribbon looks nice for a pumpkin and really makes it look special and finished. I had some wide sparkly green ribbon that I thought would make nice "leaves" for my apples so I just tied that around the stem and cut each end on an angle to resemble stylized leaves (without trying to make them really look like leaves). For my pears, I tied bows with cute green and brown pear ribbon that I happened to have. I thought they turned out cute. For one pumpkin, I used twine instead of curling ribbon to give it a more authentic look. I am not sure if I love it, but it is one option and something different. (Note: My first pumpkin would not stand up straight so I tried trimming the bottom of the pages to make them flatter. When that did not do the trick, I added some cardboard to the bottom, which stabilized it.)


{My First Finished Apple}


{Finished Pumpkin with Wider Curling Ribbon}

{Finished Pumpkin with Twine}

{My Finished Fall Display!}