Showing posts with label fall crafts. Show all posts

Wednesday, November 27, 2013

Turkey Table Toppers

Here's an easy craft to keep the kids busy this Thanksgiving. Once again, this idea is brought to you by our wonderful library lady, Mrs. D. (I hope she isn't offended that I love her ideas and run with them!) These turkey table toppers are fairly quick and easy for little ones to create without too much parent prep. I think that it would be cute to have child-made place cards for everyone by simply adding names to the tail feathers. That would surely make for a happy Thanksgiving table.

The good news is that most of the items needed for this project are things you likely have at home. The only item you may not have are the Bingo markers. I assume that the library ordered these Bingo daubers, but my suggestion is that you save yourself a lot of money and get some from Dollar Tree! I bought ours there over two years ago and they are still working great. (I normally see these in the school supply aisle.) We have red, orange, green, blue, and purple. The only color I have seen at Dollar Tree that I did not purchase was black since I figured that would have limited craft possibilities. Personally, I think this was a great investment for kids' crafts so I would definitely recommend getting some!

{Turkeys by Logan, 4, and Mia, 6}
Materials:
  • TP tube
  • small paper plate
  • scissors
  • tacky glue (or school glue)
  • yellow/orange construction paper
  • brown construction paper
  • pencil
  • 2 googly eyes (or eyeball stickers)
  • Bingo markers (or regular markers)
  • red pipe cleaner (or construction paper)
  • something to protect work surface (optional)
Directions:
  1. Cut a small paper plate in half. One half is needed per turkey, so if you are only making one turkey, set this aside for another project. (One option is this paper plate turkey.)
  2. Cut a toilet paper tube in half. If you want to make lots of turkeys but you are short on TP tubes, you can also cut them into thirds. Using your scissors, make two small notches on one end of the tube, about 1/4" deep. They will be spaced equally apart so that the paper plate will be able to slide into the notches after it is decorated. (If you need a project for leftover tube sections, try making bird feeders.)
  3. Make a beak out of yellow (or orange) construction paper. The easiest way to do this is to cut a strip of paper and then cut a smaller rectangle from the strip. Then, fold the rectangle and cut a triangle so that the fold is the base of the triangle. When glued onto paper, this will make a 3-D beak.
  4. Draw and cut out a turkey body from brown construction paper. The basic shape is a small circle on top of a larger circle and it should be about 4 1/2" tall. (Note: Mrs. D.'s is thinner and reminds me of a bowling pin and mine looks a bit more like a fat pear, but I think they both are fine. Also, hers is flat on the bottom and mine is rounded, and they both seem to stand up nicely, so take your pick.) Tip: If you are planning to make more than one turkey, use the first one as a template and trace around it to make more.
  5. For the wattle, we used a scrap of red pipe cleaner. If you want to use pipe cleaner, you may need to cut a piece about 1" long. Tip: I keep left over bits of them in an old plastic peanut butter jar for times when we need just a small piece. This way, we don't have to cut up a perfectly good pipe cleaner. Tip: If you don't have pipe cleaners, you could also make a wattle from red construction paper, cut into a kidney bean shape.
  6. Have your child decorate the half paper plate using the Bingo markers. It doesn't matter which side of the plate gets decorated. Tell kids that they do NOT need to press hard. Tip: If the ink isn't flowing well, make sure the cap is secure, and shake the Bingo markers. If this doesn't work, gently tap, tap, tap the marker until the ink starts flowing. Set aside to dry. Tip: Sometimes markers will bleed through, so you might want to protect your table before starting. I like to use cereal box liners, but you can also use newspaper, an old vinyl tablecloth, or wax paper. Tip: If you don't have Bingo markers, let your child decorate the plate with regular markers.
    {Mia made a rainbow turkey.}
  7. Have your child decorate the turkey's body. Mrs. D. provided eyeball stickers for a no-mess option. (Logan's make me smile because one is upside down.) Mia used googly eyes and adhered them with tacky glue. (Tip: If you don't have eyeball stickers or googly eyes, use a black marker to draw eyes.) Next, both kids glued down their beaks. Mia then added her red pipe cleaner wattle. (Tip: If you don't have a pipe cleaner, use red construction paper or draw one with a red marker.) Lay flat until glue is completely dry.
  8. Kids may need help with assembling their turkeys. Place some glue on the back of the turkey's body and affix it to the tube, making sure that the two slits are on the top of the tube, and are to the left and right of the body. Slide the paper plate, flat side down, into the two slits so that the colorful side is facing the front.
  9. Display your child's turkey table topper. You may want to make several for all of your Thanksgiving guests.
One final thought: I know it has nothing to do with Thanksgiving, but Mia's rainbow tail feathers inspired me, and I could totally see tweaking this craft and making it into a showy peacock. To do this, use pretty blue paper in place of brown. Skip the wattle, and add lots of colorful Bingo marker dots to the body. For a final flourish, add a blue feather on top of the peacock's head, and voila! A pretty peacock!

Have a blessed and safe Thanksgiving!

Tuesday, November 26, 2013

Cupcake Liner Owl Craft

This cute craft is brought to you by our lovely library lady. During story time, Logan (my kid who is actually not all that into crafting) happily produced this cheery bird. I think that he loves Mrs. D., so she motivates him to be creative, which is great. The cupcake liner eyes are perfectly adorable, and I only wish that I had thought of it myself!

{Cupcake Owl by Logan, Age 4}
Mia liked this feathery fellow, too, so we made a few more to hang in the window. For most of them, I just traced the original to get the body's shape. However, she wanted one baby owl, so I drew a smaller body.

Materials:
{Red Owl by Logan}
  • construction paper
  • pencil
  • scissors
  • glue (tacky glue works best)
  • 2 googly eyes (or paper circles)
  • feathers (or paper strips)
  • 2 cupcake liners (we used both regular size and mini)

Directions:
  1. Draw and cut out the owl body. If you are making several, you may want to keep the first cut-out and use it for a template. The basic shape is an oval. On one end, instead of rounding it, create a pointed triangle shape. Fold this down for the owl's head. (My kids ended up wanting these to hang out like a flap instead of being secured, so I am not sure that is what Mrs. D. intended, but it wasn't worth arguing.)
  2. For feathers, Mrs. D. had cut several strips of construction paper in brown, black, tan, gray, and white. If planning to use paper feathers, cut these in advance and curl them around your finger or a pencil.
  3. Cut diamond shapes for the beaks. To make several, I first cut a strip of paper, then cut smaller rectangles. I folded each rectangle in half (hamburger fold) and then cut a triangle, leaving the fold in tact. Once unfolded, these formed the beaks. We used yellow and orange construction paper. Mrs. D. had also cut out brown construction paper feet, which we skipped. If you don't want to use googly eyes, cut black paper circles.
  4. Have your child assemble his owl. Glue two cupcake liners to the head to make the eyes. Then add the googly eyes or paper circles to the centers. Next, glue down the beak. If you are including feet, now is a good time to glue them to the bottom of the owls' body, either on the front or the back. Then, add feathers. We used actual feathers, which is why tacky glue worked the best, but the paper strips can be adhered easily using school glue or a glue stick. (Glue stick is the least messy.) 
    {One of Mia's owls, which I call "Showgirl."}
  5. Allow glue to dry before displaying your owl craft. 
    {Mama & Baby Owls by Mia, Age 6}
Other Ideas: I decided that it would be fun to perch the owls on actual twigs, and I envisioned using pipe cleaner legs to secure them. However, Mia was happy to make owls without feet so I never mentioned this. I also came up with the idea to use paper (or fabric) flowers for the eyes, and Mia made one very showy owl that had pink feathers and paper flower eyes with jeweled centers (from my scrapbooking supplies), which ended up being her absolute favorite.

Tuesday, October 29, 2013

Marble-Painted Spider Web Craft

Here's yet another fun holiday craft idea from our fantastic story time lady, Mrs. D! My little man (who I have mentioned is not hugely into crafts like his big sister) really had a great time creating this project, and I can't blame him. Who doesn't love fun ways of painting? And painting with marbles is definitely fun!

He enjoyed adding the foam spider sticker at the end, but you make a spider from a pom pom and some pipe cleaners like we did here. Or you can just add a plastic spider ring in its place. I'm thinking you could either cut off the plastic ring part and then glue it on, or if that doesn't work, make a slit in the paper, and poke the ring part through and tape it to the back side of the paper.

I'm also feeling inspired to do a string-painting version of this spider web craft... So many spooky possibilities!

{Spider-in-a-Web by Logan, Age 4}


Materials:
  • round cake pan or pie tin
  • black construction paper
  • pencil
  • scissors
  • white tempera paint (and small bowl/cup to hold it)
  • marble/s
  • spoon 
  • adhesive foam spider sticker (optional)
Directions:

  1. Place a piece of black construction paper inside your cake pan or pie tin. Using a pencil, trace around the inside and cut out the paper circle.
  2. Lay the construction paper inside the cake pan or pie tin.
  3. Place some white paint in a cup or bowl along with a marble or two. Help your child coat the marble/s with paint, using a spoon. Again, using the spoon, help your child place a marble on top of the paper.
  4. Have your child gently roll the marble around to make a "web" pattern on the black paper. If desired, put the marble back in the paint to re-coat it.
  5. Have your child place a spider sticker in the web and then allow the paint to dry completely before displaying his artwork.

Monday, October 14, 2013

Easiest Ever Pumpkin Craft

I recently learned how to make these at our local library, and I am very pleased with how mine turned out. Really! I am not making this up. This is the easiest pumpkin craft ever, and you need absolutely NO craft skills to pull it off. Also, you barely need any materials, and these pumpkins are really quick to craft. So, it's basically a perfect craft, even for beginners.

If I had any complaint, it would be that this is a little bit more expensive up-front than many other craft projects that I have made. That said, you will have plenty of duct tape left over, so it is really just a general craft investment. (And for the record, I can't complain, because all of my materials were provided by the library. Love!) I am sure I will be making more cool duct tape pumpkins... as soon as the faux pumpkins start going on clearance at the craft stores.


{Happy Halloween Crafting!}

Materials:

  • foam pumpkin (I recently saw some small ones at Dollar Tree!)
  • 1-2 rolls of decorative duct tape (I have found small rolls in the dollar section of Target.)
  • scissors (optional)

Directions:

  1. If using more than one roll of decorative duct tape, decide which design/solid color will be used for your stem and which will be used for the body of the pumpkin. Tear (or cut, but honestly, I found it easier to just tear it with my hands) off small sections and cover the stem. You can even tear the tape in half to have easier to work with strips if you stem is on the small side. Don't worry if the base looks messy because you will end up covering it later. Tip: If your stem is too long or awkward to work with, cut it with your scissors. I found this to be really helpful!
  2. Now, cover the base of the pumpkin with strips of duct tape. The best way to do this is to start at the top near the stem and then slowly smooth the tape down along the pumpkin. You will want to leave space in between each strip of tape, and then come back later and fill in the gaps. Tip: I decided to tear off several strips and lay them along the edge of the table to make the process go more smoothly. I just eyeballed them to see that they were the approximate length that I needed. Tip: Don't worry about making your pattern (if your tape has one) line up perfectly! I could have made myself insane trying to get those chevron stripes to line up just so, but I saved myself the worry, and it came out fine. The eye just tells me that it lines up (for the most part) even if it really doesn't.
  3. Find a place to display your spooktacular pumpkin craft. See, I told you that was easy, right?

Wednesday, December 12, 2012

Paper Plate Turkey

Logan made this feathered fellow at the library before Thanksgiving, and I am obviously late in posting it. Besides being super swamped with holiday preparations, I have had problems getting pictures loaded onto the blog, severely limiting my ability to add new posts. I think I have the issue resolved, so fingers crossed.


Materials:
  • small paper plate
  • scissors
  • brown construction paper
  • yellow construction paper
  • other colors of construction paper
  • glue stick
  • 2 eye stickers (or googly eyes)
  • decorative scissors (optional)
Directions:
  1. Cut off approximately 1/3 of the paper plate.
  2. From brown paper, cut a turkey body. To do this, draw a circle (somewhat smaller than the paper plate) with a smaller circular shape on top for the head.  
  3. Cut several feathers from colored paper. If desired, you can use decorative scissors for this.
  4. Cut a beak from yellow paper. Ours is a diamond shape, folded in half.
  5. Assemble your turkey. The straight edge of the cut plate is the bottom. Glue the feathers along the curved top edge of the plate, and then glue on the body. Next, glue on the beak and add the eye stickers or googly eyes. (If using googly eyes, I suggest using white glue instead of a glue stick.)
  6. To make it more interactive, Logan's turkey has a song glued to the back, to be sung to the tune of "Short'nin' Bread." This is optional, but it adds to the craft.
"My little turkey 
has feathers, feathers.
My little turkey
has a feather of (color)."


Sunday, October 28, 2012

Paperback Pumpkins, Apples, and Pears

I learned how to make paperback pumpkins at our local library recently, and I was so excited by the first one that I quickly returned to buy a stack of books to make more pumpkins. Once I knew the basic steps, I was also able to make apples and pears so now I have a total of 7 fruit shapes on top of my kitchen cabinets. They are very festive for fall.

{The paperback pumpkin that started it all...}
 Materials: 
{Paperback Apple}
  • paperback books
  • scratch paper
  • pencil
  • scissors
  • sponge (I used an old kitchen sponge cut in half.)
  • acrylic paint (I used orange, yellow, red, and green.)
  • tray/plate to hold paint
  • cup of water
  • sticks/twigs
  • curling ribbon, twine, or other ribbon
  • hot glue gun
  • newspaper to protect work surface


Directions: 
1.) Gather some old paperback books, the more beat up the better.

{These teen books were just ten cents each at our library.}


2.) Decide which shape you want to make (apple, pear, pumpkin). Fold a piece of paper in half like a hamburger. (I re-used some printer paper for this.) Draw your shape on one half, cut it out, and unfold it. Make sure it looks the way you want, or make changes if desired. (Note: Definitely be sure that your template will fit the pages of your book.) Now is also a good time to warm up your glue gun.

{Some of the titles are pretty funny: Help! I'm Trapped in My Gym Teacher's Body.}

3.) Tear off the front cover and then begin tracing the template onto the first page using a pencil. Cut out a small section (say 20 pages or so, depending on the sharpness of your scissors and how many pages you can comfortably cut). Continue tracing and cutting small sections until the entire book has been done. Tear off the back cover and any remaining parts of the cover on the spine. (Note: I would start cutting at the bottom, work my way up to the top, and once I got close enough, just tear off the remaining section to the point where it meets the spine, which saves some cutting.)

{Tracing my first pear...}


{Cutting out a pumpkin}

4.) Now for painting. This step takes the longest. First, protect your work surface with newspaper. You may also want to wear old clothes since acrylic paint will stain. Pour some paint onto a tray or plate (I used old Styrofoam meat packaging at home and a paper plate when I made my first one at the library.) Dip you sponge into the cup of water, then dip it into the paint, and dab it onto your tray/plate so that you are applying thin coats only. Sponge paint both sides of each page. I did just outside edges, leaving white space in the centers of each pear, apple, or pumpkin shape. (Note: Thin coats of paint work best because it dries faster and the pages are less likely to stick together. On my first apple, I experimented with a sponge brush in place of a sponge. It worked, but the paint went on much, much wetter and took forever to dry -- over 24 hours and that was with the help of a hair dryer -- so I don't recommend this method because once you start, you want to finish.)

{Sponge painting the pear}

{This apple I painted with a sponge brush, but it was not my preferred method.}

5.) Use a generous amount of hot glue along the spine of the book and then fold the book backward pressing the spine together. The pages should now fan out. Fold parts or individual pages back and forth as needed to get the look you want. (Note: As I made more of these, I just started folding the book back and forth along the binding before even starting the paint process because looser bindings seem to be easier to work with. Sometimes you just have to keep playing with it until it looks the way you want. If it isn't perfect, that's okay, the final step really makes it look finished. Plus, if there are sections pages that lay open and don't look the way you want them to, you can just point this toward the back of your display, unless it is your table centerpiece.) 
 
{A Finished Pear}
6.) Put the finishing touches on your pumpkin, apple, or pear. Add a stick to the center (or wherever you can get it to fit) using hot glue. If needed, glue a page or two around it. Green curling ribbon looks nice for a pumpkin and really makes it look special and finished. I had some wide sparkly green ribbon that I thought would make nice "leaves" for my apples so I just tied that around the stem and cut each end on an angle to resemble stylized leaves (without trying to make them really look like leaves). For my pears, I tied bows with cute green and brown pear ribbon that I happened to have. I thought they turned out cute. For one pumpkin, I used twine instead of curling ribbon to give it a more authentic look. I am not sure if I love it, but it is one option and something different. (Note: My first pumpkin would not stand up straight so I tried trimming the bottom of the pages to make them flatter. When that did not do the trick, I added some cardboard to the bottom, which stabilized it.)


{My First Finished Apple}


{Finished Pumpkin with Wider Curling Ribbon}

{Finished Pumpkin with Twine}

{My Finished Fall Display!}


Sunday, October 21, 2012

A Super Simple Pumpkin Craft!

{The "Finished" Results}
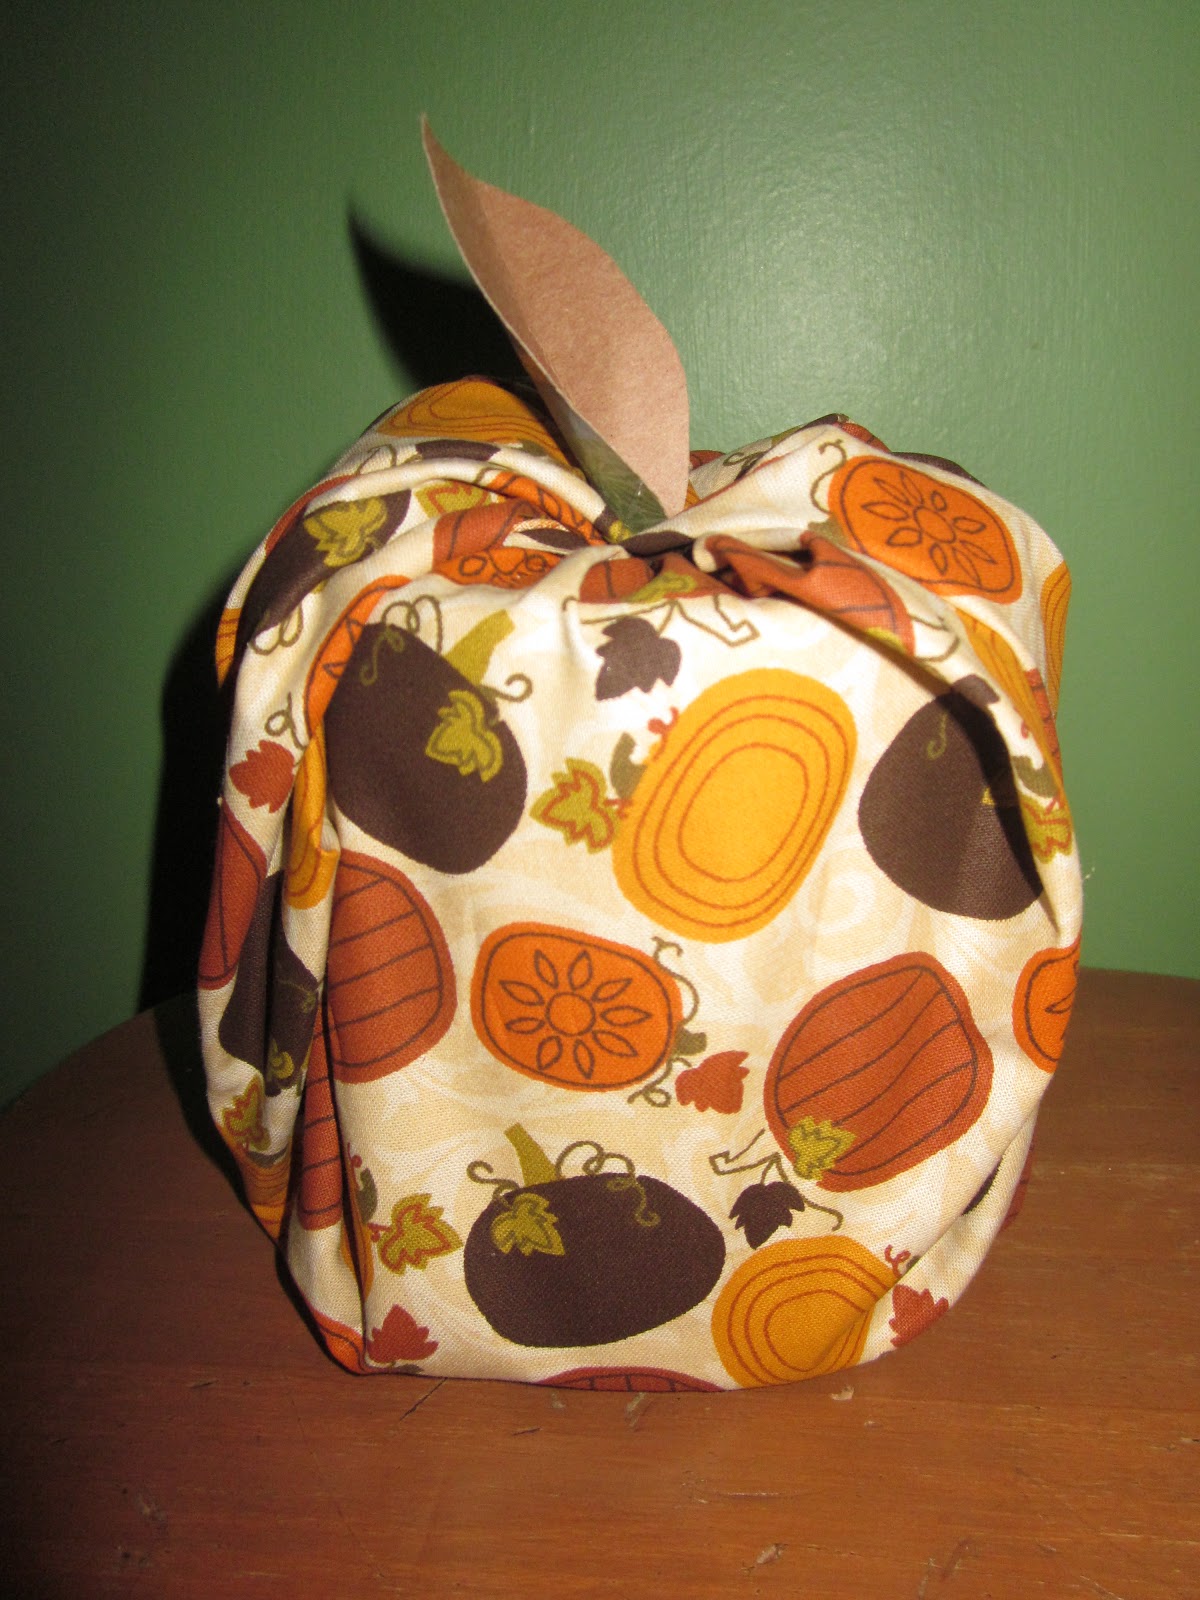
 One thing I love about my new MOPS group is that I always get to do a craft project at the end. (Bonus: I don't even have to come up with it or find the materials to create.) At the last meeting we made this really, really easy pumpkin out of a roll of toilet paper and a piece of fabric. (Yes, you read that correctly. It's a roll of actual toilet paper, not just the cardboard tube. That's a new one, right?) There was batting available for making a fuller pumpkin, but I decided to go with the basic pumpkin. This is so simple even a crafting novice can do it. Put your roll of TP down on your fabric and then bring up all the edges and stuff them into the center of the tube at the top. There were paper leaf shapes available, and we stuck them into the top and called it done. (See photo below.) After a few days of looking at this and thinking it didn't look quite "finished," I decided to add a stick from the yard to make a stem for my pumpkin. I hot glued the paper leaf to it because it kept falling out of my pumpkin. Lastly, I tied a bow with some twine. Raffia would have worked for the country cute look, too, but I had twine so that is what I used. I am happy with how it turned out. This is sitting up high on top of a green glass candle holder atop my kitchen cabinets with my other fall display items (cornucopia, pumpkins, apples, gourds, leaves) and looking just right for fall, however, I know where to look if we are ever running low on toilet paper...

{Before adding the stick and twine... It's just missing a little "something."}

Thursday, October 18, 2012

Halloween Craft Reboot

If you have been reading for awhile, you may remember our milk jug ghosts from a couple of years back, when it ended up being a project for me, and not really for kids. Well, I decided to try again this year now that Mia is a bit older and the thought of handing her a permanent marker wasn't quite so scary. 

This project was an ideal way for me to practice letting go, because my five-year-old's ghost jugs don't look the way I would have made them. I would have made sure the eyes and mouths were larger, and I definitely would not have thought to include teeth the way she did. I sat back and let her do her thing and I even tried really, really hard not to cringe when she dropped that Sharpie. (Note: I do recommend old clothes if you are feeling brave enough to let your kids try this.) The results are great, even if they aren't what I would have created. 

Mia was very proud of being able to do it herself. (My contributions were to wash the jugs, cut out the openings in the backs, and put the string of Christmas lights into the openings.) One little change we made this year was to use half-gallon jugs as well as gallon jugs (from milk and cider), mostly because this is what was available and not already crushed and placed in the recycling bin. I think having the different sizes of ghosts makes for a nice display.

{Ghost Jugs by Mia, Age 5}
{A Proud and Happy Girl!}


No Tricks, Just a Healthier Halloween Treat

Finding a healthy Halloween treat for Mia's class party turned out to be a tricky proposition. I thought if I just turned to the trusty Internet, I would find TONS of great ideas. Not so, but I did eventually come across this idea for mandarin orange cups made to look like jack-o'-lanterns, which I decided I needed to borrow. It really was the only remotely healthy snack idea I could find. Normally, we don't buy a lot of canned fruits because it is tricky to find them in juice or water instead of syrup, but I decided this was still better than cookies, candies, cupcakes, and so on. I am sure the kids are going to get plenty of those treats on Halloween. Before shopping, I saved all the coupons I could find and then ended up purchasing the Kroger store brand with my catalina coupon since it was the best deal. The best part about this craft is that it's very simple because all you need are mandarin orange cups and a black Sharpie marker. If you can draw a basic jack-o'-lantern face, you can do this project. If you are feeling creative, you can even make different faces for all the mandarin orange cups. If I weren't worried about costs, or if I knew we would have very few trick-or-treaters, I would even consider making these to pass out for Halloween treats. For now, though, I hope Mia's kindergarten friends enjoy their healthier classroom treat.

{I am excited for my healthy and cute classroom treat!}


Thursday, November 24, 2011

Turkey Collage with Dried Beans


While searching for Thanksgiving crafts that we hadn't done yet, I came across this cute variation on a hand print turkey and decided it was perfect entertainment for my little turkeys.


Materials:
  • paper plate
  • marker
  • dried beans or pasta
  • white glue (optional)
Directions:
  1. Trace your child's hand onto a paper plate. If desired, add a beak, wattle, and legs to the turkey. Older kids can do this step themselves.
  2. Give your child some dried beans or pasta. We used kidney beans, navy beans, black beans, pinto beans, split peas, and spiral pasta. Popcorn kernels are another option. I put each kind of bean into its own bowl, but you could mix them all together if you prefer. 
  3. Kids can either decorate their turkey and glue down their design to make it permanent, or they can arrange and re-arrange the turkey as many times as they want, skipping the glue.

Turkey Snack Plate

{Mia, age 4, was in a bit of a hurry when she made this.}
Here is a quick, simple idea for keeping the kids occupied while making your Thanksgiving meal. Trace your child's hand onto a paper plate, and add a beak, wattle, and legs if desired. Then give him or her some snacks to arrange into a turkey shape before "gobbling" them up. We used Rice Chex, Honey Nut Cheerios, peanuts, and pretzels, and candy corn, but you could also try dried fruit (raisins, Craisins, etc.), other nuts, seeds, chocolate chips, M & M's, popcorn, or whatever else you have in your pantry. Happy Turkey Day!

Monday, November 21, 2011

Fall "Stained Glass" Crafts with Melted Crayons

{Acorn by Mia, Age 4}
Once again I was looking for a way to use up our collection of broken crayon bits, which I have been saving for a few months since we made scribble cookies. After seeing this acorn craft, I decided we would melt them and make some stained glass-like crafts. That said, I encountered a number of problems while doing this, so I have lots of advice to offer if you want to make crafts by melting crayons (and not have it be a complete catastrophe).
  • First, you may want to peel the wrappers off of your crayon bits as you collect them in your container. (I have been using a plastic bowl, but a jug or jar would work well.) The reason I say this is that I spent a long time doing this all at once and I ended up with wax shoved underneath three of my fingernails, which is pretty painful.
  • After that, I spent another long while making wax shavings with a pencil sharpener, since Mia got frustrated quickly while trying to help. While this was necessary for making the craft, I ended up with blisters, which I wasn't thrilled about. If you do this, I would plan in advance and make some shavings each day for a week so that you don't have the issue with blistering
  • I sorted all of our shavings by color families (blues, reds, greens, etc.) into individual bowls. This was probably too perfectionistic since the kids mixed the colors all together in their projects, anyway. Don't be too concerned about being perfectly organized, unless, of course, you are so compelled.
  • I am pretty sure I ruined our ironing board and possibly, the iron. (Oh darn, how will I iron now? I obviously use it so frequently, right?) I thought I had taken proper precautions to protect them, however, it wasn't enough. I still ended up with melted crayon everywhere! If you are still reading and you are feeling brave enough to try this project, make sure you don't care about your iron or ironing board. If, however, you would like to save your iron and ironing board, note that one sheet of construction paper and one dish towel aren't going to cut it. Cover your board with plenty of paper or maybe old tee-shirts or towels that you don't care about ruining. Or buy yourself a used iron/ironing board at a garage sale, and keep it on hand for craft projects.
Materials:
{Turkey Eating Acorn by Mia, Age 4}
  • wax paper
  • old, broken crayons
  • pencil sharpener
  • container to hold wax shavings
  • pencil
  • scissors
  • warm iron
  • black construction paper (optional for making "windows")
  • tape 
  • clear contact paper  
  • paper trimmer (optional)
  • templates (optional)
    Large Acorn
    Small Acorn
    Turkey
    Large Maple Leaf
    {Acorn by Logan, Age 2}
    Small Leaves
Directions:
  1. Use a pencil sharpener to make crayon shavings.
  2. Tear off two sheets of wax paper, approximately the same size, making sure they are large enough for your design.
  3. Use a pencil to draw or trace your design on the non-waxy side of one piece of wax paper. When using a template, you will lay your wax paper over top and outline the shape onto your wax paper. 
  4. Have your child sprinkle crayon shavings inside the design area. Don't worry about being perfect; it will change as the wax melts, anyway. Remind them to use a small amount. Big clumps of wax don't work as well as a thin layer.
  5. Lay the second sheet of wax paper on top and carefully transfer both sheets to your ironing board. (Make sure you have protected the surface before doing this.)
  6. Cover the wax paper with a large, old towel. Then, gently press down the iron. I checked on the progress about every 10 seconds until I thought they were melted enough. (There is no exact science to this, though, so watch closely. The wax will melt quickly. Only adults should use the iron.)
  7. Set the wax paper/crayon "sandwich" aside to cool.
  8. If you want your project to look like a stained glass window, draw/trace your design onto a piece of black construction paper and cut out the shape. Tape your now cool melted wax creation to the back side, trimming as needed.
  9. Using scissors or a paper trimmer (my preferred method), cut two pieces of clear contact paper slightly larger than your wax paper shape or black paper (if making a stained glass "window").
  10. Slowly peel the backing off of one piece of contact paper. Place the wax paper shape or black paper onto it. Peel the backing off of the second piece of contact paper and place it over top so the sticky sides meet. Trim away excess as needed, leaving 1/4" all the way around.
  11. Use tape to display the stained glass craft in a window.
  12. {Maple Leaf by Mia, Age 4}
     
    {Oak Leaf by Logan, Age 2}


      Tuesday, November 8, 2011

      "Season's Eatings!" Turkey Card

      Here is something you can do with all those outdated spices in your pantry. I found this idea for a spice-covered hand print turkey, and decided to expand it into a Thanksgiving greeting card. Please note that this is not an edible craft, although your kitchen will smell quite lovely when you are done.

      {Spice Hand Print Turkey by Mia, Age 4}

      {Another Spice Turkey by Mia, Age 4}

      Materials:
      • white construction paper
      • pencil
      • newspaper (optional)
      • white glue
      • paint brush
      • tray/plate to hold glue
      • spices
      • orange or yellow crayon
      • black marker
      • egg carton* (optional)
      Directions:
      1. Fold a piece of paper in half.
      2. Trace your child's hand onto one side of the paper.
      3. Draw a beak and wattle onto the thumb for the turkey's head.
      4. If desired, cover work surface with newspaper to make clean-up easier. Pour a small amount of white glue onto a tray or plate and have your child "paint" it onto the entire turkey using a small paintbrush.
      5. Let your child decorate the turkey with various spices. We used black peppercorns for eyes. Other spices included cinnamon, cloves, allspice, ginger, apple pie spice, parsley, oregano, thyme, basil, rosemary, and mustard. (I know that last one isn't really related to Thanksgiving, but I thought it would provide another color.) *Tip: I found that putting small amounts of each spice into a different section of an egg carton minimized the mess.
      6. Gently shake off excess spices, and allow glue to dry.
      7. Have your child add legs and feet to the turkey using an orange or yellow crayon. (Colored pencil or marker would work as well.)
      8. Personalize your card and send "Season's Eatings!" to a loved one.

      Wednesday, November 2, 2011

      A-Corny Print Making Project

      {Bubble Wrap Print Acorn by Mia, Age 4}
      This week at preschool, Mia's class is studying squirrels and nuts, which inspired me to come up with this acorn print making craft using some leftover bubble wrap.

      {Work in Progress}
      Materials:
      • brown construction paper
      • tan construction paper
      • scissors
      • bubble wrap
      • brown paint*
      • paintbrush (we love the foam kind)
      • newspaper (to protect work surface)
      • tray/plate (to hold paint)
      • glue stick
      Directions:
      1. Fold a piece of brown construction paper in half and cut an acorn shape. (This is a bit like cutting a heart except that you don't bring your scissors to the center of the paper at the top.) Cut out acorn shape.
      2. Cut an acorn cap shape from bubble wrap. (This is like a half circle with a stem on top.)
      3. Protect work surface with newspaper. Have your child paint the textured side of the bubble wrap with brown paint. Press the painted side down onto a piece of tan construction paper and allow the paint to dry.
      4. Once paint is dry, cut out the print. (Older kids can do this themselves.) Have your child glue the printed acorn cap onto the nut shape. After glue is dry, display your acorn printmaking craft project.
      Tip*: We actually ran out of brown paint, so we made our own. You do this by mixing together orange and blue paints.

      Friday, October 28, 2011

      Jar-o'-Lanterns

      I love these cute glass jack-o'-lanterns from Disney FamilyFun Magazine so much that I wish I had thought of them myself. Here's why: 1) They are quick and easy to make. 2) It's a nice way to re-purpose something that might otherwise get thrown away. 3) If you like to do crafts, you probably have the materials on hand already (glass jars, masking tape, scissors, paintbrush, orange acrylic paint-- or blend your own with yellow and red if you don't have orange). 4) The end result is super cute. (Obviously, this is the most important thing in a craft project.) You and your kids can whip up several of these in time for Halloween.

      We attempted fancier faces than the directions suggested, and I think they came out fine. You, of course, can stick with simple triangles if you prefer. Mia told me what she wanted and I did my best to cut the shapes out of masking tape. I think having a variety of sizes and types of jars makes a nice little display, just like real pumpkins (although we haven't even carved ours yet). Not having any of those flameless tea lights available, I used regular tea lights. While the fake kind would probably be safer since they aren't a fire hazard and they wouldn't make the jars get hot, the way I see it, these are glass jars, and I don't plan to keep them where kids can get at them anyway. (This is really my only complaint with this craft; it's intended for small children, and realistically, glass isn't an ideal material for little ones to work with. That said, I know Mia well enough to know she could handle it at age 4 1/2 so I wasn't concerned.) So, for the photo, I took them out to the porch and then put them back on the counter where they have been since Mia made them a few days ago.

      Friday, October 21, 2011

      Paper Owl Craft

      The inspiration for this craft came to me in a somewhat odd fashion. My husband removed the plastic rings holding together a twin-pack of jelly jars (from Sam's Club) and I looked at it and said, "That would make perfect owl eyes!" Of course, he gave me a look that said, "You're nuts. Only you would look at plastic packaging and proclaim it to be perfect owl eyes," but any creative types reading this can totally relate (unless it's just me and I really am nuts). Either way, these owls are a "hoot" for fall, if I do say so myself.
      {Owl by Mia, Age 4}
      {Owl by Logan, Age 2}

      Materials:
      • construction paper 
      • pencil 
      • scissors 
      • cardboard (optional) 
      • Bingo markers 
      • feathers 
      • glue 
      • wiggly eyes 
      • plastic rings from packaging (optional) 
      • other materials: pom poms, craft foam, buttons, pipe cleaners, yarn, sequins, etc. (optional)

      Directions:
      1. Draw or trace an owl onto a piece of construction paper. My kids chose purple. Any color would work. Tip: If you plan to make several owls, consider using templates. I made owl templates by drawing outlines onto paperboard (cereal box sides) from the recycling bin. Here is a template you could use, if desired. Then, just trace the owl onto construction paper.
      2. Cut out owl shape/s.
      3. Decorate the owls. We used Bingo markers for chest feathers and Mia glued on colored feathers for the wings and above the eyes. Both kids glued on wiggly eyes. (Logan's is more abstract.) I helped Mia cut small circles of construction paper to go behind her wiggly eyes, which are framed by those plastic rings that started this whole project idea. The owls don't have beaks because their attention waned by that time, but simple paper diamonds would work. You could also try pom poms, pipe cleaners, craft foam, buttons, yarn, or sequins for decorations.
      4. Allow all glue to dry before displaying your owl craft.

      Coffee Filter Leaves

      Here is a cute, simple craft that Mia learned at preschool. You can make several of these leaves to decorate your windows for fall. Or perhaps you could try making them into a mobile. Either way, this project is great for little hands and doesn't require very much adult preparation.

      {Leaves by Mia, Age 4}
      Materials:
      • real leaves
      • coffee filters
      • pencil/pen
      • scissors
      • Bingo markers
      • newspaper/paper towel
      • spray bottle with water

      Directions:
      1. Trace your leaf onto a coffee filter and cut out the leaf shape.
      2. Lay the coffee filter leaf onto a few layers of newspaper or paper towel.
      3. Spray the leaf with water.
      4. Dot the leaf with Bingo markers.
      5. Spray with water a second time to get the colors to blend somewhat. (Don't spray too much water or you will wash away most of the colors.)
      6. {Leaves by Logan, Age 2}
      7. Lay wet leaf shape on paper towel to dry.
      Other Options:
      • If you can't find actual leaves, draw some freehand or use a template like this or this.
      • If you don't have Bingo markers, try using washable markers or watercolor paints. If you use watercolors, you won't need a spray bottle.
      • If you don't have coffee filters, you can also use paper towels or watercolor paper.