Showing posts with label milk jug crafts. Show all posts

Thursday, October 18, 2012

Halloween Craft Reboot

If you have been reading for awhile, you may remember our milk jug ghosts from a couple of years back, when it ended up being a project for me, and not really for kids. Well, I decided to try again this year now that Mia is a bit older and the thought of handing her a permanent marker wasn't quite so scary. 

This project was an ideal way for me to practice letting go, because my five-year-old's ghost jugs don't look the way I would have made them. I would have made sure the eyes and mouths were larger, and I definitely would not have thought to include teeth the way she did. I sat back and let her do her thing and I even tried really, really hard not to cringe when she dropped that Sharpie. (Note: I do recommend old clothes if you are feeling brave enough to let your kids try this.) The results are great, even if they aren't what I would have created. 

Mia was very proud of being able to do it herself. (My contributions were to wash the jugs, cut out the openings in the backs, and put the string of Christmas lights into the openings.) One little change we made this year was to use half-gallon jugs as well as gallon jugs (from milk and cider), mostly because this is what was available and not already crushed and placed in the recycling bin. I think having the different sizes of ghosts makes for a nice display.

{Ghost Jugs by Mia, Age 5}
{A Proud and Happy Girl!}


Wednesday, September 28, 2011

Recycled School Bus Craft

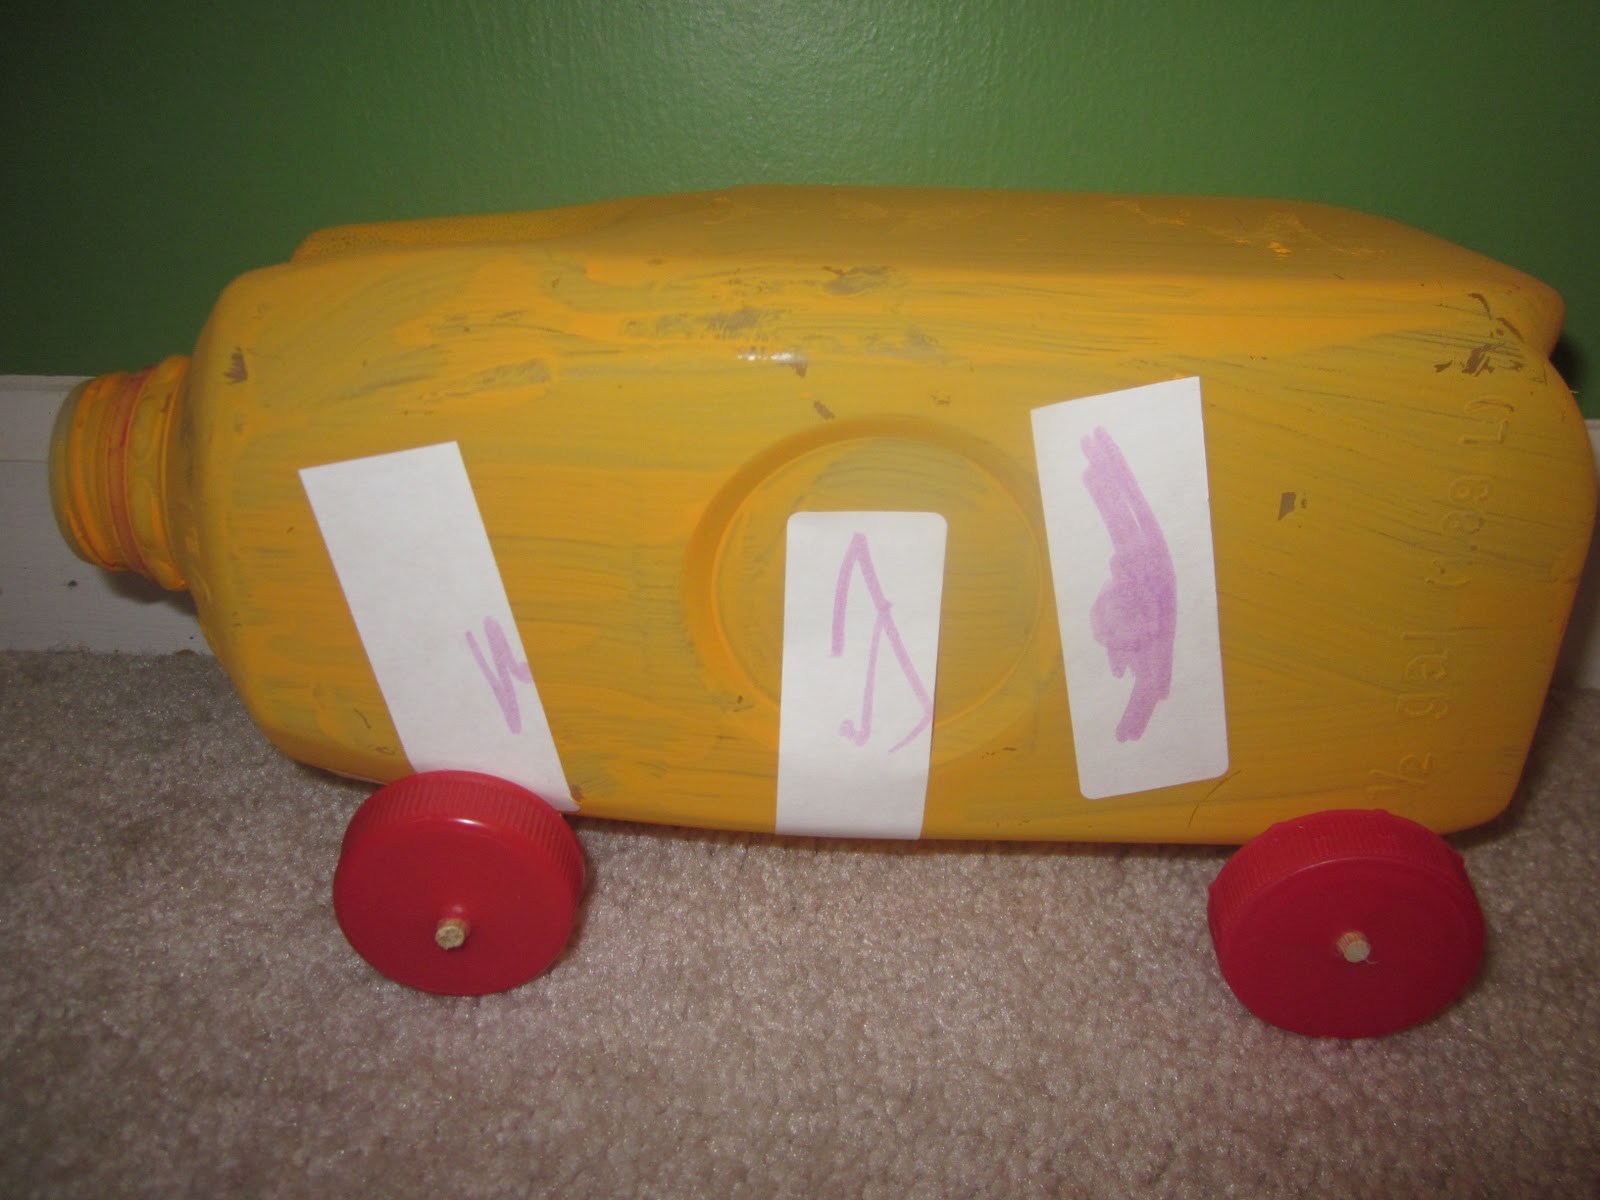
{Milk Jug School Bus by Mia, Age 4}
I am a bit behind in posting this project idea. We actually did it earlier this month shortly after school had started. Anyway, it is still good to share. The best feature is the real working wheels (which is an idea I found here)! My only disclaimer is that your kids will sing many rounds of "The Wheels on the Bus" while making this craft. I thought it was fun that Mia spontaneously burst into song, but if that's a deal-breaker for you, feel free to stop reading. One other important thing to note is that this craft requires a lot of adult preparation. The kids really just decorated their bus projects.
{OJ Carton Bus by Logan, Age 2}
Materials:
  • newspaper (to protect work surface)
  • 1/2 gallon milk jug (or OJ carton)
  • yellow paint (or yellow paper)
  • paint brush
  • wooden skewers
  • four-five plastic bottle caps
  • two plastic drinking straws
  • scissors
  • tape
  • glue (optional)
  • white labels/stickers (or construction paper)
  • push pin (optional)
Directions:
  1. Lay down newspaper to protect your work surface. Then paint your milk jug yellow. (Note: We also tried painting our OJ carton, and I don't recommend this. It didn't cover the writing very well, even with a second coat. If using an OJ carton, I would advise covering it with yellow construction paper.) Allow paint to dry.
  2. While paint dries, make your axles. First, poke a hole in the center of each lid. I started my hole with a push pin and then widened it with the pointed end of the skewer. (The writer of the original tutorial says to use a box cutter, but I thought why not try something safer and see if it works? It did.) Next, cut your straws so they are slightly wider than your jug or carton. Stick the skewer into one lid (I made the pointed part point inward), slide the straw on top, trim your skewer with scissors (I was cutting off the sharp end), and then push the skewer into your second bottle cap. (The writer of the original tutorial suggests that you can add a small amount of glue to hold the caps on. I didn't do this, but in retrospect, I think it would have helped.) Repeat these steps to make a second set of wheels. If using glue, make sure it dries completely.
  3. Tape both sets of wheels to the bottom of your jug or carton.
  4. Decorate you bus as desired. Mia and Logan added blank white labels for windows. Some of them I had trimmed down. Mia decorated with markers. Ours aren't very fancy, but you could get really complex with windshield wipers, door, stop sign, writing on the sides, people in the windows, a driver, etc.
  5. Enjoy playing with your bus with real working wheels! (And then, if you're like me, quickly stick them on top of your 'fridge and forget about them because your 2 year old played so roughly that the wheels kept popping off and your were worried he would poke himself in the eye... But really, enjoy! The milk jug handle makes a nice way to push the bus around.)


Friday, August 5, 2011

A Berry Good Time

I took the kids blueberry picking for the first time on Wednesday. It was cloudy and drizzling a tiny bit and just over 70 degrees outside. Believe it or not, this was nearly ideal picking conditions as far as I am concerned. It wasn't too hot, it wasn't buggy, we didn't have to worry about getting too much sun, and there weren't too many other people picking (although there were more than I expected).

I have decided that if you are going to pick fresh fruit with young children, blueberries are the perfect choice. The bushes are just the right height for everyone to reach. There were berries low enough for Logan and high enough that I didn't need to stoop down. You don't have to lift children up to pick the way you would if you were apple or cherry picking. You don't have to worry about them trampling the plants as with strawberries and there are no prickers as with raspberries. Ripe blueberries easily cup off in your cupped hands and unripe berries are much tougher to pick, so it's hard to goof up. Oh, and the bushes are tall enough that you don't have to worry about kids sneaking away between the rows of plants.

After returning home, Mia and her cousin Eric helped me make Any-Berry Jelly using a recipe I found on page 82 of the August 2011 issue of "Disney FamilyFun" magazine. I couldn't find a link for this online, so I will share the easy-to-make recipe.

Any-Berry Jelly

Takes 15 minutes plus cooling time. Makes 3-4 cups.
Ingredients:
  • 4 cups hulled and crushed raspberries, blueberries, blackberries, or strawberries (use a potato masher), or a mixture of any of these
  • 1 1/2 cups sugar
  • 1 pouch powdered or liquid pectin (any kind should work fine for this -- just ignore the directions that come with it)
  1. Put the berries in a large, heavy pot. In a bowl, mix the sugar and powdered pectin, then stir thoroughly into the berries. If you're using liquid pectin (we did), add it and the sugar directly to the pot of berries.
  2. Bring the berry mixture to a boil over medium-high heat, stirring constantly.
  3. Let the berries cook at a full, rolling boil for 1 minute, then ladle the jelly into very clean jars. Leave an inch of headroom for the jelly's expansion in the freezer, cap, cool to room temperature, then store in the refrigerator for immediate use or freeze it for later.
To Die for Blueberry Muffins:

I haven't made any muffins yet with this batch of blueberries, although I know I will. We ended up with 3 1/2 pounds, and I have the most delicious recipe for blueberry muffins with a cinnamon streusel topping! You will definitely want to bookmark this one. You will come back to it again and again.

Before heading out to pick some berries, make yourself this "hands-free" berry holder. Okay, it really is hands-free if you remember to take your belt, which I obviously did not. The directions come from the same issue of "FamilyFun Magazine." Cut the top third off of a clean gallon milk jug, avoiding the handle. I used permanent markers to draw strawberries and blueberries on our berry bucket. Now, find your nearest berry patch and get picking.

Sunday, October 17, 2010

Ghostly Greeters Craft

Here is a super simple craft (not recommended for younger children, however) that you can do with very few supplies. Soon you'll have a row of ghosts to greet your trick-or-treaters! I got this idea from: http://familyfun.go.com/crafts/spirit-jugs-673388/
Materials Needed:
  • plastic milk jugs
  • black permanent marker
  • scissors (or craft knife)
  • string of low wattage holiday lights
Directions:
  1. Using a black permanent marker, draw faces on plastic milk jugs. Keeping the cap on makes it easier to do this without denting the jug. (All of our jugs have inset circles on the front, so I tried to work with these to make the mouths.)
  2. Cut a hole in the back side of the jug (about 1 1/2 -2 inches in diameter). I used scissors to do this, but you could also use a craft knife. Again, keeping the cap on the jug makes it easier to do this.
  3. Set finished jugs near each other and string them together by pushing several bulbs into each milk jug. (I used purple and clear Christmas lights, but you could use any color. I have even seen strings of lights with Halloween shapes such as candy corn, which may be cute.