Showing posts with label September crafts. Show all posts

Wednesday, September 28, 2011

Recycled School Bus Craft

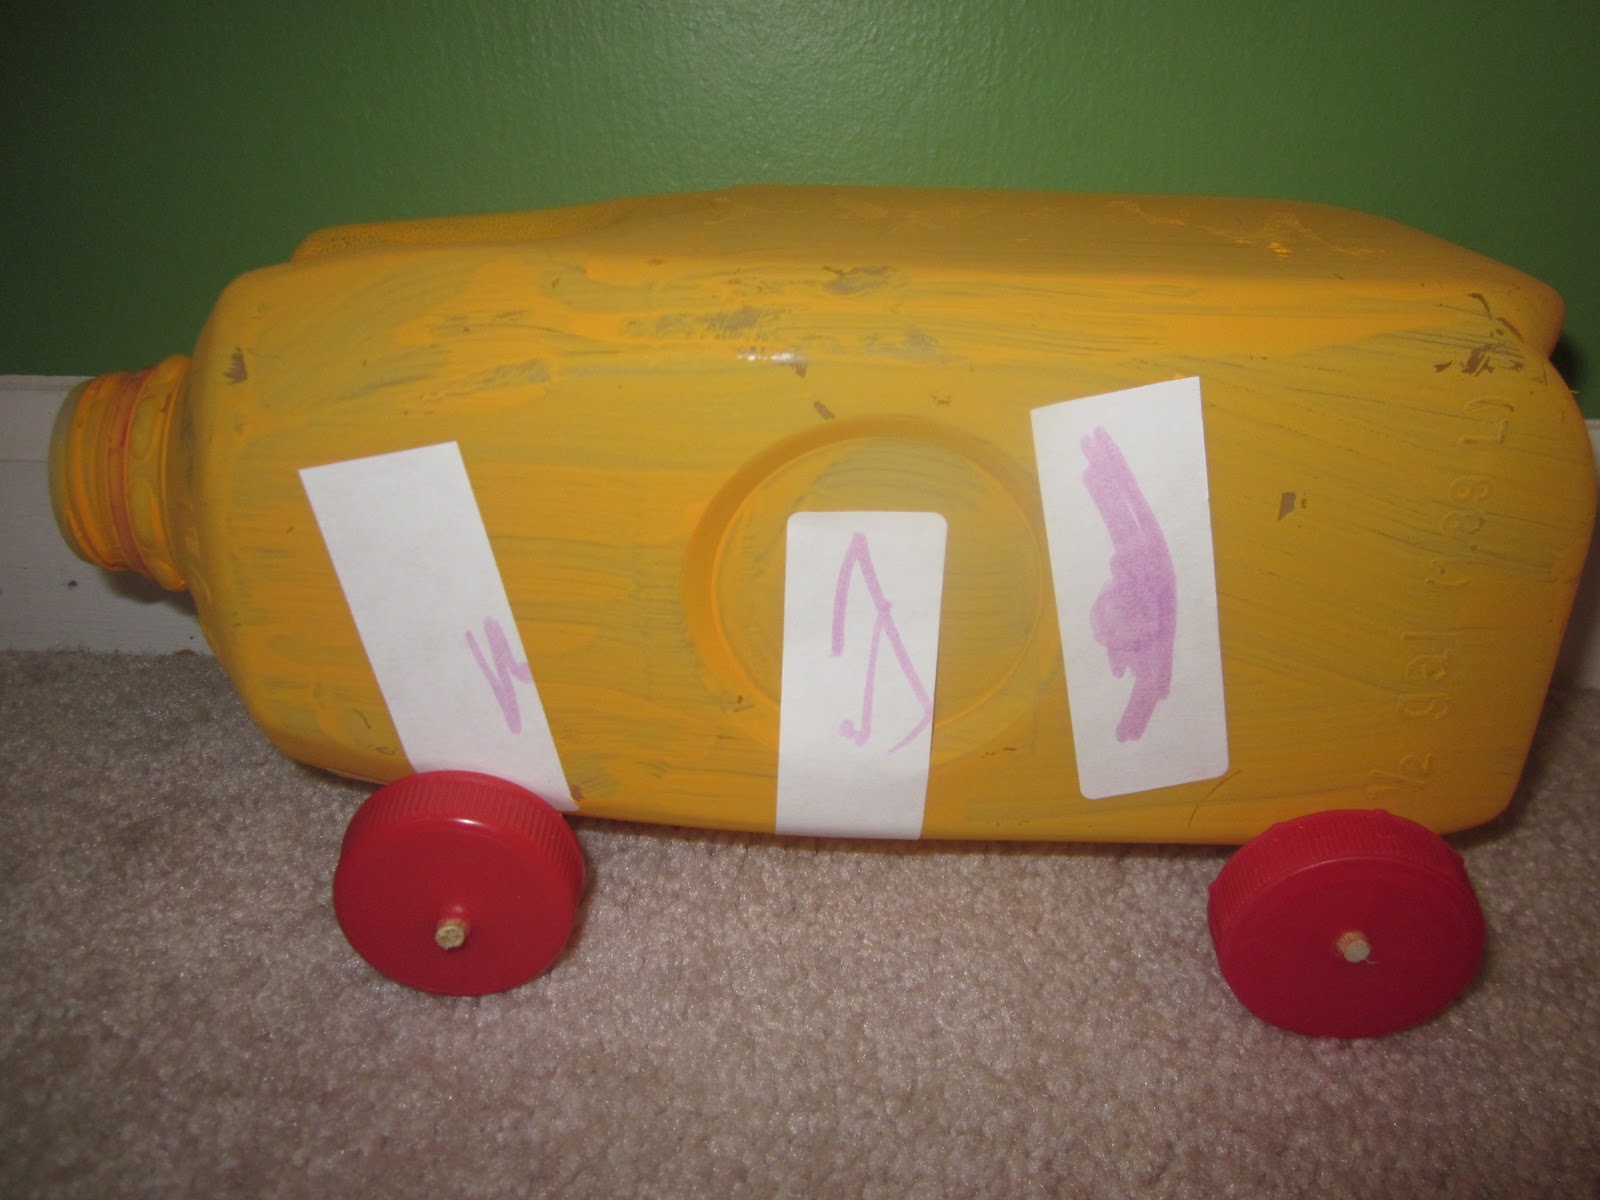
{Milk Jug School Bus by Mia, Age 4}
I am a bit behind in posting this project idea. We actually did it earlier this month shortly after school had started. Anyway, it is still good to share. The best feature is the real working wheels (which is an idea I found here)! My only disclaimer is that your kids will sing many rounds of "The Wheels on the Bus" while making this craft. I thought it was fun that Mia spontaneously burst into song, but if that's a deal-breaker for you, feel free to stop reading. One other important thing to note is that this craft requires a lot of adult preparation. The kids really just decorated their bus projects.
{OJ Carton Bus by Logan, Age 2}
Materials:
  • newspaper (to protect work surface)
  • 1/2 gallon milk jug (or OJ carton)
  • yellow paint (or yellow paper)
  • paint brush
  • wooden skewers
  • four-five plastic bottle caps
  • two plastic drinking straws
  • scissors
  • tape
  • glue (optional)
  • white labels/stickers (or construction paper)
  • push pin (optional)
Directions:
  1. Lay down newspaper to protect your work surface. Then paint your milk jug yellow. (Note: We also tried painting our OJ carton, and I don't recommend this. It didn't cover the writing very well, even with a second coat. If using an OJ carton, I would advise covering it with yellow construction paper.) Allow paint to dry.
  2. While paint dries, make your axles. First, poke a hole in the center of each lid. I started my hole with a push pin and then widened it with the pointed end of the skewer. (The writer of the original tutorial says to use a box cutter, but I thought why not try something safer and see if it works? It did.) Next, cut your straws so they are slightly wider than your jug or carton. Stick the skewer into one lid (I made the pointed part point inward), slide the straw on top, trim your skewer with scissors (I was cutting off the sharp end), and then push the skewer into your second bottle cap. (The writer of the original tutorial suggests that you can add a small amount of glue to hold the caps on. I didn't do this, but in retrospect, I think it would have helped.) Repeat these steps to make a second set of wheels. If using glue, make sure it dries completely.
  3. Tape both sets of wheels to the bottom of your jug or carton.
  4. Decorate you bus as desired. Mia and Logan added blank white labels for windows. Some of them I had trimmed down. Mia decorated with markers. Ours aren't very fancy, but you could get really complex with windshield wipers, door, stop sign, writing on the sides, people in the windows, a driver, etc.
  5. Enjoy playing with your bus with real working wheels! (And then, if you're like me, quickly stick them on top of your 'fridge and forget about them because your 2 year old played so roughly that the wheels kept popping off and your were worried he would poke himself in the eye... But really, enjoy! The milk jug handle makes a nice way to push the bus around.)

Friday, September 23, 2011

A Hand Print Tree for Fall


{Fall Hand Print Tree by Mia, Age 4}
Materials:
  • paper
  • brown crayon
  • Bingo markers
  • green crayon
  • newspaper 

Directions:
  1. Trace around your child's hand and forearm using a brown crayon.
  2. Color in tree trunk and limbs with brown crayon. Mia also drew some extra branches.
  3. Protect your work surface by placing newspaper under your paper. Add leaves using Bingo markers in fall colors. Mia chose to use green, red, orange, and purple, all of which we bought at Dollar Tree. (Okay, when I came up with this craft idea I envisioned a fuller tree, but Mia decided that most of the leaves were falling, so that is why they are all down the sides of the tree.)
  4. As a finishing touch, draw some grass at the bottom of the paper with a green crayon. Add fallen leaves to the grass, if desired.

Autumn Tree Collage

{Autumn Tree Collage by Mia, Age 4}
Materials:
  • tissue paper in fall colors 
  • paper (or printable tree template)
  • brown crayon
  • scissors
  • glue
  • foam paintbrush (optional)
  • green crayon (optional)
Directions:
  1. Draw a tree using a brown crayon. We traced Mia's hand and forearm for this but you could also use a printable template if you prefer.
  2. Cut or tear small pieces of brown, red, yellow, and green tissue paper. (We had no orange, but this would also be nice for the leaves.)
  3. Cover the tree trunk and area where you will put leaves with glue. (We watered ours down very slightly and applied it with a foam paintbrush.)
  4. Adhere brown tissue paper to the trunk of the tree and various other fall colored tissue paper where you would like the leaves to be. You could also add some tissue paper to look like falling or fallen leaves if you wish.
  5. Mia chose to draw grass with a green crayon to finish her collage. You could also make grass with pieces of green tissue paper or cut a long rectangle and use scissors to fringe it before gluing it to your paper. 

Dotty Apple Tree Craft

Yesterday the kids received a gift wrapped in bright green tissue paper, and I was inspired to do another take on last year's apple tree craft.
{Apple Tree by Mia, Age 4}

Materials:
  • paper (or printable tree template) 
  • red Bingo marker (crayon/marker/paint would also work) 
  • green tissue paper/crepe paper (or construction paper) 
  • brown crayon (or colored pencil or marker) 
  • scissors 
  • glue 
  • green crayon (optional) 
  • foam paintbrush (optional)  


Directions:
  1. Draw a tree or use a printable template if you prefer. Mia wanted me to trace her hand and forearm with brown crayon to make the tree trunk and branches. 
  2. Color in tree trunk and branches using a brown crayon.
  3. Cut or tear small pieces of green tissue paper, crepe paper, or construction paper.
  4. Glue green paper pieces onto the paper to make the tree's leaves. (We used a foam paintbrush and very slightly watered down Elmer's glue.)
  5. After glue is dry, use a red Bingo marker (Ours is from Dollar Tree.) to make apples on the tree.
  6. Mia finished her project by making grass with green crayon. You could also use your green paper pieces or cut fringe along one long rectangle of paper and glue down.