Thursday, May 16, 2013

The Perfect Play Dough?

We are gearing up for yet another birthday party for one of Mia's little friends, so that meant making a fresh batch of play dough. It really makes an awesome, inexpensive gift, in my opinion. (All I know is that nobody has complained yet, but that would bad form, of course.) I really do believe that homemade stuff is perfect for children's birthday gifts and not just because I am cheap resourceful! This will keep her interest for several weeks of creative play. Plus, what mom wouldn't be happy for her child to receive homemade gifts in place of yet another Barbie doll?

When I asked Mia what kind of play dough she wanted to make, she couldn't decide between Kool-Aid play dough and glitter play dough, so we decided to combine the two. This was actually something that I had wanted to try for awhile, but hadn't had the opportunity. Our most recent batch of play dough is holding strong, you see, and we made it two months ago. To make our "perfect play dough" or  "sensory overload play dough," as I am calling it in my mind, we used the Kool-Aid play dough recipe and then added in the glitter at the end. I LOVE any homemade play dough, but this one smells delicious, has vibrant color, and it has a little something extra in the form of sparkle, so who could ask for more? It's quite possibly the perfect play dough!

To make the gift of play dough complete, I like to include inexpensive plastic cookie cutters. (After Easter, I stock piled a bunch of these that I picked up on clearance at Target. Thirty cents for a 4-pack was a steal!) Also, here is where I posted directions for how I make my recipe "label" to attach to the jar, in case you are wondering. Mia's friend, the birthday girl, will also be receiving a few other homemade goodies to round out her gift bag including: a wave bottle, a seek 'n' find bottle, some dyed pasta beads for making bracelets and necklaces (materials for that included), some bunny shaped scribble cookies plus a construction paper pad, and a batch of homemade bubble solution complete with two wands made from pipe cleaners. (This bubble recipe is a new one I have tried this year and have not blogged about since I want to try a couple more recipes before doing a post. If you are looking for a recipe now, feel free to check out the 3 I tried last year.)


Ingredients:

  • ½ Cup salt                           
  • 1 Cup flour                        
  • 2 tsp. cream of tartar        
  • 1 pkg. Kool-Aid*                  
  • 1 Tbs. cooking oil               
  • 1 Cup water               *I use generic drink mix packets.*
  • glitter
Directions:
  1. In a pan, mix dry ingredients. Add oil and water. Kids can help with this. (We used a Kroger Tropical Punch unsweetened drink mix packet for this particular batch.)
  2. Cook on medium heat until a ball forms, stirring as needed.
  3. Set aside to cool, and then knead the play dough. Kids can help with this. Tip: Wax paper or a cutting board or place mat will protect your work surface from stains.
  4. To add glitter, I find it is easiest to make a well in the play dough, pour in small amount of glitter, cover it over with the dough and then knead until it is distributed throughout the dough. Repeat as needed until you have as much glitter as desired. Tip: Glitter play dough is not all that messy. The glitter tends to stay in the play dough quite well and not end up everywhere, as you might expect it to. So, don't be afraid to add some sparkle to your play dough! If you are concerned about the mess, just have kids play with it on a vinyl place mat, some wax paper, a cutting board, or my new favorite multi-purpose craft item: the liner from a cereal box - It's free and stuff doesn't stick to it. You can even re-use these.
  5. Enjoy! Play dough will keep for several weeks in an airtight container. Tip: Cool Whip tubs, zippered baggies, and jars work well for this. My personal favorite are plastic peanut butter jars. Important Note about Homemade Play Dough: Although it is non-toxic, kids shouldn't eat it. It's very salty, so I'm not sure why they would want to, but it does happen. Tip: Personal experience has taught me to keep play dough away from pets as well. I can't tell you how many times our dog has eaten this and then gotten sick. It doesn't hurt her, of course, but it is a nuisance to have to clean up dog vomit while your kid is contentedly playing with his new batch of play dough.

Wednesday, May 15, 2013

A "Tweet" Mother's Day Gift

I love when I discover that I can do something new. Don't you? I'd had seen this kit for making birds nest earrings (so cute!) in the Oriental Trading Company catalog a handful of times and each time I thought I really like those. I wonder if I could make them? But, why would I buy a kit to make 6 pairs? Then, I decided they would be perfect for Mother's Day gifts, so I went for it!

I'm glad I decided to give it a go. These were not at all expensive and both my mom and mother-in-law were impressed by them, saying, "You made those!?" Yep. That's me. I can make earrings, apparently. (I'm smiling while I type this because I am so pleased.) Each pair only took between 20 and 30 minutes to make, I think, and it took less time as I went along because I got the hang of it. All I needed to make them was a wire bending tool-thingy, which I already owned for some reason. (In case you couldn't tell from my lack of proper terminology for the tool, this is my first attempt at jewelry making -- outside of the little "class" I took at our library in the fall -- where I made a couple of necklaces that are sort of falling apart.) I'm pretty sure I bought this tool some years back when I was making beaded wire flower pot decorations in the shapes of butterflies.

How will I use all 6 pairs of earrings? Well, I made one pair as a gift for myself. Remember, I mentioned that Mother's Day this year also happened to be my birthday? So, of course, I needed a little something special for myself. The remaining three pairs will be perfect for end-of-the-school-year teacher gifts for Mia's kindergarten teacher, para-pro, and her tap teacher. Yay for advanced planning and having that taken care of! (I'm mentally patting myself on the back, here.)


I think the card turned out cute, too. I used some pre-made beige card stock cards. Ordinarily, I just make my cards from scratch, because I am cheap resourceful, but I found these on clearance and put them aside for when I needed a quick card. (Since this month is sort of kicking my butt with exhaustive things that I trying my best to keep up with, I was thankful for that foresight!) Next, I found a pretty bird-themed clear stamp in my collection and used my scrapbooking markers to ink the bird in teal, the branch in brown, and the leaves in green. I gave it a quick "huff" to add some moisture back to the pigment in case it had started to dry out while I was finishing my coloring, and then stamped it in the lower right corner of the card. I used my ProvoCraft Silent Setter tool (I got this a few years ago at either Jo-Ann's or Michaels, using a coupon, of course!) to make two holes in the front, using the smallest size punch tip. First, opening the card and placing the cutting mat on the inside of the card prevented me from making the holes go all the way through when I only wanted them on the front of the card. Then, I slipped the earring through the holes and added a small piece of tape to the inside to secure them. I scrawled a quick note, and the card was finished, wishing both grandmothers a "tweet" Mother's Day. I have since made 3 more quick and easy cards for the teachers with "a note of thanks" stamped in brown below the bird in place of the words "Happy Mother's Day!"

Nature is full of elegant designs. I just love the color of the robin's egg blue paired with the twisted silver wire. It's very organic and simple. Plus, I love the symbolism of nesting, which I thought was perfect for some of our favorite nurturing women. I think this makes a nice tribute to the moms, grandmas, and teachers in our lives, who deserve to have a "tweet" day on Mother's Day. I hope that you, too, had a "tweet" and restful Mother's Day.

Saturday, May 11, 2013

4 Homemade Face Mask Recipes

Here's post #5 in my series "How I Pamper Myself." (In case you missed the previous posts, feel free to check out How I Wash My Makeup Brushes, Homemade Eye Makeup Remover, Homemade Face Moisturizing Oil, and 5 Homemade Facial Cleansers.) While face masks are pretty easy to whip up at home, they definitely feel indulgent to me. Unfortunately, I rarely think to do them more than a couple of times a month.

There are tons of DIY face mask recipes out there, but I have only tried a few. My requirements are that they not contain too many ingredients or too odd of ingredients (I am sure papayas are nice for this, but I would rather use a fruit I commonly have in my own kitchen rather than make a special purchase) and that they not be too time-consuming to create. I realize that's entirely a matter of opinion, though. I will pull out the food processor, but I would prefer to not have to do this, if that makes sense. Here are a few that I have tried that I feel are worth mentioning.

{Ingredients for DIY Face Masks}


My tried and true recipe that I have been using the longest is one I got from the book Vinegar Fridays. Every time I use this mask, I notice that my skin feels firmer and my complexion is glowing, so it definitely does good things.

Martha Washington's Vinegar Facial Mask
  • 1 egg
  • 1 tsp. honey
  • 1/2 tsp. apple cider vinegar
  1. Whisk the ingredients together in a small bowl.
  2. Then, apply to face. I often use a basting brush, but fingers work fine, too. 
  3. Leave on for 20 minutes. 
  4. Rinse with warm water.

Next, I decided to try this one since it calls for common ingredients, and honey is known to be wonderful for skin.

Apple Honey Mask
  • 1 apple, cored and quartered
  • 2 Tbs. honey
  1. Chop apple in food processor.
  2. Add honey.
  3. Refrigerate for 10 minutes.
  4. Pat onto face and leave for 30 minutes.
  5. Rinse with warm water and pat dry.
The pros of this mask recipe are that it 1) smells nice 2) feels good when applied to skin and 3) my face felt nice after using it, essentially all I would hope for. The cons, however, were that it 1) had a weird consistency - both runny and pulpy at the same time - 2) made way too much (I wonder if I was supposed to use only 1/4 of the apple?) and 3) it became sticky before it was time to rinse off. While this wasn't the worst beauty item I have ever made, it was not my favorite for those reasons, and I would probably stick with the other recipes I have tried so far.


This next recipe smells absolutely delicious! If I hadn't remembered it had raw egg in it, I probably would have drunk the left over portion because it reminded me of a smoothie. Again, I decided to try this because it has honey, and also a fruit that is readily available to me this time of year: strawberries. And because I feel like I am sharing so much with my lovely readers lately, here is a special something for just for you: a late-night self-portrait taken while wearing my smoothie mask. My skin felt very soft after using the strawberry lemon mask, but a bit on the tight side. I suppose the dryness is why it is suggested for acneic skin, but I am not sure if this is a desirable result. I will probably try it a few times throughout the summer before making my final decision. It's certainly worth a try.

Strawberry Lemon Mask (for Acne)
  • 1 tsp. lemon juice
  • 1 egg white
  • 1 1/2 tsp. honey
  • 1/2 cup strawberries
  1. Mash/blend all ingredients. (I used my food processor for this.)
  2. Smoothe onto face.
  3. Leave on for at least 10 minutes.
  4. Rinse with warm water and pat dry.
{Yep. That's me with a smoothie 'stache.}


This last one I saw on Pinterest. It looked interesting because the picture shows the model peeling the mask off her face. Either I got the proportions wrong, or this doesn't really happen. No matter, though. This was a nice little recipe. The lemon juice cuts the egg smell and makes this one smell nicer than good old Martha Washington's recipe. I'm not sure where the expression "egg on your face" came from, but I can tell you from personal experience that it's not a bad thing. In fact, it's definitely good for your face. Additionally, those two recipes with egg are probably my favorite since they are the easiest to make, meaning I don't have to use my food processor. (For the record, this is not hard, it just means that I have more to clean up after doing my mask, and frankly, who wants to spend lots of time on clean-up when she just got done pampering herself?)

Egg White Mask (for Oily Skin)
  • 1 egg (separated)
  • few drops lemon juice 
  1. Whisk together an egg white and a few drops of lemon juice. (The directions said to use fresh squeezed, but I used lemon juice from a bottle.)
  2.  Apply to clean skin. (I used my fingers for this.) 
  3. Wait 15-20 minutes.
  4. Wash off with warm water and pat dry.
  5. The directions say to follow with an oil-free moisturizer, but I use my homemade moisturizing face oil instead.
Well, this concludes my post on homemade face mask recipes. Hopefully, you found one that sounds good. Feel free to share how you will be pampering yourself this Mother's Day! I think my day will include some ice cream, and hopefully, somebody else will do the cooking.

Friday, May 10, 2013

5 Homemade Facial Cleansers

I have what I would call combination skin with an oily T-zone and drier cheeks, but I was having all sorts of breakouts this winter, which prompted me to look for a new face wash. It didn't help that I made a really BIG mistake in using some Clean & Clear because I had purchased months before, having gotten what I thought was a super good deal with a coupon. Truly, it's not all that good of a deal if it makes your skin go crazy. Plus, this stuff is loaded with parabens and other chemical crap that I have been strategically eliminating from my day-to-day usage.

Next in my series of posts on the topic of "How I Pamper Myself," I am writing about a few different DIY facial cleanser recipes that I have been experimenting with for several weeks now. (My previous posts included How I Wash My Makeup Brushes, My Homemade Face Moisturizing Oil, and Homemade Eye Makeup Remover, in case you missed those.) There are many, many variations of homemade facial cleansers out there and this is just a small sampling that I tried. My original plan was to try at least 4 different recipes for at least a week each so that I could give a fair analysis of my results.
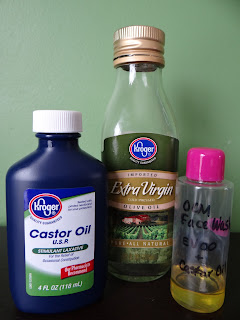
{This is my new favorite face wash!}

2/18/13 Trial #1: Baking Soda/Water
Up first was a simple sounding paste made with baking soda and water. I first tried this at night. My initial reaction was that this felt gritty in my palm, but adding more water made it slightly softer. My skin felt okay after the first usage, but I worried that it was too harsh to use regularly. By the second night, with twice daily usage, my skin felt smooth and my cheeks were not as dry. The acne on my forehead appeared to be clearing up, but I wasn't sure. After the third day, I was convinced that my skin was indeed looking better, but I could not tolerate the abrasive texture of this cleaning method any longer. I couldn't even bring myself to do this twice on the third day. So, my plan to last a week had failed. I don't remember where I came across this idea originally, but I do know that it was not my favorite homemade face wash! This works fine to wash my hair, but not my face, apparently.

2/21/13 Trial #2: Oil Cleansing Method (OCM)
This one seems a bit strange, but it also sounded relatively simple, so I decided to try it next. It's just a mixture of two oils, extra virgin olive oil (EVOO) and castor oil (found in the laxative section of the grocery store) It may seem counterintuitive to wash one's face with oil, but this actually feels really lovely and seems to produce very desirable effects. I learned a little chemistry lesson while researching this: oil dissolves oil, so using oil to make a cleanser is actually ideal for skin, since it naturally has oil. Plus, it's nourishing and not over-drying. Unlike my horrible experience with the Clean & Clear, this did not over-dry my skin (which, you are probably aware, makes your oil glands go into over-gear producing more oil to compensate, a vicious cycle).

On the first night, I combined a 50/50 mixture of my EVOO and the castor oil, because that was the proportion recommended for "normal" skin. I started with a small batch of just 1 teaspoon of each and mixed them in a small plastic bottle that is meant for travel sized portions of toiletries.

To Wash:
  1. Apply oil mixture to DRY skin. Gently rub in. I do this all over my face, including my eye lids.
  2. Soak a wash cloth in hot water. (I make it as hot as I can tolerate since it cools quickly.)
  3. Apply wash cloth to face and allow the steam to clean your face. I usually wait about 1 minute for the wash cloth to cool off completely.
  4. Gently wipe oil from face with the wash cloth. This removes eye makeup pretty well so for the most part, I have not needed to use my homemade eye makeup remover. I also do not find that I need to apply moisturizer after washing since the OCM is so hydrating.
My initial reaction to the OCM was that my skin felt good afterward, and it was not too oily. I quickly learned to keep wash cloths on hand in the bathroom instead of in the linen closet (since Logan was going through a phase of sleeping on the floor in the hallway, blocking my access to the closet). The main difference was the waiting portion of the cleaning routine. Normally, I would wash, rinse immediately, dry my face, and be done. I have since come to love the waiting because it forces me to just sit and be still for 1 whole minute, evidently not something I typically do! It's like giving myself a mini-facial, which is very pampering, in my opinion. On the morning of the 24th, I forgot keep my face dry in the shower, so I just decided to skip washing for that morning. I used my homemade face oil after the warm water splash and that got me through the day just fine. My skin seemed to be clearing up and I had less acne, but I was anxious to try out some other cleansers, so I kept experimenting.

2/28/13 Trial # 3: Oatmeal
This sounded easy enough. I like that it really only had one ingredient. I had already ground up some oatmeal in the food processor, making a knock-off Aveeno oatmeal bath that I had seen on Pinterest. I didn't share this one because it grossed Logan out and he refused to soak in it after the first time, so as far as a home remedy for eczema goes, that one was a strike-out for me. I put some in a small bowl that has a lid and kept it in the bathroom during this trial period. To wash my face, I just a tablespoon of oatmeal in my palm and then added enough water to make a paste. (I realized that this was way too much and vowed to use less after that.) Initially, I was surprised by how gentle this was to use. I had expected some abrasiveness. The smell wasn't overwhelming, it was distinctly "breakfast-y" but not so much as to deter me from using it. After the first use, my face felt clean and it appeared brighter. It didn't feel dry, but I saw dryness on my cheeks and followed up with my homemade face oil. Also, when I washed with this, I feared it was no good in the eye area. I wasn't even willing to attempt it, so I had to use my homemade eye makeup remover when washing in the evenings. Questions that came to mind were I wonder if this would be okay with whole oats, or did I do the right thing by using my ground oats? and Is this more appropriate as a weekly scrub/exfoliant rather than a daily cleansers? As you can see by the dates, I kept with this method for a bit. One downside to washing with oatmeal, however, is that I did not like finding bits of it in my hairline and eyebrows after I thought I was done rinsing. For that reason alone, I wanted to keep looking for another face wash method.

3/10/13 Trial #4: EVOO/Grapes/Milk
Well, I already knew I liked the olive oil, and milk is an ancient method for cleansing the skin. Lots of different fruits are purported to be good for the skin, probably because of the acids, I am guessing. What sold me on this particular recipe is that it didn't call for ingredients that were exotic or expensive. I can't tell you how many recipes I saw that asked for me to gather 15 different items, many of which I do not regularly have on hand, so this one looked like a winner for simplicity's sake! Grapes? Check.

2 Tbs EVOO
5 fresh grapes
1 tsp milk (I used whole milk)

  1. Process ingredients in a food processor until smooth and watery. (I found this hard to accomplish due to the peels plus the small size of the batch.)
  2. Apply to face. (The directions did not say how to use this at all, so used my hands.)
  3. Rinse with warm water.
My initial question was How long does it keep? The pros for this method were that it was easy to make with items most people have in their kitchens, it felt good going on the skin, and my face felt clean and moisturized. The cons were that it smelled bad, it looked icky, it probably wasn't safe to use near the eyes (I did not venture to try this), and it may have possibly clogged up my sink. I wanted to determine how long it would keep for and try it at least 3 times (to keep with my somewhat scientific method of giving stuff more than one chance to prove itself to me). On the second night, I found that it had congealed in the fridge, so I tried to warm it in my palms and apply it to my face, following with a warm wash cloth a la the OCM. This was a mistake. The smell nearly gagged me when I was confined under the wash cloth and forced to inhale the odor. I really did not like using this stuff, but my skin looked better than it had in weeks. The answer to my initial question: I would consider this to be something that is a one-time use formula, which makes it better for a weekly "mask" application, not something I would do daily. (Food processor each day? No thanks!)

3/13/13 Trial #5: Pure EVOO
Well, this fits my first requirement of being simple. It's just straight extra virgin olive oil. When I first tried this, I had no complaints. I used it the same way I did the OCM, just without the castor oil. However, I eventually decided that I didn't like how my skin felt afterward; it was just too oily. And it had seemed that my acne had improved more when using the 50/50 blend that included castor oil.

4/8/13 The Winner for Me: Back to the OCM!
My skin is not completely clear of break-outs, but it is definitely much improved from the winter when I was using the dreaded Clean & Clear. It's also very smooth and moisturized, and I swear it looks brighter and healthier. I now use the OCM just at night. For the most part, it gets rid of all my eye makeup, so I rarely need to use my homemade eye makeup remover. In the mornings, I just rinse my face with warm water and follow with my homemade face oil. This fits my lifestyle in that it is simple, inexpensive, and safe to use. The castor oil, which I found at Kroger, was on sale for $1.59 (regularly $1.89) for 4 ounces. Extra virgin olive oil is widely available, and I am considering buying it in bulk. The bottle I bought from Kroger was $3.49 for 8.5 ounces, but I just finished it off last night while experimenting with some other homemade beauty products. When I went back to this face cleanser, I made myself a larger batch consisting of 2 tablespoons of castor oil and 2 tablespoons of EVOO. I know that I can tweak the proportions as needed, but for now, I am happy my natural face wash.

Tuesday, May 7, 2013

My Homemade Face Moisturizing Oil

So, this was actually one of the first homemade beauty items that I decided to make and the reason is kind of odd. Back in the fall, Brett informed me after reading some random blog, that Zooey Deschanel uses some uber-expensive face oil. This information took awhile to absorb because I first had to wonder what blogs he is reading? Also, why would he care about some female celebrity's beauty rituals? Then, it hit me: he thinks she is hot. Duh! And, whatever makes her hot will also make me hot, right? I assume this is how his mind works, at least.

Therefore, I decided to do some research. I no longer remember the exact article that he had read and shared with me, but Googling "Zooey Deschanel's face oil" immediately pulls up one that gives me the name of this product. I believe that it's what we looked at back in November when he first brought up this interesting topic of discussion. Upon initially seeing this in November, the first thing I realized was that cost was a huge deterrent. $30 for 2 ounces! That is a bit steep for me (perhaps not for Zooey Deschanel?), but I assume it is also a bit on the high end for my readers, as well. That's when it dawned on me that I could surely just mix up my own face oil and save tons of money.

That meant more research! I found this blog, which described tons of oils and their respective helpful properties. Then, I jotted down a few oils that I was interested in possibly using, depending upon availability and price. The oils I selected came from a natural foods store. For my base oil, I chose sweet almond oil, which comes in a 16 ounce bottle for $10.99. (I was considering jojoba originally but it was more expensive, so I went with the almond oil. Also, I rationalized that if for some reason, I didn't like my face oil, the almond oil could serve as an all-over moisturizer until it was used up.) For the extra nourishing oil, I decided on evening primrose oil for two reasons: the blogger said it was great for all skin types, and it is supposed to be beneficial to folks with breast pain, which I touched on in my previous post. This came in a 4 ounce bottle for $19.99, so it was the brunt of my cost. Lastly, I chose my essential oil from myriad possibilities. Lemongrass, according to the blogger, is good for all skin types, plus it is supposed to brighten and tone skin. Honestly, I am not sure if I have noticed the last couple of things, but it smells nice, which was the deciding factor for me. It came in a 1 ounce bottle for $5.99, which is not bad, really, because essential oils are used so sparingly. (Again, I rationalized this expense by telling myself that if this didn't work out, I would just add a few drops each time I mix up my all-purpose cleaner.) All told, I spent just under $40, which was an initial investment, but I look at it that way: as an investment. I can now make a bajillion batches of my homemade face oil for a little more than Zooey Deschanel apparently paid for 2 ounces of her fancy-pants face oil.

{3-Ingredient DIY Face Oil}
Ingredients:
  • base oil (I use almond oil)
  • nourishing oil (I use evening primrose oil)
  • essential oil (I use lemongrass)
Directions: 
  1. Fill your container (I used a small plastic bottle intended for travel-size portions of toiletries, but I assume glass is the preferred material here. My container holds about 2 ounces, I belive.) about 2/3 of the way with your base oil. I use almond oil. Jojoba and argan are considered to be really good stuff, if you don't mind the extra cost. Tip: I have found that a small silicone funnel is especially handy for transferring oil from the large bottle to the smaller bottle.
  2. Next, add the extra nourishing oil until the container is nearly full. Again, I used evening primrose oil, but there are many, many others to choose from. Tip: The eye dropper is optional. I really like my flexible funnel.
  3. Lastly, add a few drops of the essential oil. I used 5 or 6 drops of lemongrass.
  4. Shake well and apply to face using a cotton ball. You really only need a couple of drops to cover the whole face, although sometimes I add an extra drop if I am planning to moisturize my neck. To apply, sweep upwards in gentle, circular motions. Tip: I have also used this oil as a hand moisturizer, specifically as a cuticle treatment, which has worked nicely. Tip: Because you will use such small amounts of oil, I like to tear my cotton balls in half to prevent waste.
Note: This oil should keep for 8-12 months (according to Crunchy Betty) if kept in a tightly closed container and stored in a dark place. I found that mine only lasts me about 2-3 months, so I don't have to worry about it going bad.

I first made this face oil back in December and I have made it once more since then. (There was an unfortunate accident resulting in spillage. Good thing it wasn't the uber-expensive $30/2 ounce kind!) I use this oil once a day now, in the mornings. (At night, I wash my face using the oil cleansing method, which I promise I will share soon!) I feel that it does an awesome job of moisturizing my face, even during the winter months. The only issue is that I was struggling with was more acne, at least until the weather recently got warmer. I don't think the oil is to blame, (in fact, I am sure it is not, I am saying the blame is my own for buying crumby Clean & Clear face wash because it was a good deal), but down the road I would like to experiment with my blend of oil and possibly consider tea tree oil to help with the acne. There are tons of possibilities out there, and I really only have tried one version so far. The beauty of homemade face oil, is that you can tweak it to fit your skin type and current needs, so I am betting that I will be making this for a long, long time (and not just because I have oodles and oodles of ingredients left)!

Note: If you liked this post, you might also be interested in how I clean my makeup brushes and how to make your own eye makeup remover.

Friday, May 3, 2013

Homemade Eye Makeup Remover

I have been working on wiping out chemicals from our daily usage since becoming a stay-at-home mom almost four years ago. Household cleaners were easy enough to take care of so they were some of the first that I started making myself. (For my all-purpose green cleaner recipe, look here.) But, beauty items are trickier, it seems. There is a lot more trial and error involved because everyone has different skin types and preferences from these types of products. So, I am now sharing my second post in a series of ways that I like to pamper myself. I think all moms can use some pampering right about now.

Why make my own eye makeup remover? I became fed up with the ingredients store-bought eye makeup removers several months back. I am done with parabens, and it is disturbing to see how many household products (including tons of things that people apply to their bodies!) in which they can be found. (There is a story here, that I have not shared on the blog, because truthfully, I have shared it with only a few people who are close to me. The short version is that last July I had a breast cancer scare, and thankfully, the lump that I found is harmless -- NOT cancer, praise God!)

Honestly, it is hard to weed through all of the ingredients in various cosmetics, so I am very slowly changing things. If you read my post about how I clean my makeup brushes, you can probably deduce that I am not about to give up makeup! However, I do want to use things that I feel are safe. Eye makeup remover seemed like it would be fairly easy to make at home, and I was sure that there were safe recipes to be found. I discovered this blogger who saved me a lot of trouble by testing out several recipes herself. For obvious reasons, I wasn't interested in trying anything that she said burned her eyes! I decided to try out her personal favorite, and that is what I have been using since (except for times when I clean my face with the Oil Cleansing Method, which I will explain in a later post on homemade facial cleansers). It is as easy as I had hoped to make my own eye makeup, and more importantly, it is something I feel completely safe applying to my face. The fact that it works, is all the more reason to make your own eye makeup remover at home.

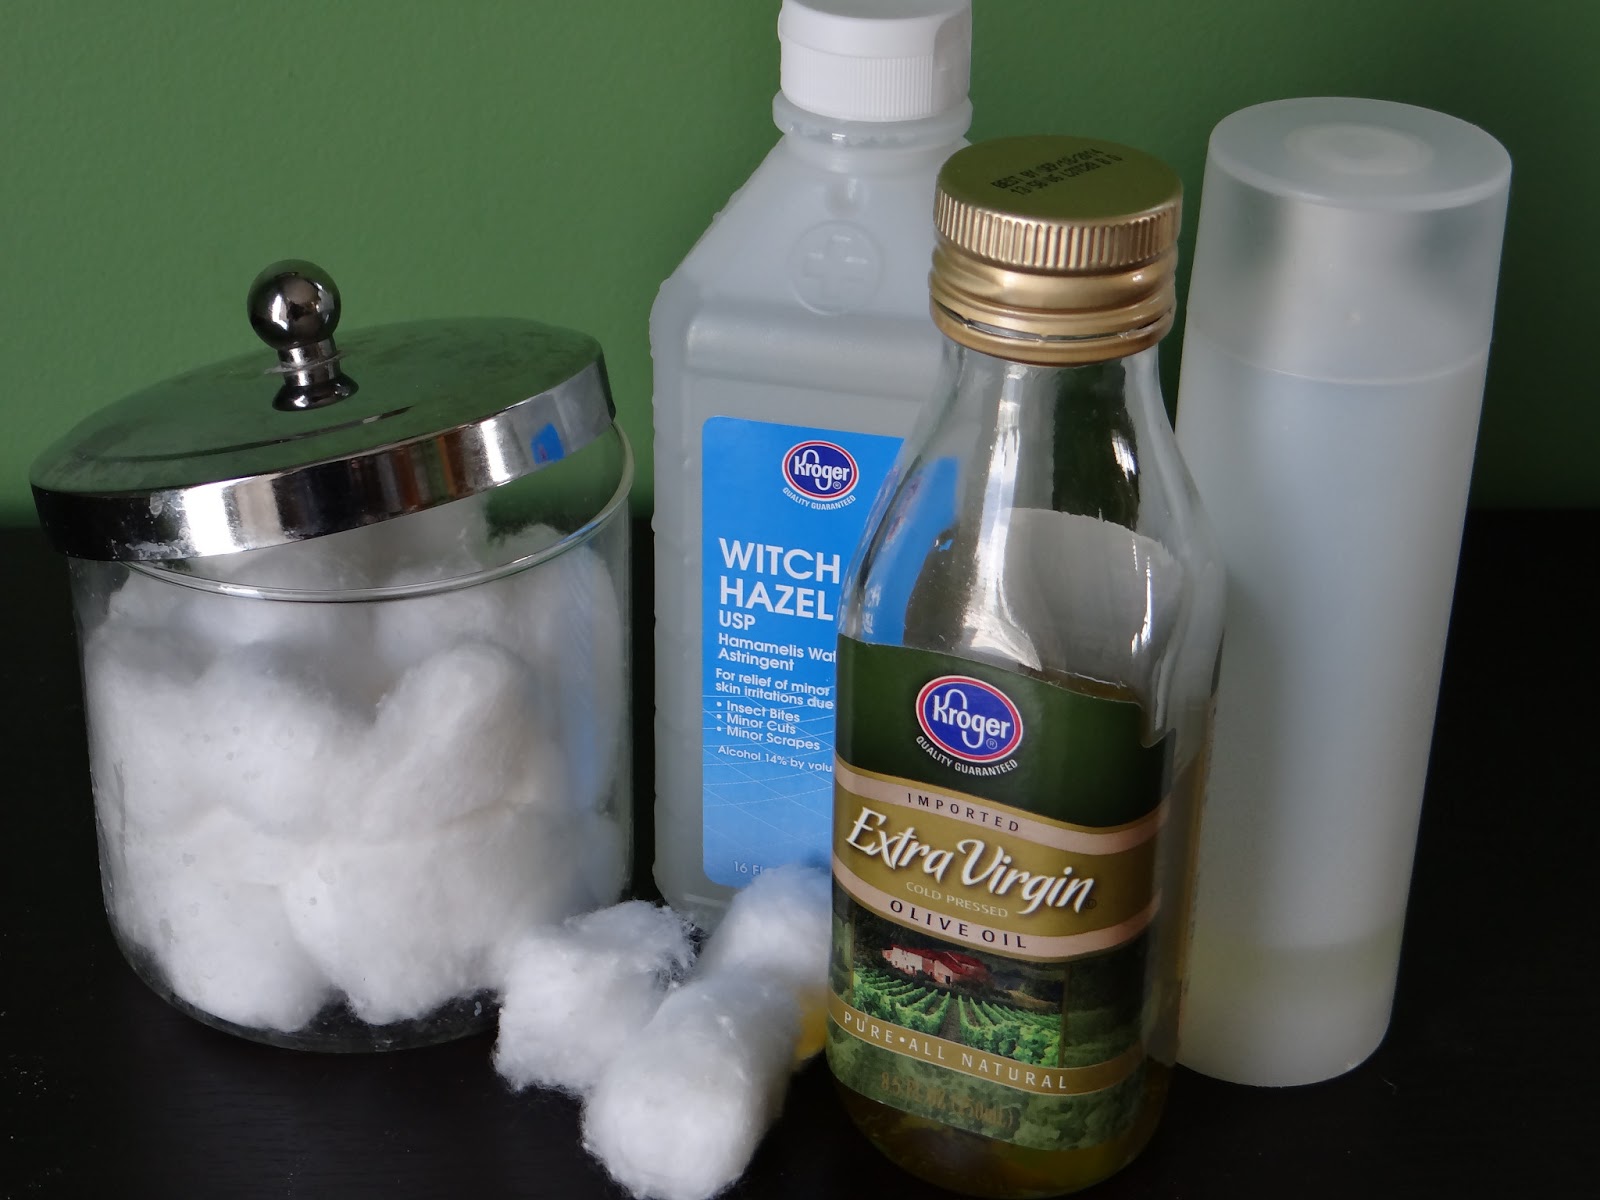
{Just 3 ingredients are needed for this DIY eye makeup remover.}

Ingredients:
  • 2 Tbs witch hazel (Y.ou can find this in the first aid section of the grocery store)
  • 2 Tbs oil (I use extra virgin olive oil but you could also try jojoba oil or almond oil.)
  • 2 Tbs filtered water (I use water from my Brita pitcher.)
Directions:
  1. Add all ingredients to your container. Tip: A funnel is helpful for this. I have been using the same container that formally held my store-bought eye makeup remover (I think the brand was Boots), which I washed out. It is far, far too large for the amount of eye makeup remover that this recipe yields, but that doesn't matter to me.
  2. While bottle is capped, shake well before using.
  3. Apply a small amount -- really, you don't need much -- to a cotton ball and gently sweep over eyes. Sometimes, I even tear the cotton balls in half and just use one half to avoid waste. Note: You can also use this to remove makeup anywhere on your face, which I have done before going to work out.
  4. This will safely keep for a few weeks, but since you are only making a small batch, you should be able to use it all within a reasonable time frame.


Wednesday, May 1, 2013

How I Wash My Makeup Brushes

It's May! Aside from spring officially having made it to Michigan, there are lots of nice things to look forward to in May. One is, of course, Mother's Day, and the other is my birthday, which happens to fall on Mother's Day this year. With the thought of a little self-indulgence in mind, I have decided to do a series of posts on simple and inexpensive ways that I like to pamper myself.

I have a few new followers so I hope you will bear with me as I take a divergence from the usual kids' crafts. If you don't know me very well, I pretty much love to make anything, not just crafty things. Also, I've been planning to share this since February, so it's about time I got around to it. Any time I can find a way to make something myself, I am open to trying it because a) It almost always saves me money b) It almost always is better for me (and my family) than the commercial version and c) It is almost always better for the environment. One beauty-related example that I have shared in the past, which lives up to all of those things, is how I gave up shampoo over a year and half ago.

My next tip is super simple, which is why I am starting here: how I wash my makeup brushes. This is an idea I found on Pinterest, and I knew that it would be better for my brushes than the soap and water that I previously used. As I have mentioned before, vinegar is awesome! This solution removes my Bare Minerals powders from the brushes plus the mascara from my eyelash comb. This doesn't take very long, and it's a great investment in myself. Having clean brushes means having cleaner skin, which means fewer breakouts, all good things! Plus, it may be psychological, but I believe that the makeup goes on better and looks nicer when I wash my brushes at least a couple times a month. (Ideally, I would do this once a week, but sometimes I just plain forget, or I realize they won't be dry in time for my next makeup application.)

{This cup from my brother's wedding rehearsal dinner works well for this.}

Materials:
  • 1 cup hot water
  • 1 Tbs distilled white vinegar
  • cup to hold water/vinegar mixture
  • towel
Directions:
  1. Combine 1 cup hot water with 1 tablespoon vinegar.
  2. Soak brushes for 20 minutes.
  3. Rinse brushes with hot water. Rinse again with cold water.
  4. Use a clean towel to pat brushes to remove excess moisture. Then, allow them to air-dry completely by laying them on the towel.