Showing posts with label birthday. Show all posts

Tuesday, June 11, 2013

Party Like It's MCMXCIX!

We're kind of dorks. (That might not be a news flash, but I thought I would state it up front, in case you didn't read this.) That's why I was pretty geeked (pun intended) to find these "Roman Candles" a few months back at Marshall's for $3.99. I tucked them away, feeling they would be perfect for my math nerd husband's birthday cake.

For his birthday, he requested this Toffee Cake, and I agreed to make it, because it was his birthday, and also, because he's pretty awesome. When he was looking for cake recipes, he decided to skip bookmarking any that called for a stand mixer since we didn't have one at the time, and he selected this particular recipe that called for a boxed Devil's Food Cake mix. Then, in a somewhat ironic turn of events, I finally got my stand mixer!! (See, I told you he was pretty awesome.) Brett's birthday cake was its inaugural usage, and I have to say that this was such a joy to use with a boring old boxed cake mix, I can hardly wait to make something from scratch. (You know, when I have more time... like when I'm not busy preparing for our tropical vacation sans children. Eeeeeeeee!)

Even though I linked the recipe from cooks.com, I'm going to take the time to type it out here. Why? Well, I lost one recipe (that I know of) for some white chocolate strawberry muffins that I posted here and I have forever been looking for a substitute since then, and falling hopelessly short. So, in the event that I really want this recipe again, (and I am sure I will!) I will have a fail-safe. Smart, huh?

  • 1 box Devil's Food Cake mix
  • 1/2 (14 oz.) can sweetened condensed milk (I used a bit extra.)
  • 6 oz. caramel ice cream topping (Again, I used extra.)
  • 3 bars chocolate covered toffee, chopped
  • 8 oz. Cool Whip
  1. Bake cake according to package directions in a 9" x 13" pan. (To make the cake look a bit more elegant, I decided to make it a layer cake instead of baking it in a 9" x 13" cake pan.) Cool on wire rack for 5 minutes. Make slits across the top of the cake, making sure not to go through to the bottom.
  2. In a sauce pan over low heat, combine sweetened condensed milk and caramel topping, stirring until smooth and blended. Slowly pour over warm cake, letting it sink into slits; then sprinkle with the crushed candy bars. (I skipped doing this in between my two layers, but I did add extra caramel sauce.)
  3. Let the cake cool completely, then top with Cool Whip. Decorate the top of the cake with more toffee bar chunks and swirls of caramel topping. Refrigerate.

For display, it was placed on a new-to-me glass cake stand that I had picked up at a rummage sale for $1 the very morning that I was planning to make the cake. Serendipitous, indeed! I was a bit harried, though, since it was the last day of school for Mia, and I didn't end up trimming the two rounds to make them even and flat. It turned out not to be a big deal, though, because the Cool Whip made excellent, easy-to-work-with frosting. I had never used a tub of Cool Whip for frosting before, but I expect to use it again because it was very simple to apply with my angled spatula and it covered up a multitude of baking sins (like those uneven layers I mentioned.) I was thankful to have reserved a small amount of Cool Whip to do touch-ups, as we were traveling to Brett's brother's house to celebrate, and it got a just a tiny bit messy looking on the way there. (My strange method that I came up with for transporting the cake worked very well: I stuck the cake stand into a large pot so that the stand rested just on the outer edges. This was I was able to hold it in place and rest my hands on the handles of the pot during the drive, and remain reasonably comfortable while doing so.)

In addition to looking pretty, this cake was very moist, too, thanks to the caramel sauce that was drizzled into slits cut into both of the layers. I topped it all off with the extra caramel sauce and some smashed up Heath bars, Brett's favorite candy bar. (By the way, pummeling candy bars with a rubber mallet is very cathartic. Just make sure they are sealed in a baggie and then wrapped in a towel, and you're good to go.) On another side note, the left over condensed milk was very happily used for condensed milk paintings, which Mia had been asking me to do again, so that was a happy coincidence, and it meant no waste (because obviously, we will eat the remaining caramel topping soon...). Everyone agreed that the cake was delicious, but the Roman numeral candles were truly the Pièce de résistance!

{All you need to know is that I am younger!}


Friday, February 1, 2013

Welcome to Care-a-Lot! (A Care Bears Themed Birthday Party)

As soon as Christmas was over, Mia was asking me when we were going to start making things for her birthday party, which was last Saturday. This gave me about a month to get everything ready. She had chosen the Care Bears theme, and it didn't take me too long to discover that it wasn't something I could find in any stores. There were a few things on Amazon and eBay, but nothing that seemed worth the cost. I wasn't too concerned, though, because Mia agreed that we could do a lot of "rainbow" colors for decorations and such instead of focusing just on Care Bears.

Plus, I love a creative challenge. I think that is why I do parties in kind of a crazy-big way, not that I think it isn't important to celebrate my kids' milestones. I do, of course, or we wouldn't do it. Truly, though, this mama loves herself a good project, and doing themed birthday parties allows me to express myself creatively with quite a few of them. Thankfully, Mia's desire for advanced planning helped me pull it off without getting getting too stressed out. In fact, I feel pretty fulfilled for making her 6th birthday party a success.

The Invitations:
I designed a fairly simple invitation in Microsoft Word that would allow me to print 4 per page. At the top, I centered this "Have a Rainbow Day" image. For the wording, I used this free "Care Bear Family" font that I downloaded. (This is fun because the punctuation includes hearts.) I used different colors of the rainbow to set apart the key words: red for "What," orange for "When," yellow for "Where" (Note that the where is "Care-a-Lot" and I added our address in parentheses.), green for "RSVP," blue for "Cell," and purple for "Home." After the important information, I typed "Please help share in the birthday cheer!" emphasizing the words share and cheer because they related to the Care Bears theme. I also added "Your presence is your present," which didn't make too much difference, but it was worth a try. I included this image of Cheer Bear, which I made smaller and flipped in my word processing program. After printing, I cut them apart with my paper trimmer, used scalloped scissors to add decorative trim to the top and bottom edges, and then adhered them to red card stock.

The Decorations: 
I tied together some Dollar Tree balloons (red, orange, yellow, green, blue, and purple) and had my husband put them on the mailbox, but they must have blown away at some point during the party.

Guests were greeted at the front door by a fun "Welcome to Care-a-Lot" sign that I made from a cardboard box and acrylic paint. The wording is again done in Microsoft Word with that same free font. You can find complete directions for the sign here.


I made these super simple and very inexpensive zig zag streamers following the directions I found on this blog. My only change that I would suggest is to specify that I used construction paper that was first trimmed in half (like a hot dog). Then, I saved myself some time by cutting several pieces at once. They don't need to look perfect. I used Scotch tape to hang them from the entryway to the dining room, three of each color: pink, red, orange, yellow, green, blue, and purple. I had one extra streamer per color, so I hung them at the end of the hallway going into the kitchen, so that when people came in the front door, they saw the same rainbow: pink, red, orange, yellow, green, blue, and purple.


The buntings on the ceiling were probably the most annoying thing for me to do for this entire party. I am not sure I even would have done this if Mia hadn't caught me looking at the picture online (which did not include any directions, by the way) and announced that she really wanted it for a decoration. I knew it would be inexpensive, so I decided to give it a try. I purchased some 97 cent table cloths from the party aisle at Wal-mart (red, orange, yellow, and green -- plus I already had the blue one that I had found at a garage sale over the summer -- for 10 cents). I cut the table cloths in half, and then folded each one in half again, length-wise, so that they were not as transparent. I used pieces of double stick adhesive that I had cut prior to getting started. They were about 1" squares, and I used at least 3 or 4 per section. (And then, I was climbing up again the following day to apply a bit more since some were falling down...) The white balloon cloud came from that same Dollar Tree bag of balloons (There were really quite a few in there, maybe about 45, so it was a pretty good deal.) and is tied together with light blue curling ribbon (also purchased from Dollar Tree two years ago). I also had a purple table cover from Wal-mart that I trimmed to fit our dining room table and our card table, taping down the ends so it didn't slip.


The Food:
Since we were having a party with the most of the girls from the kindergarten class, and then having some family afterward, I wanted to keep the food simpler than I have in the past. (Basically, I told myself I am not serving a full meal, and I made myself stick to it.) I didn't even make a "fancy" themed drink; I just offered milk, apple juice, or water. I am kind of proud of myself for this. And they ate and drank from our regular kids' plates and cups from IKEA, because I hate buying stuff that would just get thrown away. For food, I offered crackers and heart shaped cheese. I took some sliced deli cheese that I already had and then used my little metal heart cookie cutter (actually, I think it's meant for fondant, but you get what I mean). I thought about doing a rainbow veggie platter, but my kids are not huge fans of peppers so I just did red grape tomatoes, orange carrots, and green cucumber slices so it wasn't truly a rainbow.

One of my only big to-dos for food was making the rainbow fruit kabobs, which were inspired by this photo. I used bamboo skewers, which I broke about in half. On each one, I threaded a whole strawberry, an orange slice, 3 canned pineapple pieces (note for future reference: buy something larger than tidbits), a slice of kiwi, a couple of blueberries, and a couple of purple grapes. Then, I cut off the sharp end of the skewers, and arranged them on my tray.

My other kind-of-a-big-deal food was 6 layered rainbow Jell-O cups, which were inspired by this blog. I used 5 ounce clear plastic cups that were left over from my failed chocolate business (waste not, right?). I did this as inexpensively as possible by getting Kroger brand gelatin for as many layers as possible, and I also bought as many sugar free varieties as I could get since the kids wouldn't likely know the difference, and why give them more sugar if I didn't need to? I bought the small 3 ounce boxes (0.3 ounces for sugar-free varieties). I used the quick-set method involving ice cubes, so each layer set up for about 20 minutes before I was adding the next layer on top. (I actually had this almost down to a science by the end: put Jell-o in refrigerator, set timer for 15 minutes, wash bowl and spoons, put water on to boil around when timer went off, repeat...) I guesstimated that 2 tablespoons of each flavor would be about right, and it was nearly perfect for making 16 cups. (I had determined that 16 cups was the max amount that would fit in my cake pan, and I planned to put the Jell-o cups in the pan to make it easier for all the in-and-out of the refrigerator. It was a great tip I had picked up here.) My layers from bottom to top were: Grape Jell-O, Berry Blue Jell-O, Kroger Sugar-free Lime Gelatin, Sugar-free Lemon Jell-O, Kroger Sugar-free Orange Gelatin, and Kroger Sugar-free Cherry Gelatin. I topped the rainbow cups with Cool Whip "clouds" and served them with the cake in lieu of ice cream. One good thing about this was that I didn't have to dish up any ice cream.

The Cake:
I promised Mia a Care Bear cake, and I used this photo for my inspiration. I used my favorite white cake recipe and tinted the batter pink with Wilton icing color, purchased from Jo-Ann with my coupon. The head is a 9" round and the body is a 10" round. Plenty of cooking spray and waxed paper cut to fit the cake pans helped ensure that the cakes came out without breaking apart. I also used my cake knife to trim them so that they were flat before frosting them. The neck looked a bit skinny, and my cake, overall, was quite short since I should have doubled my recipe. I made 6 (short) cupcakes. One is the muzzle. One is cut in half and used for the ears. The other four are the paws. All are covered with plenty of frosting to keep them glued together.

For frosting, I made the Wilton buttercream recipe, which I again, tinted pink, and applied with an angled spatula. The center of the ears, the belly, and the mouth/nose area of Cheer Bear are all done with plain white buttercream that I had set aside.

It is fortunate that Valentine's Day is around the corner because that meant that seasonal heart-shaped candies were easy to find. Cheer Bear's nose is a red cinnamon jelly candy, which came in a bag for $1 at Kroger. The foot pads are pink marshmallow Peep hearts. I cut one in half, and placed the sticky sides down on the frosting. The eyes are a regular marshmallow, which I cut in half, and again, placed the sticky sides down. Then, I used black decorating gel to make the pupils. The freckles are red non-pareils (which I got for $1 at Target last Christmas). I used red decorating gel for the mouth and eyebrows. The most important part of Cheer Bear is her rainbow belly badge, which I made using red, orange, yellow, green, and blue mini M&Ms. (Note: The leftovers made delicious cookies, and I think I will buy the mini size for baking from now on.)

My cake display was a piece of cardboard that I cut to the size I wanted. Then, I took some colored tissue paper from Dollar tree, and folded it so that the 5 bands of color: pink, red, yellow, green, and blue all fit in approximately equal amounts. I used Scotch tape to affix the tissue paper to the back side. I used more wax paper circles on top of the tissue paper to try to avoid having the buttercream completely soak the tissue paper. It didn't work perfectly, but I am sure it didn't hurt either. I found these tall rainbow colored candles at Wal-mart for about $1.50 and the birthday girl was quite happy with the whole cake presentation overall.

The Activities:
When guests arrived, they each got a party had that I made from colored cardstock using this template and directions. I made 2 hats of each color: red, orange, yellow, green, blue, and purple. Brett helped me assemble them, since I was struggling with getting the tabs into the slots correctly. Then, I found images of Care Bears online, put them in Microsoft Word, adjusted them so that they were all the same size, and printed them. I cut them out, leaving about a narrow white border. Then, I applied them to the hats with Mod Podge and a foam paint brush. After they dried, I added the ribbon ties. The directions didn't say how much ribbon to use, or even what kind of ribbon to use. I used narrow ribbons, about 1/8" wide, most of which I already had at home. I needed to buy orange and blue, so I got those at Wal-mart for about 50 cents each. (I actually got more of a turquoise shade because I planned to use it as hangers for the sun catchers they were going to paint.) It turned out that this project was kind of a waste because the hats wouldn't stay on the girls' heads, and when they were all leaving, there were some disagreements on who had which hat since I had used a different Care Bear for each, and apparently some are more desirable than others. Anyway, they looked great, but I am not sure I would take the time to make my own hats again, unless I used elastic cord, perhaps.

After they got their hats, I took their photos with my Cheer Bear photo prop, which was placed in front of yet another Wal-mart plastic table cloth. This one was a turquoise, which I thought would make a nice "sky" backdrop. It was doubled over and taped to our fake fire place.


Another party activity that we had was painting rainbow sun catchers that I had found in the craft aisle at Wal-mart for 53 cents each. To prepare before the party, I tied a narrow turquoise ribbon hanger to each one. I attached a piece of masking tape to each ribbon and folded it over to make a flag, which I wrote each child's name on. Then, I poured small amounts of sun catcher paint (which I borrowed, but you can get it from Oriental Trading) into small plastic cups with lids. These were also left over from my failed chocolate business so I didn't have to go out and buy them. I used 2 cups per color so they would have enough to share without having to wait for a color, or at least that is what I figured. Each kid got a paper towel and a small paint brush to use. This worked fine. The girls were very neat and put the lids back on without even being asked. We just left them on the paper towels on the counter to dry during the party and sent them home flat at the end. The most interesting thing, to me, was that none of them looked anything alike even though they started with the same sun catchers.
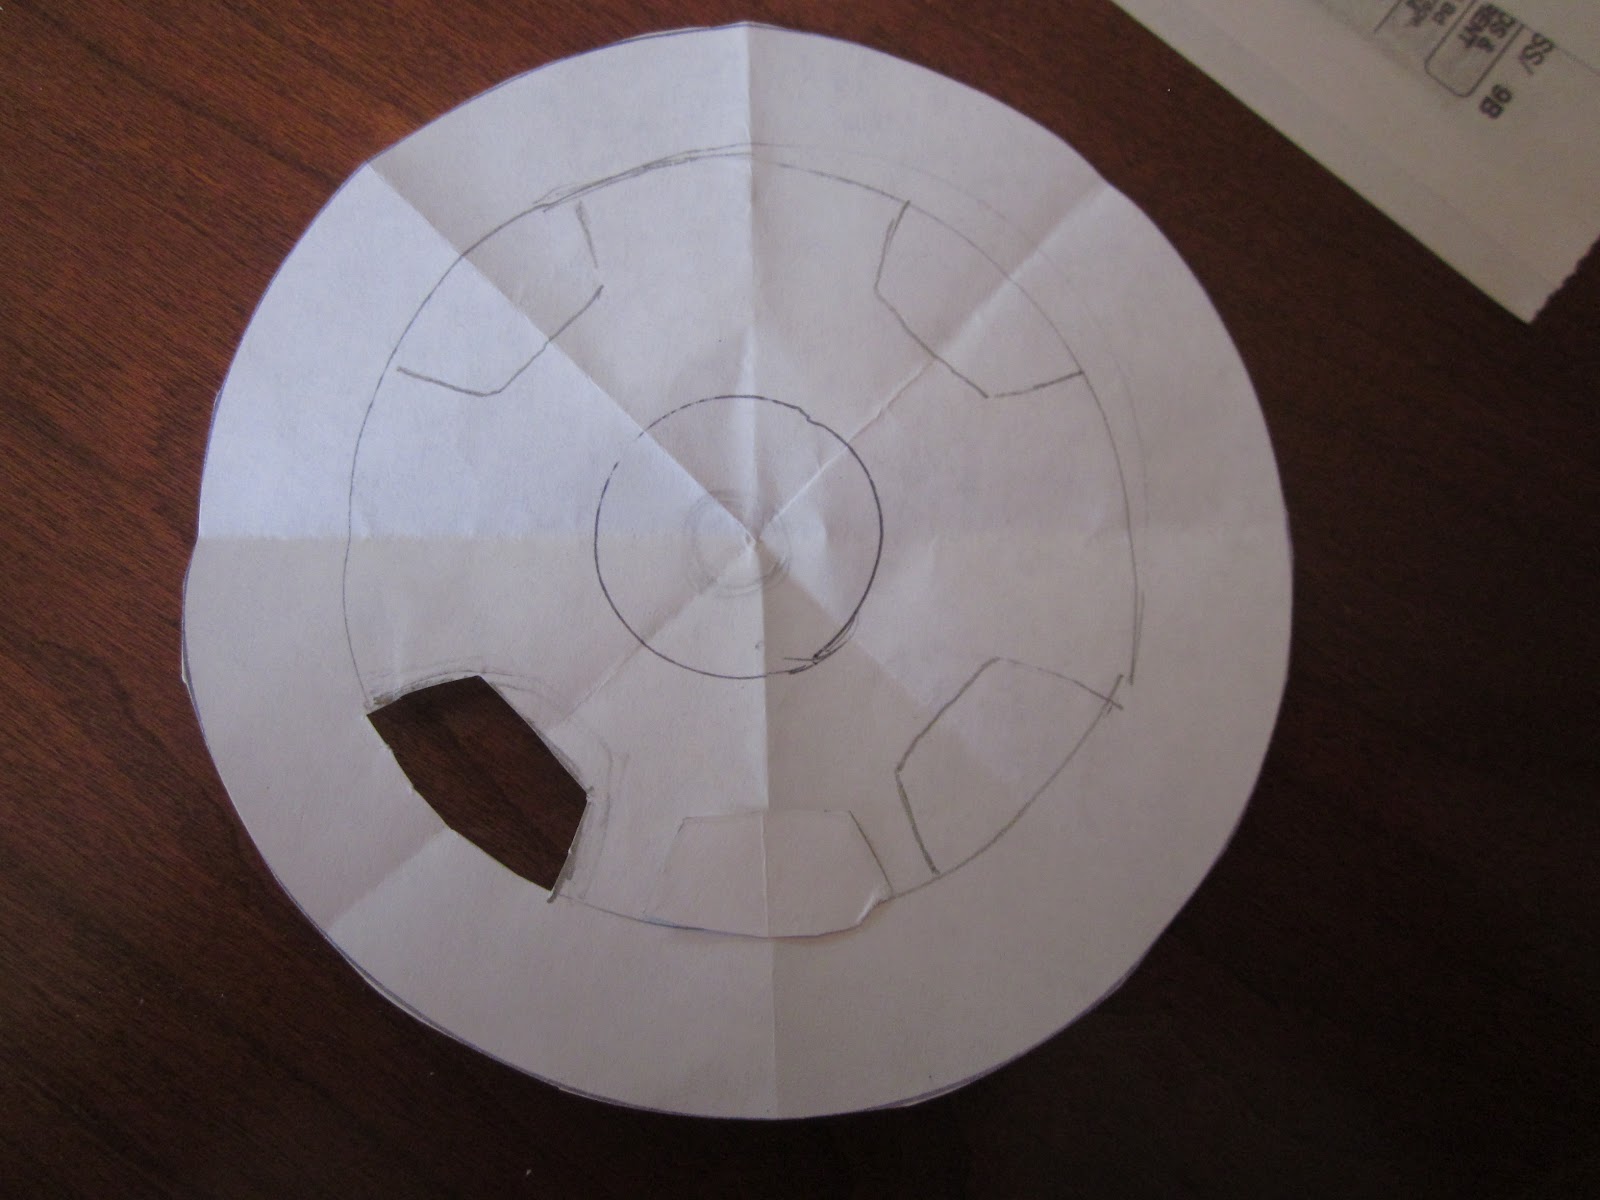
The home-made rainbow pinata was a lot of fun. Unfortunately, I don't have any useable pictures of the game itself seeing as how it takes 3 hours to make something and it ends in about 5 seconds. The good news is that it was a pull-string, so it was not destroyed in that 5 seconds. My plan is to hang it in Mia's room.

Another game that I created was "Pin the Cupcake on Birthday Bear." I taped Birthday Bear to the same table cloth we had used for our photo back drop. This one lasted a bit longer than the pinata, and everyone was anxious to have their turn. We used Mia's winter scarf for a blindfold and that was very effective.


All in all, this was a great party. Things went smoothly. We had a nice turn-out. Everyone had a great time. Most of the things I planned came together almost exactly the way I imagined them. It didn't cost me very much. And most importantly, there was one very happy little girl. That's enough to validate all the time and energy I spent pulling this off.

Saturday, September 29, 2012

Ka-Chow! A "Cars" Birthday Party

It's been about a month since Logan's third birthday party, so I really need to finish these posts. This will be the last one of a series of five posts. If you missed the first four, they were about the hand painted birthday candle, the DIY pull-string pinata that looked like Lightning McQueen, the "Pit Stop" game, and the Pit Passes.

I love coming up with themed parties, and I was very happy with how Logan's Cars themed 3rd birthday party turned out, especially since he was thrilled with it. I consider myself to be creative and it is lots of fun for me to come up with decorations, food, activities, and other things to fit with the theme of the party. I started planning ideas several weeks beforehand, and then I began creating the bigger items about two and half weeks prior to the party. Yes, this took time, but again, it was fun for me. I am not suggesting that every mom needs to do this sort of thing, and my goal is not to make other people feel bad if they don't throw elaborate themed birthday parties. However, if you are the type of person who really LOVES making things and you have the time and the ability, I say go for it. (Since I am home full time, I like to say that I have more time than money, forcing me to come up with less expensive ways to do something. This is really good incentive to be creative.) This is my gift, and I would not do this sort of thing if it was "work" for me. (There are lots of other "cool mom" things that I do not excel at, so everyone has their niche area.) I hope you enjoy seeing the ideas.

The Invitations:
In the interest of keeping it simple, I used this cute animated race track evite. I titled the party, "Welcome Race Fans!" and added this text, "Rev up your engines and race over to {Our Last Name} Speedway because Lightning Logan is turning 3! We will have Cars themed food and fun activities in the fast lane. Be sure to pre-register with the Pit Chief by 8/21 to reserve your pit pass, and don't forget to bring your own pit crew! (No presents are necessary.) 
~ Pit Chief Meg

The Food:
This food for this party was fun to make and it was well received by both kids and adults. The main dish was "Mack's Cheesy Wheels" or homemade macaroni and cheese using wagon wheel pasta (which is surprisingly hard to find) and for some reason I do not have a photo to share. I borrowed the idea from this blog and gave it my own name.

{"McQueen's Fruit Racers" were a big hit. I definitely recommend that you soak the apple slices in water with lemon juice since Red Delicious turn brown quite easily, but I soaked mine and they stayed nice looking. The wheels are made from halved green grapes and they're held on with toothpicks so you will want to watch kids with sharp edges. I found the idea for this snack here.}

{These were my weird brain child and not as popular as other food items. I had seen stoplights made from Rice Krispie treats with frosting and M&Ms and wanted to make a healthier version. So, I bought rectangular crackers, spread them with cheddar cheese spread, used a pretzel stick for the base, and put on slices of grape tomato, baby carrot, and green grape for the colors of "Sheriff's Stop Lights."}

{"Sally's Cozy Cones" are just Nacho Cheese Bugles in a bowl.}

{"Doc Hudson's Chocolate Dip Sticks" are pretzel rods dipped in melted Dove Chocolate Discoveries milk chocolate, because I couldn't bear to use bad chocolate.}
{"Luigi's Spare Tires" are store bought mini chocolate doughnuts stacked up high. I got the idea from here.}

{Please excuse the blurry photo. "Fillmore's Organic Fuel" is really Country Time Lemonade mix with about 5 or six drops of neon green food coloring added.}

Many of the food ideas came from this fun blog. The labels for the food were made in Microsoft Word using this checkered flag border clip art. I used the Magneto font in red for the lettering since it was the closest match I could find for the Cars logo font. For clip art images, I used the following: Lightning McQueen, Sheriff, Sally, Mack, Doc Hudson, Luigi, and Fillmore. I printed these all off on one page, trimmed them down with my paper trimmer, and adhered them to red card stock (first folded over into a card) using clear Con-tact paper. (For "Fillmore's Organic Fuel" I skipped the card stock and just affixed my sticker to the pitcher.)

The Cake:
A few months ago, I found this silicone race car cake pan on clearance at Marshall's for $3, and decided it was perfect for having a Cars themed birthday cake. 
 

{Here is the batter before it went into the oven. Logan asked for "swirl" cake. I found the cake mix at the store and then discovered it is just a yellow or white cake mix and you add in a packet of cocoa powder to some of the batter. I will keep that in mind for the future. Note: I accidentally overfilled the compartments and had to trim the pieces down after baking.}

{Here is the finished cake plus six cupcakes that I made with the extra batter. The cake display is just a piece of cardboard box covered with aluminum foil. I made buttercream frosting and dyed it red using the Wilton no-taste icing color, which I found at Jo-Ann. My biggest concern was getting a true red since I didn't think Logan would be pleased with a pink Lightning McQueen. I am glad I found the no-taste version, though, because I heard that red food coloring can be pretty yucky. Since I forgot to leave some frosting plain white for the eye, I added half a marshmallow with a blue M&M and black decorating gel to finish it. I used black McCormick food coloring from Walmart to do the tires and added red M&Ms to the centers. The lightning bolt is yellow decorating icing and the number 95 was a mix of that along with the red buttercream, I think. Since the cake was actually 12 separate pieces, I had to frost each one individually on all sides (I used an angled spatula, which is very handy) and then push them together to make the car look like one whole cake. This was a little extra effort, but it was worth it when I went to serve cake and didn't need a knife. I just pulled it apart with my hands. This is not the nicest looking cake I have ever made, but I had one very happy little boy, so that was all that mattered to me.}

{A decent pastry bag is nice to have. I used my Dove Chocolate Discoveries one for the cupcakes. The checkered flags I made with free downloadable scrapbooking paper, trimmed into 1" x 3" strips. I folded the paper over itself on a toothpick and secured it with a piece of double sided scrapbooking adhesive.}

{See my directions for making the birthday candle.}

The Decorations:
{My inspiration for this welcome sign that I taped to our front door came from this poster. I decided to skip hand lettering and go with word processing to make it easier for myself. The words "welcome to" and "gateway to Logan's party" are in Brush Script and "RADIATOR SPRINGS" is in Showcard Gothic. I used the word art feature to make all the lettering in outline format. Then I printed it on blue paper and colored in the letters with dark blue and red scrapbooking pens. I "laminated" my sign with two pieces of clear Con-tact paper.}

{To make this sign, I printed this image in Microsoft Word as large as I could and still have it fit on a single piece of paper. Then, I used tracing paper and went over the design with a pencil. I put my traced copy on top of a piece of plain white card stock and then traced over the pencil marks to leave an impression on the white paper. Finally, I went over the impressions with pink and turquoise scrapbooking pens. A ruler was helpful for this. I "laminated" my Flo's V8 Cafe sign with two pieces of clear Con-tact paper and then taped it to a kitchen cupboard so that it was near the food.}

{Making this 3D paper Tow Mater should have earned me a black belt in origami! I will warn you that by the time you cut out all the pieces, fold them, and glue them together, you will have invested about an hour and a half. It was super cute, though, and now he is living in Logan's bedroom on a shelf. Also, if you don't read directions all the way through before starting, I'll give you a tip: you will need brown string of some sort (luckily, I had embroidery thread on hand) for the tow cable, and something to make a hole with (I used a push pin).}

{You may remember this road sign from Logan's construction themed 2nd birthday party.}

{After 3 coats of white paint, I added some black Sharpie, and transformed it into...}

{... this new age-appropriate decoration. In retrospect, it makes less sense for a racing theme, but whatever. I wanted to re-use something, and I did.}

{I also made some hanging decorations for the chandelier with clip art images, clear Con-tact paper, and fishing line. Mostly, I used rectangular images because it was easy to match them up for making them two sided. One that wasn't a rectangle, but did line up well was the Cars logo. Another was the Sarge's Surplus Hut sign, because I actually found images for both sides!}

The Activities:
All of the kids received a "Pit Pass" with their name and photo on it. My husband got one, too, since he asked nicely only his said "Pit Crew." So, naturally I needed to make one for myself, which identified me as the "Pit Chief." My inspiration for this came from here.


I used our plastic bowling set to create a game I called "Tractor Tipping." (I was kind of proud of myself for coming up with this. My original idea was to paint aluminum cans and make it more of a bean-bag toss type carnival game, and then I realized this would be so simple and easier for the kids to play without help setting up.) I printed off several of this clip art image and then cut them out and used clear packaging tape to affix them to the plastic bowling pins. Easy peasy.

The "Pit Stop" game turned out pretty cool. I made it with one side of a dishwasher box, paint, black Sharpie, and some clip art images. See my previous post for more detailed directions.


This one is probably my all-time favorite. I have wanted to do a pinata for awhile, but never wanted to spend the money. I know am I tooting my own horn, but this Lightning McQueen pull-string pinata (formerly a cardboard box and some curling ribbon) turned out so well, that I really, truly amazed even myself. It was really one of those things that I pictured in my head and thought it would either be a spectacular success or a huge failure, and fortunately, it was the former.


Other activities were just having out the car mat and toy cars to play with plus the twisty race car track toy where the two cars spiral down. And, of course, they played outside. The nice thing about planning parties for little ones is that they can easily entertain themselves with very little.

The Thank You Cards:  
Even though the party was over, the Cars theme continued with the thank you cards.
 
{For the thank you cards, I took a picture of the birthday boy with all of his Cars gear and had several copies printed. I used red card stock for the cards and made two per 8 1/2" x 11" sheet. The photos are inserted into clear adhesive photo corners.}

{I made a fill-in-the-blank template for the cards once again using this checkered flag border. The wording says, "Dear ______________, Ka-Chow! Thank you for helping me to celebrate my 3rd birthday! Thanks also for the ______________________________________. I love it! Sincerely, Logan" and it is in the Magneto font. I also added this image of Lightning McQueen.}

{For the front of the thank you cards, I used this image. When I printed in in Microsoft Word, it was almost the perfect size for the card. I only had to trim it slightly.}

Wednesday, September 19, 2012

DIY Pit Stop Game for "Cars" Party

Here we go: Cars party post #3 is all about the "Pit Stop" game I made from one side of the box our dishwasher came in. I originally found this idea on this website. I think it was made of plywood or something similar, and I assume it was larger and more expensive than my DIY version.


Materials:
  • large piece of cardboard
  • pencil
  • scissors (or craft knife)
  • red spray paint
  • acrylic paint: black, white, yellow, orange, red, turquoise
  • Styrofoam tray for paint (or bowl/plate)
  • round objects (bowls/pans/bottle caps, etc.) for tracing (or a compass)
  • hook and loop tape
  • foam paintbrushes
  • word processing software (Microsoft Word)
  • Mod Podge
  • black Sharpie marker
  • newspaper (to protect work surface) 
  • scrap paper
Directions for Car:
1) Find a large piece of cardboard. I used one side of a dishwasher box. I cut mine with scissors because they were handy. (Although this is probably not the ideal box-cutting tool, it is what I felt safe using around my kids, and it worked fine.) Using one of Logan's Lightning McQueen toys for reference, I sketched the outline onto the cardboard and cut it out.
 

    2) Protect work surface with newspaper. Spray paint the cardboard car cut-out. (I found some very inexpensive spray paint at the craft store that was intended to be used on glass, but for 79 cents I decided it was worth a try. I had no problem with this other than I did it in the garage on a rainy day, and the paint bubbled slightly in a few places since it isn't recommended for use during high humidity.) If you prefer, you could paint it with a brush, but spray painting yields quick coverage and no brush strokes. (Note: I ended up flipping mine over and painting the side without the writing.)

    3) Once paint is dry, draw details like McQueen's eye and eye lid, side windows, headlight, mouth, outlines where wheels will go, etc. and go over them with a black Sharpie marker.


    4) Paint details on Lightning McQueen. White and turquoise for eye, light strokes of white (or gray) for side windows, white for mouth, yellow for headlight, red/orange/yellow graduated for lightning bolt. Allow paint to dry and add additional coats as desired. Touch up black Sharpie marker if needed.

    5) Enlarge this number 95 clip art and print to fit the side of the car. (I also used this clip art image for my Lightning McQueen pull-string pinata.) Apply to car with Mod Podge on foam paint brush.

    Directions for Tires:
    1) Trace and cut out two cardboard circles. (I used a frying pan for my template, and again, cut mine out with scissors. Really technical, huh? See, you can do it, too.)


    2)  Protect your work surface with newspaper. Pour some black acrylic paint onto your Styrofoam tray (or plate/bowl). Paint the circles with a foam paint brush.


    3) Once paint is dry, trace center circles onto your black circles. (I used a small bowl for this.) Paint the center circles with red paint and allow paint to dry.


    4) While paint dries, make your template for the spokes (unless you want to paint these freehand two different times. I did not want to do that.) I used a scratch piece of computer printer paper, and traced that same green bowl, and cut out the circle. Then, I traced a smaller bowl (or maybe it was a jar lid?) for a smaller circle. Next, I folded my circle into eighths. In the center of one fold, along the curved line of the un-cut circle, I drew a trapezoid-type shape. I cut that out and traced it so that I had a total of 8 of that shape. These all need to be cut out. I think the center circle I sketched out freehand, but you could trace a bottle cap or something similar. The very center circle will need to be cut out. I drew dots where I wanted my 5 bolts to be around the center circle and just poked through the paper with a pencil to get the holes started.


    5) Now that the template is made, it is easy to lay it onto your red circle and using a black Sharpie, fill in the cut out areas. Repeat on the other tire.


    6) For the lettering "LIGHTYEAR," I found the closest font in Microsoft Word (Eras Bold ITC, 85 point font) and used the word art feature to make it into block lettering. I was able to fit this 4 to a page (the number I needed) in landscape format. My husband pointed out that the lettering isn't on a slant like the real thing, but I felt this was as close as I could get without having to do hand lettering, which would have taken much too long. I did cut out each letter individually because I thought it would look more finished that way. I laid the letters out the way I wanted them, and then applied them with Mod Podge. Once it was dry, I applied a coat of Mod Podge over the whole tires to ensure a good seal.


    7) To make it so that the tires could be taken off and reattached repeatedly, I used hook and loop tape (I think it is made by 3M). It came in strips. I affixed the two sides to each other and then cut them into 1 inch sections so that I had 6 total (3 per tire). Next, I peeled the backing off of one side of the tape, adhered 3 pieces to the cardboard car, peeled off the backing for the opposite side of the tape, and affixed it to the tire, making sure that the two sides of hook and loop were matching up. I repeated this with the other tire, and then tested them a couple of times to make sure the tires could come up and go back on with relative ease for little hand and not come undone. Fortunately, this worked like I hoped it would.


    9) Enjoy your pit stop game. We just did tire changing, but you could also have kids do minor repairs with plastic tools or have a clean, empty gas can for fill-ups, or other "pit stop" type activities you can come up with (not my realm of expertise). Now, Logan has a big cardboard Lightning McQueen car "living" in his room, and he loves it.

    {The birthday boy changes Lightning McQueen's tires at his 3rd birthday party.}