 |
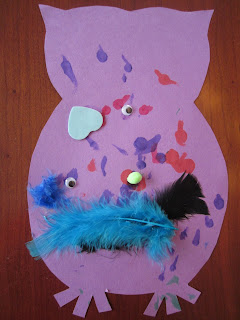
| {Owl by Mia, Age 4} |
 |
| {Owl by Logan, Age 2} |
Materials:
- construction paper
- pencil
- scissors
- cardboard (optional)
- Bingo markers
- feathers
- glue
- wiggly eyes
- plastic rings from packaging (optional)
- other materials: pom poms, craft foam, buttons, pipe cleaners, yarn, sequins, etc. (optional)
Directions:
- Draw or trace an owl onto a piece of construction paper. My kids chose purple. Any color would work. Tip: If you plan to make several owls, consider using templates. I made owl templates by drawing outlines onto paperboard (cereal box sides) from the recycling bin. Here is a template you could use, if desired. Then, just trace the owl onto construction paper.
- Cut out owl shape/s.
- Decorate the owls. We used Bingo markers for chest feathers and Mia glued on colored feathers for the wings and above the eyes. Both kids glued on wiggly eyes. (Logan's is more abstract.) I helped Mia cut small circles of construction paper to go behind her wiggly eyes, which are framed by those plastic rings that started this whole project idea. The owls don't have beaks because their attention waned by that time, but simple paper diamonds would work. You could also try pom poms, pipe cleaners, craft foam, buttons, yarn, or sequins for decorations.
- Allow all glue to dry before displaying your owl craft.
No comments:
Post a Comment