Tuesday, April 9, 2013

Recycled Magnet Craft

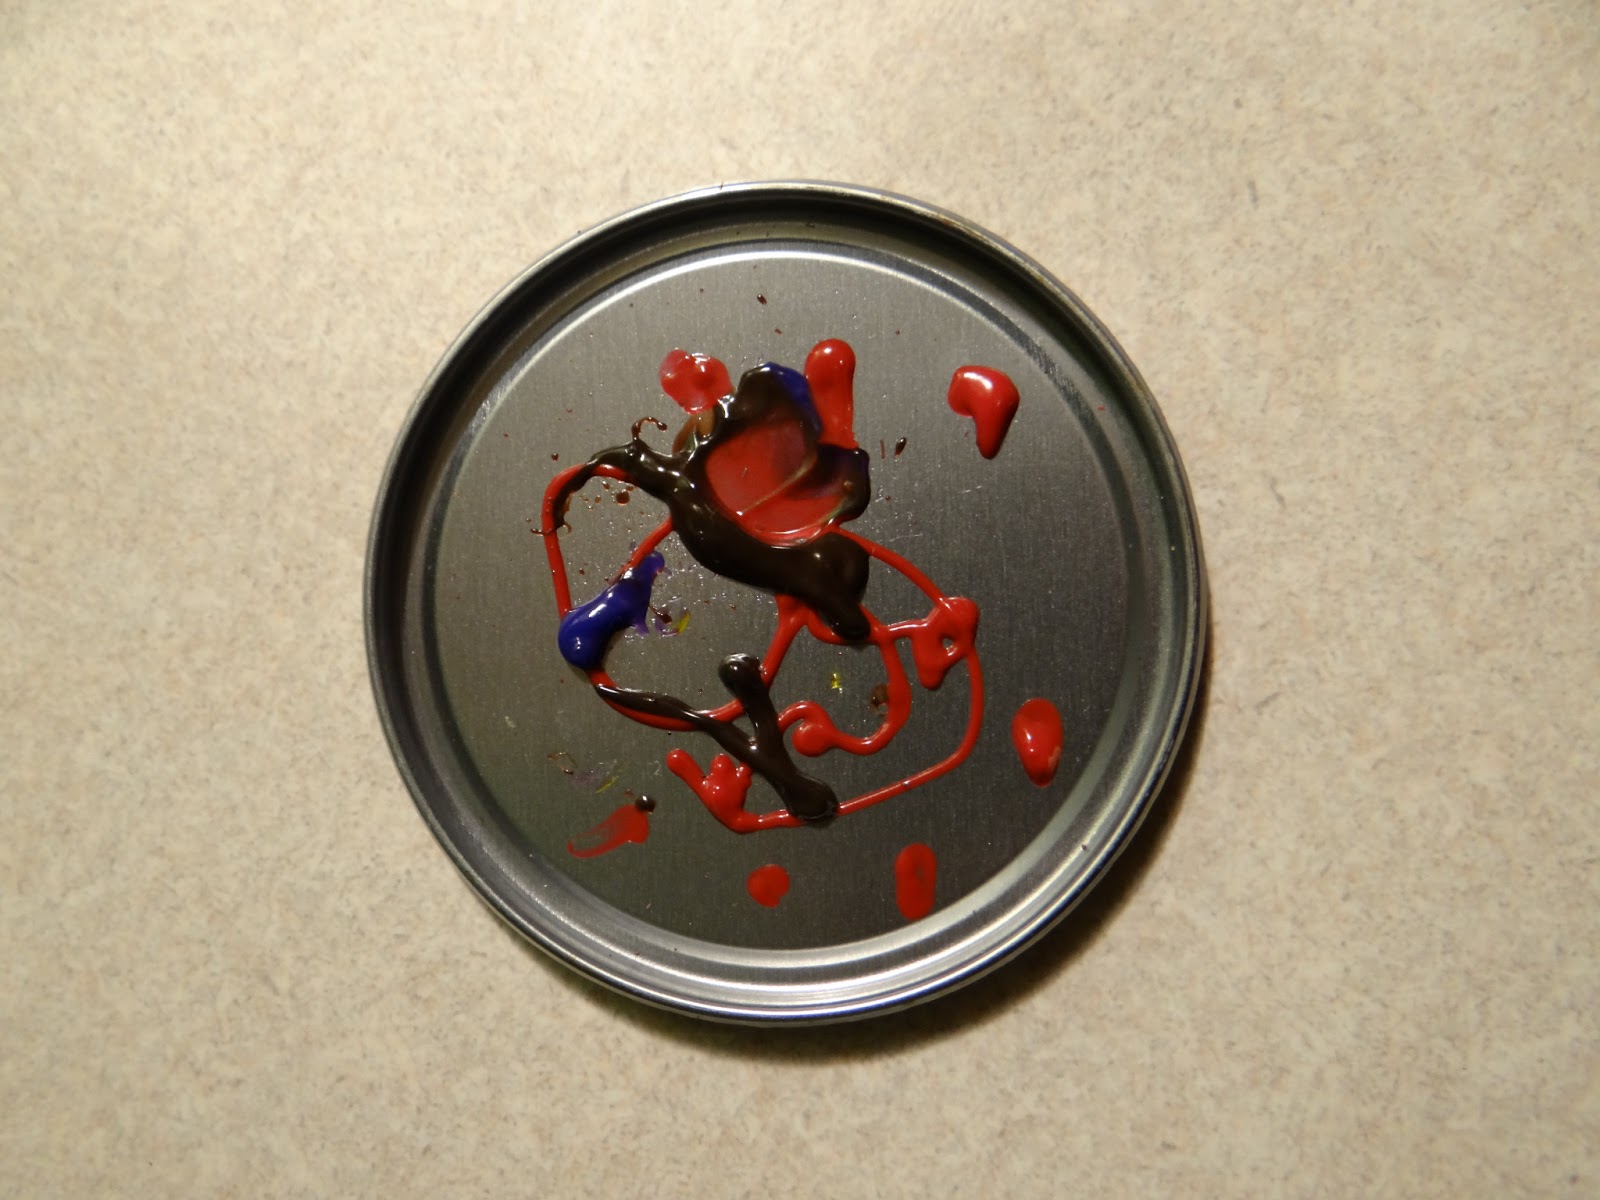
Here is a brilliantly simple way to re-use that round piece of aluminum that comes with cans of frozen juice. I learned this one tonight at the Art Night at Mia's school and even though I very rarely buy frozen juice, I loved this idea! In the past I always felt there had to be another use for that nice round piece of tin, but I never thought of one. Now, I know! They make super-simple little magnets.

To switch things up, you could even cut out a photo and paste it in to make them little photo frame magnets instead of using puffy paint. That is much less likely to stain clothing and more personal, too. I think that would make a nice Mother's Day gift idea.

{Recycled Magnet by Mia, Age 6}


Materials:
  • clean, round aluminum lid from frozen juice can
  • self-adhesive magnet
  • puffy paint
Directions:
  1. Peel the backing off of a self-adhesive magnet, and adhere it to the inside of a clean, round lid from a frozen juice can.
  2. Flip it over and then use puffy paint to make designs on the opposite side. Tip: I have found puffy paint to stain clothing, so you may want kids to wear smocks or old clothes before using puffy paint.
  3. Allow puffy paint to dry completely. This will take several hours, more or less, depending upon how thickly you apply the paint. Now you have a magnet. Tip: You can save your lids and then make several magnets to give as gifts. This is something useful that any mother would appreciate for Mother's Day!

Saturday, April 6, 2013

DIY Colored "Sand Art" Jars

I had originally found this idea online while searching for rainbow crafts to possibly do for Mia's Care Bears party. I decided it wasn't a good activity to try with a large group of kids in my small dining room, but it was a perfect spring break activity for my own two kiddos. These turned out really pretty, and you would never know that they aren't even made of actual sand, but rather, colored salt. The most notable benefit to using salt instead of sand is that it is way, way cheaper. The cost was the only thing that had prevented us from making colored sand art jars in the past. Making your own faux "colored sand" is not difficult to do at home, but it is kind of messy. I think the process was fun, and the end results are beautiful, so it is totally worth a small amount of spilled salt, in my opinion.

One thing I did learn is that craft is better suited to school age kids rather than preschoolers, especially if you are using somewhat large jars as we did. Mia, at age six, had more patience for this than her little brother did. That's really a no-brainer, but I was hopeful that Logan would be able to fill his jar. He only managed 3 layers before he started being kind of naughty and salt was flying all over the place, and I decided to cut him off. Then, I packaged up Logan's left over "colored sand" in baggies in case he decides to try again tomorrow. Mia, on the other hand, ended up with 6 layers. Maybe the rule of thumb is that kids can make one layer per year of age? Okay, I'm not sure that is true, but that is how it turned out at our house.

As usual, they had different ideas for how to do things. Logan produced 3 layers in 3 distinctly separate colors, and Mia made her six layers alternating just two colors: pink and purple. However, she didn't make the layers all look the same. She colored for different lengths of time to produce different intensities of pigmentation so there is a gradation of color from darker to lighter as she went. I don't know if this was intentional or if it was the product of getting tired with the process and trying to speed things along. Either way, she was pleased with her finished "sand art" jar.


{"Sand Art" Jars by Mia, Age 6 and Logan, Age 3}
Materials:
  • colored chalk
  • paper
  • salt
  • glass containers with lids or corks
  • cookie sheets (optional)
  • Super Glue/hot glue (optional)

Directions:
  1. Pour some salt onto the center of a piece of paper. We used black construction paper, which will later be re-used for chalk drawings, but any paper will work for this. Tip: To contain the mess, we first laid our papers on cookie sheets. I highly recommend using cookie sheets. The rim helps keep the salt from ending up all over the table and floor. (It's not perfect, but it helps quite a bit.)
  2. Rub colored chalk back and forth over the salt until it is the color you want. We used sidewalk chalk for this, but you could use the smaller chalk that is intended for use on chalk boards. Tip: Show younger kids how to color with the sides of the chalk to make this process go a bit faster. Tip: You may want to re-center the salt occasionally during the coloring process since it tends to spread outward. To do this, just slightly fold up the edges of the paper until the salt slides back to the center. Then, add more color as desired.
  3. Once the chalk is the color saturation you are looking for, carefully roll the paper into a funnel, and slowly pour the colored salt into your glass container. Older kids may be able to do this on their own, but adults should help little ones. Tip: We used these fun square glass bottles with cork stoppers that I found at the Salvation Army for 99 cents apiece. I had searched high and low for my old set of glass spice jars because I thought they would be perfect for this, but I have yet to come across them. You could also use baby food jars or small canning jars or any other glass container that has some sort of lid. Tip: If you want, you can turn and twist your container as you pour for different layered effects. Mia did this while I poured each layer.
  4. Turn the paper over for the next color, and repeat steps 1 through 3. Do this as many times as needed to fill your jar or bottle. Tip: While filling, make sure not to shake the container or you may end up with a muddy brown mixture instead of vibrant rainbow colors.
  5. Once your container is filled, place your lid on top and make sure that it is secure. Tip: Since we were using corks, I added a small ring of Super Glue to them before inserting them. You could also add Super Glue even if your container has a screw-on lid if it gives you peace of mind. Hot glue would work as an alternative if you do not have Super Glue.
  6. Find a nice place to display your colored "sand art" jars. Ours look lovely on the sunny kitchen windowsill.
{Demonstrating the "proper technique"...}
{And here's Little Man's method. I love how her look seems to say, "You are sooo doing that the wrong way! He did switch after seeing a demonstration of "proper technique."}

Friday, April 5, 2013

A Busy Bag Activity

Recently, I put together these "busy bag" sticks so that the kids would have something to do while we are waiting at places like restaurants or doctor's offices or just because it's spring break and I have heard "I'm bored" more often than I should. This was another brilliantly simple idea that I saw on Pinterest. These were easy to put together one evening while watching "The Voice" at the same time. I bought a package of colored craft sticks at Michaels, the large size that resemble tongue depressors, which cost me about $2. I used some round Velcro stick-on tabs that I had at home, plus a new package of square ones from Wal-mart, which cost about $3.80. So, in total, I spent less than $6.00 and I made over 50 of these activity sticks. That is enough for both kids to play with and both kids have enjoyed these! We did lose a handful of the sticky tabs, but it has not made much of a difference in the entertainment factor. Anything that both a three-year-old and a six-year-old agree on is all right by me.

Materials:
  • large craft sticks
  • scissors
  • self-adhesive Velcro tabs
  • bag or bin to contain craft sticks

Directions:
  1. If using circle Velcro tabs, cut them in half to get more bang for your buck. If using square tabs (I believe mine were 1" squares, but I don't know for sure.), cut them into quarters. I cut mine diagonally to make 4 triangles. If you prefer not to cut the tabs, this will save you time, but you won't be able to make nearly as many activity sticks.
  2. Peel the Velcro tabs off of their backing and adhere them to the ends of the craft sticks. The way I did this was to put on "hook" tab on one end of the craft stick and the "loop" tab on the other end. Then, I flipped them over and did the same thing on the other side, only I reversed the positions of the tabs. My belief was that they would be able to do more different types of building activities this way, but who knows, I may just be anal retentive.
  3. That's it! Your busy bag is now ready for action. We store ours in a ziplock bag, but you could also use a pencil pouch, pencil box, aluminum can, or whatever else you have that is handy.
{Some building fun!}

Thursday, April 4, 2013

Spring Cookie Cutter Stamp Art

Last month, Logan made did some printmaking using shamrock cookie cutters. For a simple activity to do over spring break, I had the kids make some stamp art with our spring cookie cutters. Mia enjoyed experimenting with different amounts of paint on the cookie cutters, producing thick lines fading to thinner lines, and even sort of dotted lines as the paint was used up. Logan just enjoyed mixing colors. Of course, this inevitably turned to a finger painting project for him, and then for Mia as well.

{Spring Cookie Cutter Stamp Art by Mia, Age 6}
Materials:
  • cookie cutters in spring shapes (egg, cross, bunny, tulip, butterfly, flower)
  • paint trays (we used old Styrofoam trays)
  • paint (we used powdered tempera that I mixed up beforehand)
  • paper (we used construction paper)
  • table cloth or newspaper (optional)
  • paint smocks or old shirts (optional)
  • cookie sheets (optional, to hold paper and contain messes)
Directions:
  1. First, I covered our work surface a vinyl tablecloth (which happens to be in a Halloween print, but I picked it up for a few cents at the church rummage sale for the sole purpose of crafting.) Newspaper also works. Tip: Also, before starting I had Logan put on his paint shirt, which is one of my old t-shirts that I make fit better by using a clothespin to gather the extra material at the back of the next. Mia just wears another old shirt of mine.
  2. Next, I mixed up powdered tempera paint in red, yellow, blue, orange, green, and purple. I let each child pick 3 colors and put them onto Styrofoam trays (left over from some meat packaging and washed well; I am a fan of using what you have that is free.) Tip: The reason I only allowed 3 colors is that any more than that and it would have just become muddy brown. Tip: You could also use ready-made tempera paint, or even acrylic if you are feeling brave. Add white if you like, or use more than one shade of the same color to get different effects. (Note: Acrylic paint stains fabrics, so be aware.)
  3. I let the kids dip the cookie cutters into the paint, mixing as they wanted. Then, they stamped it onto some construction paper, and repeated until they felt the prints were finished. Tip: The reason I only allowed 3 colors is that any more than that and it would have just become muddy brown.
  4. We let the paint dry completely and then I hung up the kids' artwork for spring decorations.
{I love that he chose primary colors.}

{Finished Stamp Art/Finger Painting by Logan, Age 3}

Wednesday, April 3, 2013

Homemade Bouncy Balls Experiment

Yesterday, we tried what was essentially a science experiment: attempting to make homemade bouncy balls. I found the idea on Pinterest. The only possible problem was that this blogger's directions very clearly stated that Elmer's Glue-All must be used, and I only had Elmer's School Glue on hand. So, I checked our local Wal-mart, but they were all out of the Glue-All for some reason. Then, I had the idea that Aleene's Tacky Glue is probably pretty similar to the consistency of Elmer's Glue-All, so I decided it was worth a shot.

The bouncy balls ended up being the right size, shape, and consistency, I believe. They bounced just a bit, which I think is the desired effect. I can't say for certain, since I did not try it with the Glue-All, but I think this worked as well as could be expected for homemade bouncy balls. Obviously, we could not expect them to bounce as high as store-bought balls. I think Mia was a tad disappointed by this because she said, "It just bumps a little bit." However, this provided some spring break entertainment without breaking the bank, which was what I was looking for in an afternoon activity.

{Finished Bouncy Balls}

{Bowl #2: BEFORE Mixing}
Materials:
  • 2 Tbs warm water
  • 1/2 tsp Borax
  • 1 Tbs Aleene's Tacky Glue (or Elmer's Glue-All) not regular glue
  • 1 Tbs corn starch
  • 2 bowls
  • spoons for mixing
  • food coloring (optional)
Directions:
  1. In the first bowl, mix 2 tablespoons of warm water with 1/2 teaspoon of Borax. Stir to dissolve. There will be some powder that does not fully dissolve. Add desired food coloring and stir to mix. Kids can help with mixing, and also with adding food coloring, if you are comfortable with that. Tip: If you are unfamiliar with Borax, it can be found in the laundry aisle of your grocery store. I bought mine at Meijer for $3.42 and it has lasted me well over 2 years, so it is very affordable. It has lots of practical uses including making homemade cleaning solution (which I use to clean practically everything), homemade laundry detergent (which I use to wash all laundry except for diapers), and growing crystal snowflakes.
  2. In a second bowl, combine 1 tablespoon of Aleene's Tacky Glue (or Elmer's Glue-All, not regular glue) with 1/2 teaspoon of the Borax mixture from the first bowl. DO NOT MIX! Let it stand for 15 seconds, then stir the mixture until it is too thick to continue stirring any longer. This is a bit harder for little hands, so probably will need to be done by an adult.
  3. Using your hands, quickly roll the mixture into a ball. Kids can help with this step. Allow it to harden. We let ours set for about 30 minutes before playing with them. (You may not need to wait that long, but I wasn't sure.)
  4. Try out your bouncy ball. Have fun, but don't expect it to perform like a regular store-bought bouncy ball!
  5. You can repeat step 2 as many times as you like while you still have the mixture from step 1 available. We made two balls, one per child, but there was enough left over to make several more.
    {Forming the Bouncy Ball}
{Trying out the Bouncy Ball}

Tuesday, April 2, 2013

Easter Egg Sun Catchers

I feel like I am behind on posting since Easter has come and gone, but really, it felt a bit early this year. Anyway, here is a project we did on Sunday. We've done plenty of these sun catchers over the past couple of years. It's so easy and relatively mess-free, that once you have made them you find occasions to make more. Plus, it helps if you already have a stock-pile of pre-cut tissue paper squares in an assortment of colors. I prepped a few paper eggs and Con-tact paper rectangles and then took the whole bunch along to Grandma and Grandpa's house so that all the kids could make them, if they chose.

{Pink Egg by Mia, Age 6 & Yellow Egg by Logan, Age 3}
Materials:
  • colored tissue paper
  • scissors
  • pencil
  • construction paper
  • clear Con-tact paper 
  • scrap paper (optional, for making egg template)
  • paper trimmer (optional)
  • clear tape (for hanging finished sun catchers)
Directions:
  1. Cut colored tissue paper into small squares. I used approximately 1 inch squares, but you could make yours bigger or smaller depending on the age of the children. Tip: To make this process go faster, layer a couple of pieces of tissue paper together, cut into smaller rectangles, and then cut the rectangles into strips, re-layering as needed. Put as many strips together as you can comfortably cut before cutting smaller squares. Tip: I save all of the cut tissue paper from previous projects, and store it in zippered baggies according to color. Tip: You don't need to go out and buy nice, new tissue paper. We re-use all the crumpled pieces that come in gift bags.
  2. Fold a piece of construction paper in half like a hamburger. 
  3. Fold a piece of scrap paper in half, hamburger-style, draw one half of an egg shape, and cut it out. Make sure that your template will fit within the borders of your folded construction paper, with about an inch or more border all the way around. Tip: You could also find an egg template online if you prefer. Tip: If you are only making one egg sun catcher, you can save this step by simply folding your paper in half a second time, drawing your egg shape, and then cutting it out. You should end up with two corresponding egg shapes on either original half of the folded paper.The template is just handy if you know you will be making several sun catchers.
  4. Lay your egg template onto the construction paper, trace it with a pencil, and then cut it out so that both sides of the folded paper have a corresponding egg shape removed from the center.
  5. Cut two pieces of clear Con-tact paper (I used both a paper trimmer and scissors for this.) so that they are at least 1/2 to 1 inch larger than the construction paper all the way around. Tip: Do not remove backing from contact paper until you are ready to use it. Tip: If you have leftover pieces of Con-tact paper, save them for future projects. For example, I find that the long, somewhat narrow strip left after making several of these sun catchers is just the right size for "laminating" labels onto jars of homemade play dough, which we give as gifts. The smaller remnants are also good for hanging leaves in the fall.
  6. Adhere one side of the paper to the clear Con-tact paper so that there is a border of at least 1/2 inch all around the paper. Tip: Slowly peel the Con-tact paper away from the backing as you smooth the construction paper down onto the contact paper. This way you don't end up with "bubbles."
  7. Have your child stick tissue paper squares onto the Con-tact paper egg shape until it is filled. Tip: You can use multiple different colors or shades of the same color (pink, purple, etc.) of tissue paper to give the sun catcher a more complex design. It looks especially nice where the two colors have overlapped in places.
  8. Layer the other half of construction paper on top of the first, making sure that the egg shapes line up. Tip: If you wish for the project to have a name and date, add this to the back before sealing up the sun catcher.
  9. Add the second piece of Con-tact paper over the top, smoothing it down as you go. Trim away excess if desired, but don't trim too much or the sun catcher will not stay together. 1/4 inch is the minimum border I would recommend.
  10. You can display your sun catcher in a window using clear tape. Another option is to use a hole punch to make two holes near the top, thread some ribbon or yarn through the holes, tie it off, and then hang your sun catcher.

An Eggstra Special Lunch

About a year ago, I saw this idea on Pinterest for an "Easter egg lunch hunt." I didn't set it up as an actual egg hunt, but I did serve the kids their lunch in leftover Easter eggs today. This was a HUGE hit! Both Mia and Logan were really surprised and excited to see what was inside each egg, even though there wasn't a single jelly bean or piece of chocolate anywhere in sight. Each child got an egg crate with plastic eggs containing:
  1. baby carrots
  2. cucumber slices
  3. cherry tomatoes
  4. green grapes
  5. blueberries
  6. strawberries
  7. blackberries
  8. Cheez-It crackers
  9. peanuts
  10. Craisins
  11. string cheese (cut into quarters and each kid got 2 sections)
  12. cooked cubed chicken
{Whoa! Chicken! Yay!}
My kids had different strategies for dealing with their "eggstra special lunch." Mia ate hers somewhat methodically, opening one egg at a time, for the most part. Logan opened all of his eggs, dumped the contents onto the table, and then ate a mishmash of foods together. In the end, it was all the same. Everybody was happy, including this mama. I had found a clever way to get them both to eat a nice variety of foods. The portions were small enough to keep them interested, which meant that they actually ate almost everything I served them, and I am sure most moms will agree that can be a huge challenge.


{Lunch is served.}
Normally, my kids are pretty good eaters, but it was still rewarding to hear their exclamations of joy over all the different healthy choices that they were given. It's not often I hear such joyous cheers for "Blackberries!" and "Cherry tomatoes!" In particular, I was pleasantly surprised by how well the chicken was received. In a typical situation, they would be indignant if I tried to serve them plain, cold chicken, but finding it inside of eggs was exciting enough to elicit reactions like "Whoa! Chicken. Yay!" I was just trying to figure out what kind of protein I could get in there, and once I saw the cut-up chicken in the refrigerator, I figured it was worth a shot. Clearly, serving lunch in Easter eggs was a winner of an idea. I'm not saying I would always resort to gimmicks to get them to eat well. However, switching things up was fun and unexpected for them. It may be a good idea to occasionally serve little portions of lots of different foods in muffin tins or ice cube trays, just to make food more fun.