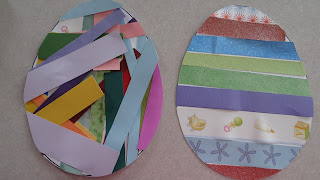
I like that the final results are so unplanned looking and Logan's, in particular, is super cool. It looks nothing like I imagined, but his layering technique produced this crazy-quilt look, which is fun and unique. Mia's egg is simple and clean, more like what I was thinking when I offered up the materials, but that is what is great about crafting with kids; they each can put their own spin on the project and that makes it all the better. And this is a project that will work with all ages, from toddlers on up, so get to work using up your paper scraps.
 |
| {Easter Eggs by Logan, Age 3, and Mia, Age 6} |
Materials:
- Easter egg template
- printer
- white cardstock
- colored paper strips
- glue stick or glue
- scissors
- Print off Easter Egg template, or draw your own, if you prefer. I used white cardstock for this since it is sturdier than regular paper. This template was perfect because it was about as large as it could be so it didn't waste much of the 8 1/2" by 11" cardstock. (Of course, I saved the scraps out of habit.) Tip: You could use any color cardstock. It doesn't really matter since it will get covered up, so use what you have available.
- Have kids glue strips of paper to eggs. Don't worry if they go outside of the lines. This is fine. Allow glue to dry.
- Cut out egg shapes following the outline from the template. Tip: It helps to turn them so that your are looking at the reverse side and cut while holding them up in the light.
- Display your Easter eggs. See, wasn't that simple?
No comments:
Post a Comment