Wednesday, December 19, 2012

Christmas Craft FAIL

At some point in the fall, I saw leaves in Mia's classroom that had colored paint streaks on them, which I assumed were made with marbles. When I asked about the process, she confirmed that they had done some marble painting, and I decided that we were going to try it for a Christmas craft. This was not my greatest plan.

I am not sure if the biggest mistake was using acrylic paint (knowing full well that the marbles would go flying at some point and almost certainly land on our carpeted dining room, which I HATE, but that's another story... or perhaps, it's why I wasn't too concerned about the issue of using paint that stains in the first place.) The other problem I had was not being sure of what kind of container to use to hold the paper and marbles. I decided on some clear storage bins that we have because they were large enough to hold the paper, but small enough to fit on the dining room table.

So, here is how we did this, and I am warning you up front that this is obviously not the best way to go about things. I can share this now because it's been long enough that I am no longer annoyed with myself, and I am not in the stress of the immediate situation of flying paint covered marbles. There's an image for you, right? Anyway, I figure it's good to be able to laugh at myself, plus it helps clear up any misunderstanding that you may have that I am Super Mom. Nope, just a regular mom who has some kooky ideas, some of them more successful than others.

{Christmas Tree by Logan, Age 3}
Materials:
  • clear plastic container/s
  • green construction paper
  • pencil
  • scissors
  • plastic cups
  • spoons
  • red, green, and yellow acrylic paint
  • marbles
  • newspaper (optional)
Directions:
  1. Fold your green construction paper in half like a hot dog. Draw 1/2 of a tree shape on one side, (Start at the top center and make increasingly larger triangular branches. When you have about an inch left at the bottom, draw the last line back toward the center crease and then down to the bottom of the paper to make half of the tree trunk.) and keeping the paper folded, cut it out. You now have a symmetrical tree. If you don't like how it looks, you can always re-fold it and trim some more as desired. Tip: If you are making more than one tree, use the first one as a template to save some time. Lay your tree shape into a container.
  2. Pour a small amount of paint into cups. We used red, green, and yellow acrylic paint and added just enough to each cup to cover a marble completely. Tip: You may want to do this with a washable paint such as tempera paint. Tip: Gold would look nice in place of yellow, but we didn't have any gold paint. Tip: If using acrylic paints, have kids wear old clothes or a paint smock. Each of my kids has an old t-shirt of mine that we use for painting projects.
  3. Use a spoon the scoop the marble out of the paint and gently set it on top of the paper inside of the plastic container. Let your child roll it around to make designs on the paper. Tip: The marbles don't always stay put, so if you are concerned about paint getting spilled, you may want to protect work surfaces with newspaper first. Repeat as desired with other colors of paint. Allow paint to dry before displaying your Christmas tree, which should now look like it is adorned with colorful garland. Tip: You can lay it on newspaper for this.
Additional Notes and Words to the Wise:
You can make other shapes besides trees. We did bells on the same day. It's not my favorite, but I think that is because I wasn't thrilled with my bell shape that I came up with. You can find templates for these types of thing online, if you prefer, but I usually save time by making my own, and in this case I wasn't too excited by the results.

{Bell by Mia, Age 5}
Since this interesting craft catastrophe took place, I learned a helpful tip. Logan made a marble painted paper ornament at Story Time last week. I am sure it was no coincidence that the ornament was a circle, the same size and shape of the container being used for the marble painting (round cake pans). This is sheer genius, people. And now, you know how I will be doing this in the future, if I am ever again feeling brave (or crazy, you pick) enough to attempt marble painting with kids.

{Logan's ornament has a folded paper topper -- glued on either side of the paper -- and yarn for hanging.}


The nice thing about this project (see how I can find good in even my goofiest flub-ups?) is that you can do it with almost any age child. The marble painting itself is very simple and toddlers can manage it just fine. There is some prep work that an adult will need to do, but overall, it is easy.It is the stress caused by flying marbles that is the parental concern here. Don't attempt this at home if you know it will put you over the edge.

Tuesday, December 18, 2012

My Little Drummer Boy

On a recent trip to the library, Logan selected the picture book Drummer Boy by Loren Long. After reading this nice Christmas story, we were inspired to make a drum. It ended up being a project for Mama instead of a kids craft project like I was originally hoping, but he is still enjoying playing with it, and even Mia has had some fun with our homemade drum. My directions are far from perfect, but I will share them as best as I can for anyone who would like to make their own recycled drum. Most of the time I think of crafting with kids as being about the process rather than the product, but in this case the product is definitely what I want to focus on.

Materials:
  • clean empty canister with lid (we used a Swiss Miss Cocoa container)
  • 2 sheets of 9" x 12" green construction paper
  • 2 sheets of 9" x 12" yellow construction paper
  • glue/glue stick (optional)
  • clear tape
  • paper cutter (optional)
  • ruler
  • pencil
  • scissors
Directions:
  1. (Note: The logical way to start would have been to measure the drum to see what size paper to use. I didn't do this right away, but eventually I determined that the circumference was 22 inches by using a piece of yarn and measuring the yarn with a ruler. This might have made things easier.) However, the way I actually started was by folding a piece of green construction paper around the canister. It was too tall, so I used my fingernail to make an impression of where it needed to be cut. Then I used my paper trimmer to cut it to size. I did the same with a second piece of green paper, overlapped the two and taped them to the canister. (Tape was adding when a glue stick wasn't really getting the paper to stay in place.)
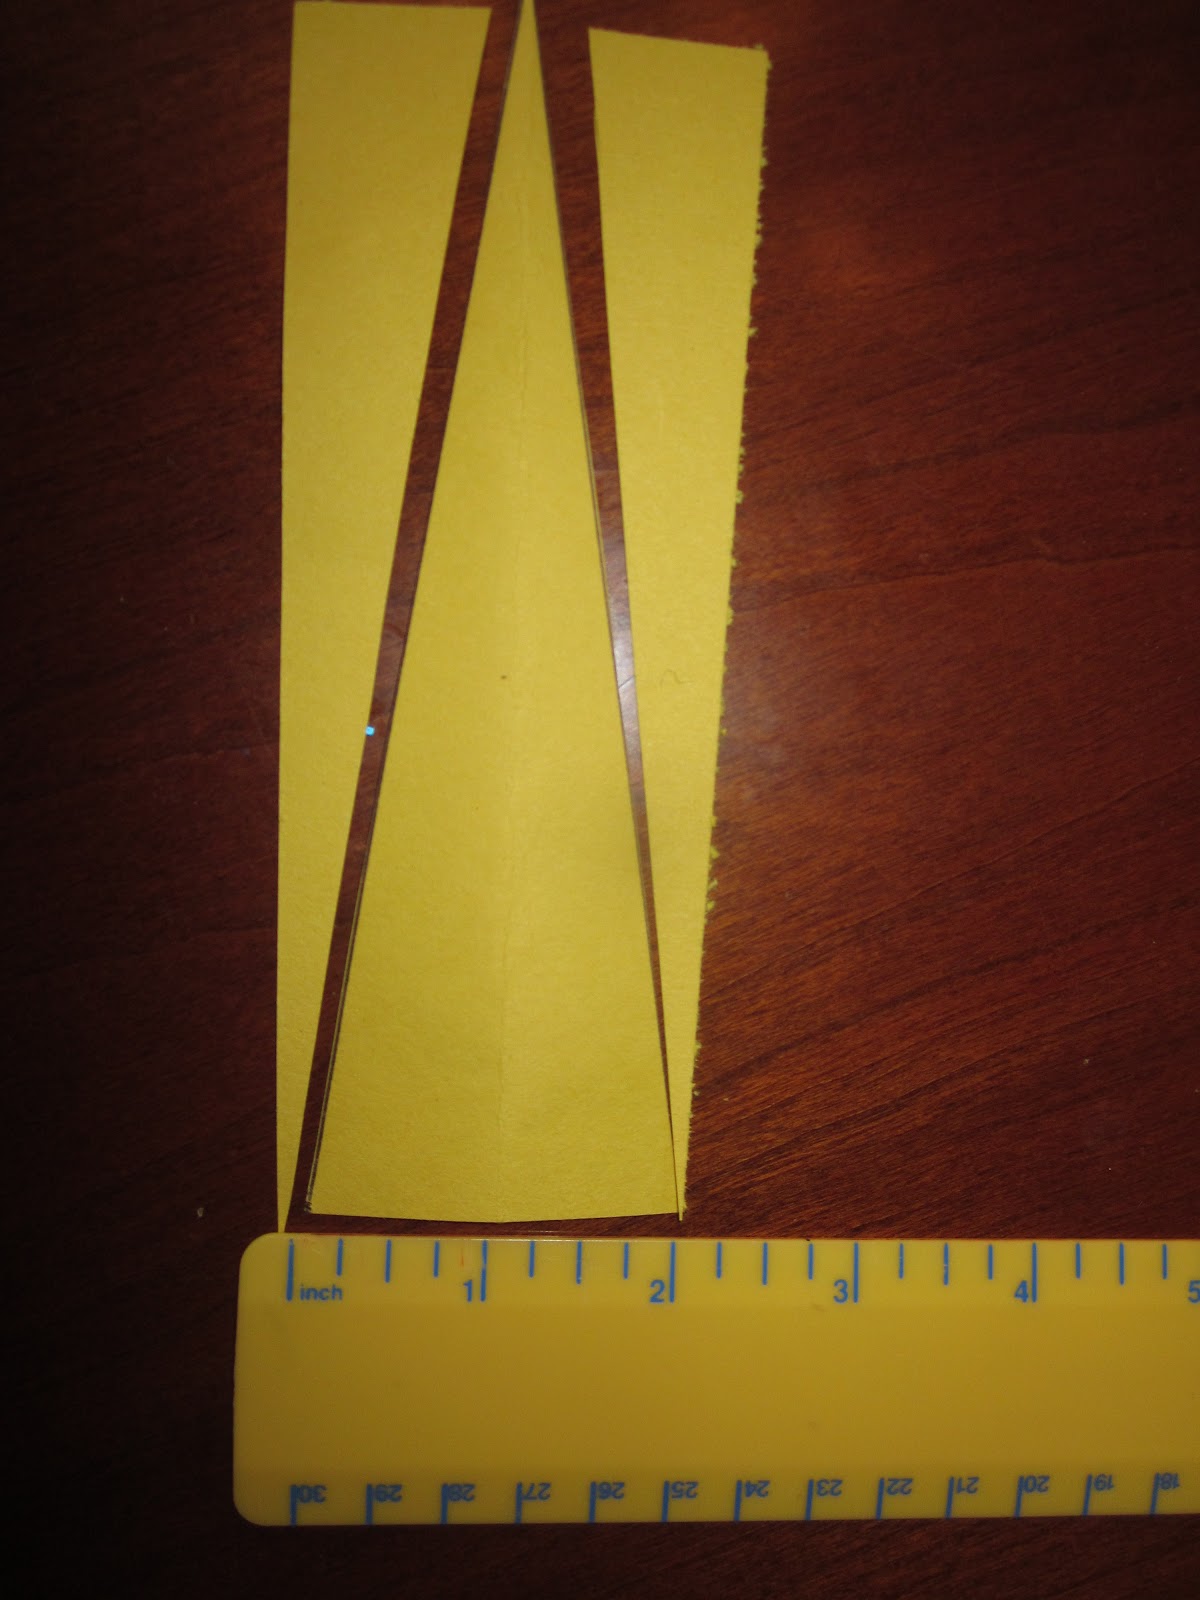
  2. Next, I made triangles from yellow paper. I decided to make 11 of them because I thought they would be 2 inches wide and then I would have an even number on my drum. (Note: It didn't actually turn out to work, but I was proud of myself for planning ahead and trying to use what math skills I still possess.) I used 2 sheets of yellow construction paper and used my paper trimmer to cut them into strips that were 6 1/2 inches long (the height of the container) by 2 inches wide. I folded one strip in half hot dog style and then used the crease to figure out where my triangle point would be. Then, using a ruler, I drew two pencil lines from the center (bottom) to the outer edges (top left and right). I cut out the triangle and used it as a template to make 11 more triangles.
  3. I started gluing the yellow triangles along the top edge of the green paper. I laid them next to each other and kept gluing, eventually discovering that I had one too many triangles. (So much for my math skills, eh?) They started being a bit too long as well. The final drum ended up with some overlapping of triangles, which I had done all that math to avoid in the first place, but oh well. 
  4. Logan doesn't care how it looks. He used two paper towel tubes for drumsticks, but you could use wooden spoons or whatever you are brave enough to give to your children. This drum does make noise when banged on, especially if they bang on the metal bottom instead of the plastic lid top. (Note: You can make your drum look even prettier I suppose, by adding ribbon, string, or yarn zig-zagged up and down the triangles. I would suggest securing it with metal brads if the drum is going to get played with, but again, this is not even needed.) Personally, I let it go that it didn't look perfect because the drum is making my little drummer boy quite happy, which, in turn makes me happy.


Build-a-Snowman Snack

Once again, we sat down to do a project that I pinned to Pinterest last winter. The idea was to make a snowman craft using mini marshmallows, but I decided it would be a shame to glue those tasty treats to paper when we could eat them instead. So, I switched it up and decided that Mia could build her own snack. I gave her a plate with some mini marshmallows, a skinny baby carrot, two pretzel sticks, and some mini chocolate chips. (I had originally thought to try to make it even healthier by getting out the raisins, Craisins, and peanuts, before deciding that it hardly mattered since the main ingredient of this snack was sugar considering how many little marshmallows it takes to make a decent looking snowman.) Here is what she came up with. Obviously, it didn't last long, but really, I didn't need a paper project with food on it that I would be concerned about somebody eating.

{Mia recently made this snowman snack.}

For Logan, I arranged the stuff on the plate in a snowman and let him have at it since I didn't figure he would have the patience to build a snowman himself. As you can see, mine doesn't look all that different from my five-year-old's handiwork. The kids both enjoyed this, and it wasn't time-consuming or difficult to do with items we already had in the pantry. Now, I am thinking that a gingerbread house with a snowman design would be another project for the future.


Friday, December 14, 2012

Easy DIY Glitter Ornament


Last night, at my Grace Circle meeting at church, there was a discussion of making ornaments and this technique was one that was mentioned. I thought it sounded simple enough, and then I was fortunate enough to get to make this one at my MOPS meeting this morning. Very serendipitous, indeed. And the good news is that these ornaments are truly simple to make. We moms used glass bulbs, but if I do this with my kiddos, I will seek out the plastic kind. I wish the picture showed the detail better. I used a mixture of blue and green glitter, and I was pleased with the results.

Materials:
  • newspaper
  • clear glass/plastic ornaments
  • glue
  • glitter
  • paper/funnel
  • permanent markers/paint pens/glitter glue pens (optional)
  • ribbon/ornament hook
  • scissors (if using ribbon to hang your ornament)
Directions:
  1. Protect work surface with newspaper.
  2. Remove the top of the ornament and pour in some glue. Making sure opening is covered, swirl the ornament around. If needed, keep adding small amounts of glue until the entire inside is coated with a thin layer of glue.
  3. Using rolled up paper or a funnel, add some glitter. (You do not need a lot.) Again, making sure the opening is covered, swirl the ornament around until the glitter adheres to the glue, and you are happy with the results. Don't worry if you see white areas because they will dry clear and should have glitter as well. Put the top back on the ornament and set it aside so that glue can dry.
  4. Decorate the outside of your ornament as desired. You can use permanent markers, paint pens, or glitter glue pens to write names and dates or to make designs. Allow drying time as needed.
  5. Cut some ribbon and attach it to the ornament. Or use an ornament hook to hang your completed ornament on your Christmas tree. These would also make nice gifts. You can make them with your kids (I would suggest getting the plastic kind if doing it with younger children) and give them to grandparents, teachers, friends, neighbors, really anyone, because who wouldn't like something made by an adorable child? Another option if you don't want to use glitter and glue is to use paint inside of the ornaments. Happy crafting.

Salty Snowman Scene

{I like to think of this guy as "Salty the Snowman." Created by Mia, age 5}

Here's another one I have had pinned in Pinterest for quite awhile, and we tried it out. Mia enjoyed it, of course. She is very much into crafting, just like her mama. This project, however, was not a good one for Logan, age 3. He ended up with a snowball scribble covered in A LOT of salt. I am not even ashamed to tell you that I threw it away, especially since he did not even notice. The end result is a fun, textured snowman, no glitter required.

Please note that this is not an original idea. I keep trying to find the blog of the original idea for this, but the link seems to be broken. I guess that can happen over the course of 40 weeks (crazy, but true, this is how long ago I saved this idea), so my apologies to whomever came up with this idea. I really did try to give credit, but it is just not working out.

Materials:
  • construction paper (any color)
  • crayons or colored pencils (white and any other color you choose)
  • paint brush
  • white glue
  • salt
  • baking sheet (optional for containing the mess)
  • small cups (optional for holding glue and salt)
  • other optional decorative items: puffy paint, buttons, sequins, pom poms, etc.

Directions:
  1. Have your child use a white crayon or colored pencil to draw a snowman. You can also put your snowman on the snow covered ground and make snowflakes falling in the air, as Mia did in her winter scene. Mia also drew a black top hat and a blue scarf.
  2. Lay the paper on a baking sheet. (Tip: You can add wax paper, tin foil, or parchment paper as well if you don't want to craft directly on your baking sheet.) Have your child add glue to the parts that he or she wants to be snowy. (Tip: For less mess, put some glue into a Dixie cup and let your child apply it to the paper with a paint brush.)
  3. Next, add salt to the glue. (Tip: I definitely recommend giving him or her another small cup of salt.) The salt can be added in little bits, shaken off, and then used again as needed. Allow the salt/glue mixture to dry.
  4. Decorate your snowman as desired. Mia used orange puffy paint for the carrot nose and red puffy paint for the eyes, mouth and buttons. Other materials that you could try are buttons, sequins, and pom poms. Make sure that all glue is dry before displaying the snowman project.

Thursday, December 13, 2012

Foot Print Penguins

{Foot Print Penguin by Mia, Age 5}
Know any kids with "happy feet?" If so, this project is perfect. You can do this with toddlers on up, provided that you are willing to do all of the work for young children. It's cute and not at all complicated, so what more could you ask for? I found this craft idea on Pinterest, and made a couple of small changes (black ink instead of paint and orange puffy paint for the beaks).

Materials:
  • paper
  • black ink
  • black paint
  • white paint
  • paint brushes
  • Styrofoam tray (or plate/bowl to hold paint)
  • orange puffy paint
  • 2 googly eyes
  • glue
  • newspaper (to protect work surface)
  • damp cloth/paper towel/baby wipes for clean-up

Directions:
  1. Spread newspaper on your kitchen floor (or other area you feel is okay for working). Lay a piece of paper down on top of the newspaper. (We used plain white computer paper.) Have your child sit in a chair by the paper. Using a black ink pad, cover the surface of his/her foot with ink. (You can also use black paint, but I decided to try this with ink to make it a bit simpler.) Help your child to step down from the chair directly onto the paper. Carefully lift foot off of paper, clean up the bottom of the foot, and set paper aside so ink can dry. If making more than one penguin, repeat step 1 as many times as desired.
  2. Once the ink (or paint) is dry, use white paint (We used recycled Styrofoam trays from meat packaging as our paint palette.) to make the face and tummy of the penguin. For the head, I started with a heart shape for each penguin. Mia was able to do the rest herself, but I did all of Logan's painting. (This was after I gave him the white paint and let him have at it, which ended up being that he covered all of the black foot print with white paint and made what I called an "invisible penguin" since it was on white paper, so please note that you can't really expect a 3 year old to be able to do this on his own.)
  3. Now, use black paint for the flippers. Allow paint to dry.
  4. Glue two googly eyes to the head. (That's the part that Logan did.) Make a triangular beak out of orange puffy paint (or regular paint if you don't have puffy paint). Allow puffy paint to dry. (This may take overnight.)
  5. Your penguin is now ready to be displayed. You can frame it and give it as a Christmas gift, turn it into a card, mount it on colored paper (I am thinking of using red card stock) or just hang it on the refrigerator. Enjoy.
{Foot Print Penguin by Logan, Age 3, with lots of help from Mama}


Wednesday, December 12, 2012

Paper Plate Turkey

Logan made this feathered fellow at the library before Thanksgiving, and I am obviously late in posting it. Besides being super swamped with holiday preparations, I have had problems getting pictures loaded onto the blog, severely limiting my ability to add new posts. I think I have the issue resolved, so fingers crossed.


Materials:
  • small paper plate
  • scissors
  • brown construction paper
  • yellow construction paper
  • other colors of construction paper
  • glue stick
  • 2 eye stickers (or googly eyes)
  • decorative scissors (optional)
Directions:
  1. Cut off approximately 1/3 of the paper plate.
  2. From brown paper, cut a turkey body. To do this, draw a circle (somewhat smaller than the paper plate) with a smaller circular shape on top for the head.  
  3. Cut several feathers from colored paper. If desired, you can use decorative scissors for this.
  4. Cut a beak from yellow paper. Ours is a diamond shape, folded in half.
  5. Assemble your turkey. The straight edge of the cut plate is the bottom. Glue the feathers along the curved top edge of the plate, and then glue on the body. Next, glue on the beak and add the eye stickers or googly eyes. (If using googly eyes, I suggest using white glue instead of a glue stick.)
  6. To make it more interactive, Logan's turkey has a song glued to the back, to be sung to the tune of "Short'nin' Bread." This is optional, but it adds to the craft.
"My little turkey 
has feathers, feathers.
My little turkey
has a feather of (color)."