Pages

Friday, March 23, 2012

Rockin' Foot Print Robins

After coming across this photo on Pinterest, I was looking forward to making some cute foot print robins with my two favorite little people. Although, the robin happens to be our state bird, I think of it more as the first sign of spring. With this gorgeous weather, we've been seeing tons of robins lately, and it seems like a perfect early spring project.
{Rockin' Robins by Mia, Age 5 and Logan, Age 2 1/2 (with help from Mama)}
Materials:
  • paper
  • brown paint
  • red paint
  • Styrofoam tray to hold paint
  • paintbrushes
  • newspaper to protect work surface
  • orange or yellow marker
  • black marker
Optional Materials:
  • glue 
  • wiggly eye
  • feathers
  • black puffy paint
Directions:
  1. Protect work surface with newspaper. (Tip: I found it's easiest to do this on the floor and have the child sit in a chair until you are ready to make the foot print.) Paint your child's foot brown. Lay your paper on top of the newspaper. Then help your child make a foot print on the paper. Let the paint dry.
  2. Fill in the robin's breast with red paint. (This is the instep area of the foot print.) Older kids can do this themselves.
  3. Draw a beak and legs with an orange or yellow marker. (The head of the robin is the heel of the foot print.)
  4. Add an eye. Mia chose to do this with black marker. Logan used a wiggly eye. (The bird looks perpetually surprised now, perhaps because the wiggly eye is a bit large for the size of the bird's head.) You could also use black puffy paint for the eye as Mia did with her blue jay.
  5. If you like, you can also add a feather for the robin's wing. Mia did this later when she decided to create a foot print cardinal. She also made a blue jay with a white feather breast and blue feather tuft on its head. If you like making these foot print robins (or blue jays and cardinals like Mia did) you may also like foot print ducks. What other birds can you come up with?
{Cardinal by Mia, Age 5}

{Blue Jay by Mia, Age 5}

The Leprechauns Came

Last Friday, I couldn't go to bed until I crossed one last thing off of my to-do list: "Make sure the leprechauns come." Mia had been asking repeatedly when the leprechauns were going to come and bring her gold. Well, I didn't have any gold on hand, and I didn't want to run out in search of those gold foil-wrapped chocolate coins. I decided I needed to make something that would be cool enough to take place of gold. At first I wasn't sure what that could be, and then I remembered chatting with another dance mom on Tuesday who told me about making rainbow cupcakes for her daughter's birthday. It was a good time to give them a try. From the description she had given me on how to make the cupcakes, it sounded like it would take a little time, but wouldn't be too difficult. I didn't have a white cake boxed mix in the house, so I found a white cake recipe and tried it out. And I am so glad I did. This white cake recipe makes a moist, spongy cake that reminded me a sugar cookie, and most importantly in this case, it kept the food coloring nice and vibrant.

{Rainbow Colored Cake Mix}

How I Made My Cupcakes:
After making my white cake mix, I divided it into six bowls. Each bowl had about 3/4 cup cake mix in it. Then I added the food coloring. I used my regular McCormick liquid colors and just adjusted the amounts to reflect one sixth of a cake mix.I lined my muffin tin with silicone cupcake liners. 

Then, I poured a teaspoon of purple tinted cake mix into each cup. I spread it around as best I could. I had a small amount left over, which I saved.


Next came blue. Again, I used about a teaspoon for each except this time I didn't spread it around because I didn't want the colors to blend together.


The next layer is green.


After green comes yellow.


Follow that with orange.


Lastly, I topped them with red. By the end, I had realized that heaping teaspoons were the way to go because it was easier.


I had small amounts of each color remaining after filling my 12 muffin cups so I spread these into a casserole dish and made a small-ish sort of tie-dye cake along with my rainbow cupcakes.


I used Betty Crocker whipped frosting, which I had on hand already and then added star sprinkles for more color. If I hadn't had canned frosting available, I would have made this buttercream. (Honestly, I was glad I didn't need to, though, because it was after midnight before the leprechauns finished up.)

{The top view doesn't really show them to their best advantage.}

When it came to displaying the cupcakes, the leprechauns were kind of tired and running out of ideas, but I figured they would like green diapers best so I stacked them on the table next to the rainbow cupcakes.


These cupcakes turned out well. They were tasty and pretty. Mia was very excited to see that the leprechauns had come, and thankfully, she didn't even notice all of the colorful dirty dishes sitting in the sink. (Hey, I mentioned it was really late, right?)

{These cupcakes are worth the extra effort!}

Saturday, March 17, 2012

Mother of Invention

{A problem that requires some creative thinking}
Recently, I realized that two of Mia's favorite pairs of footie pajamas were getting holes in them. I asked for solutions for fixing this problem and was told to cut of the feet (logical I suppose, but this doesn't solve the problem because she loves the pj's because they are footie pj's) or to wear socks underneath, and while that may keep feet from getting cold, it doesn't really solve the problem either. I was feeling discouraged because I am terrible at sewing. It's something I have tried, and I guess if I had help and practiced, I could get better, but for now let's just say I can't sew.

Then Brett suggested that I (yes, I) could sew something into the bottoms of the feet and cover the holes. This supported my best guess for what to do (short of throwing them away, which if you know me is something I hate to do with something that still has plenty of use left), and the fact that he said this made me think I really could do it. So, I found some fabric that I had (remember I said I have tried to sew, and I hate to throw away things that are still useful?), and set to work.

{My "Pattern"}
First, I made a rough outline of the footie onto the fabric using a felt tip pen. I made sure that these were slightly larger to allow for any sewing mishaps when I tried to match up the material. I marked on the backside of the material so that the marker wouldn't show through on the pretty side. I cut out the first footie shape and then traced it two more times and cut those out, too. (There were three altogether for the two pairs of tjammies since three of the four feet had holes in them.)

{The inside after I was done}
Next, I turned the feet of the jammies inside out and then started sewing the footie shapes patches to them so that the pretty side of the material would show through the holes, although I couldn't tell you the name of the stitch I used or even if it counts as an actual stitch given how uneven it is. However, I made sure to get the initial knot of my thread sandwiched between my patches and the original material of the footies so that it wouldn't make an uncomfortable bulge. (I was proud of myself for thinking of that.)

{End Result: A Peekaboo of Pink}
This entire process wasn't too difficult, even with my rudimentary sewing skills, but it was how I spent a decent chunk of time Friday morning while the kids were playing nicely with each other. In the end, the results were enough to convince me that I had found a solution that would work until she outgrows those princess and Tinkerbell jammies that she so loves. My little girl was happy with my work, and admittedly, so was I. It reminded me of a quote by Eleanor Roosevelt, "You must do the thing you think you cannot do." I'm offering this as a little bit of inspiration for other moms who are feeling like they can't solve a problem for their child; it's amazing what we can do when we set our minds to it. And really, what wouldn't we do for our kids?

Friday, March 16, 2012

"Pop Art" (Bubble Painting)

{This is my favorite of the ones Mia made.}
Here is a good one that had me wondering why we had never done this before. (Can you guess where I found the idea? Yep. Pinterest.) It is fun and simple for preschoolers on up. Instead of using paint, we made our bubble paint with food coloring. (Warning: No matter how capable you think your two-and-a-half year old may be, he will still suck up the liquid through the straw instead of blowing into it. Yes, I pretty much knew this was likely to happen, but I decided to give him the benefit of the doubt. Oddly enough, he wasn't at all bothered by the taste of the dish soap and may have kept drinking it if I hadn't stopped him. Silly boy.) Now, go forth and make your own "pop art."

{Bubble Art by Mia, Age 5}

Materials:
  • cups
  • straws
  • water
  • food coloring
  • liquid dish soap
  • newspaper
  • white paper
Directions:
  1. Protect work surface with newspaper. In a cup, combine water, a few drops of food coloring, and a drop or two of dish soap. Do this for as many colors as you would like to use. We used neon purple, neon pink, neon blue, and neon green, and kept adding color as we went to get more saturated color.
  2. Insert a straw and have your child blow bubbles so that they foam up over the rim of the cup, but not so hard that it splashes over. This takes a bit of practice, we learned. Note: I also read somewhere that if you put a pin hole in the straw first, it will prevent them from sucking up the liquid, but I didn't know this before Logan tried, and I don't know if it really works or not.
  3. Before bubbles pop, lay your paper over top of them and allow them to pop on the paper. Repeat as desired. Once the artwork is dry, you can display it. Note: This would probably work best with watercolor paper, but since I didn't have any we used white cardstock and 12" x 12" white scrapbooking paper (the plain pages that come in the albums -- I never use them for scrapbooking but they are great for kids' artwork, and they fits nicely in the frames meant for LP albums. This makes for easy wall art.)

Wednesday, March 14, 2012

DIY Bathtub Paint

{How I got my paint palette... 1 drop of each color as indicated: top row: neon green, red, green, blue + red  middle row: neon purple, yellow, blue, red + yellow  bottom row: neon pink, neon blue, green + blue, neon pink + neon blue}
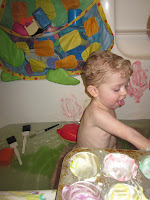
This is one of those things that is pure genius, and that's largely because of its absolute simplicity. I wish I had thought of it. No matter, though, it is still a great idea (from Pinterest, once again) and I had to share. I have tried this twice so far. Last night, I mixed up twelve different colors in a muffin tin, and the time before that I used 3 small plastic containers. The problem with the individual containers was that they kept tipping over when the kids dipped their paint brushes into them. The problem with the muffin tin was that it was too large to rest on the edge of the tub without it being a bit unstable as well. The original post where the idea came from shows a 6 cup muffin tin, and I think this would be ideal.

The nice thing about this paint besides how easy it is to make is that it washes up quickly with a splash of water. Both times I have made it, I ended up with tiny traces of dye on my fingers, but it soon washed away during our bath time fun. You can also customize your paint colors by mixing different food colors together. The only possible drawback is the smell of the shaving cream. It bothered me at first, but since we've been painting with it lately, I seem to have gotten used to it. Now, I barely notice it, and the kids definitely do not seem to mind. Mia enjoyed seeing what new colors she could create, and Logan loved finger painting (which he normally doesn't like to do).

Materials:                                                
  • shaving cream
  • food coloring
  • paintbrushes
  • something to hold paint
    {Finger Painting Fun}
Directions:
  1. Squirt some shaving cream into your container.
  2. Add a drop or two of food coloring. 
  3. Mix and enjoy. To clean up, rinse with water.
{Mia's "Colorful Dots"}

Tuesday, March 13, 2012

Super Undies to the Rescue!

When Mia turned 5 in January, we decided to stop buying Pull-Ups and see if she could stay dry at night on her own. Statistically speaking, most kids will stay dry at night at this age, but given family history, we knew this was iffy. That's why we hadn't pushed the issue. We tried going without Pull-Ups for perhaps 2 weeks before giving up. Everyone was exhausted from the process of trying to help Mia stay dry. We were waking her up 1-2 times a night, limiting fluids before bed time, offering rewards, everything we could think of, but still having wet beds that were due to her being physically unable to make it through the night. She is that deep of a sleeper. I was tired of washing sheets daily, often 2 sets of them because she would wake up from one accident, have us change the bedding, and then have another accident before morning. It was very discouraging to all involved.

So, we went back to Pull-Ups even though I was not happy about this idea. Unfortunately, Mia was getting what was essentially a diaper rash, and we knew the Pull-Ups were to blame. People who know me know that I LOVE, LOVE, LOVE our cloth diapers for a number of reasons including the fact that they save us so much money and I know they are better for the environment -- two reasons to hate constantly buying Pull-Ups. It didn't take too long before I reached the point of frustration at this wastefulness and researched our other options. The pediatrician gave me a brochure for a potty alarm system, which wasn't recommended for children younger than 6 and it sounded like it would be waking everyone up at night again, so I figured what's the point of spending money on that? The doctor's recommendation was medication, which I was not to thrilled about. Personal experience tells me that this doesn't work so why should I give her drugs that won't make a difference?

This left reusable training pants as our final hope. We had talked to Mia about getting reusable cloth "Pull-Ups" and she was excited about the idea. However, I was skeptical of finding any that could stand up to Mia's super soaking abilities. I am so thankful to have a friend, Jenifer, who suggested Super Undies. She even helped me figure out sizing, which was one thing I wasn't sure about. On the website, I showed Mia the color choices, and not surprisingly, she picked pink and purple. I decided to order 2 nighttime training pants in the large size to start with so she would always have one to wash and one to wear.

After 3 weeks of use, we have had no leaks, (I can't say that for when we were using Pull-Ups) and one very happy little girl. Every night when she puts on her pink and purple Super Undies, she does a little happy dance that she calls the "Tushy Dance." When I asked her why she liked the Super Undies she said, "because they're pink and purple." (Duh, Mom!) Are they better than Pull-Ups? She says yes, "because they don't give me a rash!" They do give her a "bubble butt" since all the absorbent layers make them bulkier than disposable training pants, but she thinks this is hilarious and doesn't mind at all. In fact, I think that's what prompted her to do the "Tushy Dance." Gotta love those absorbent layers!

Super Undies is an awesome product that has saved our sanity as well as Mia's poor bum. My only regret is not knowing about them sooner. We could have skipped Pull-Ups altogether. I plan to order 2 more so that I have enough to wash with diapers twice a week instead of washing daily. I view this as a good investment because they will last us quite a long time, and as it happens, I have a feeling we're going to need overnight trainers for quite a long time. (Sorry, Honey, but this is likely the case.)